
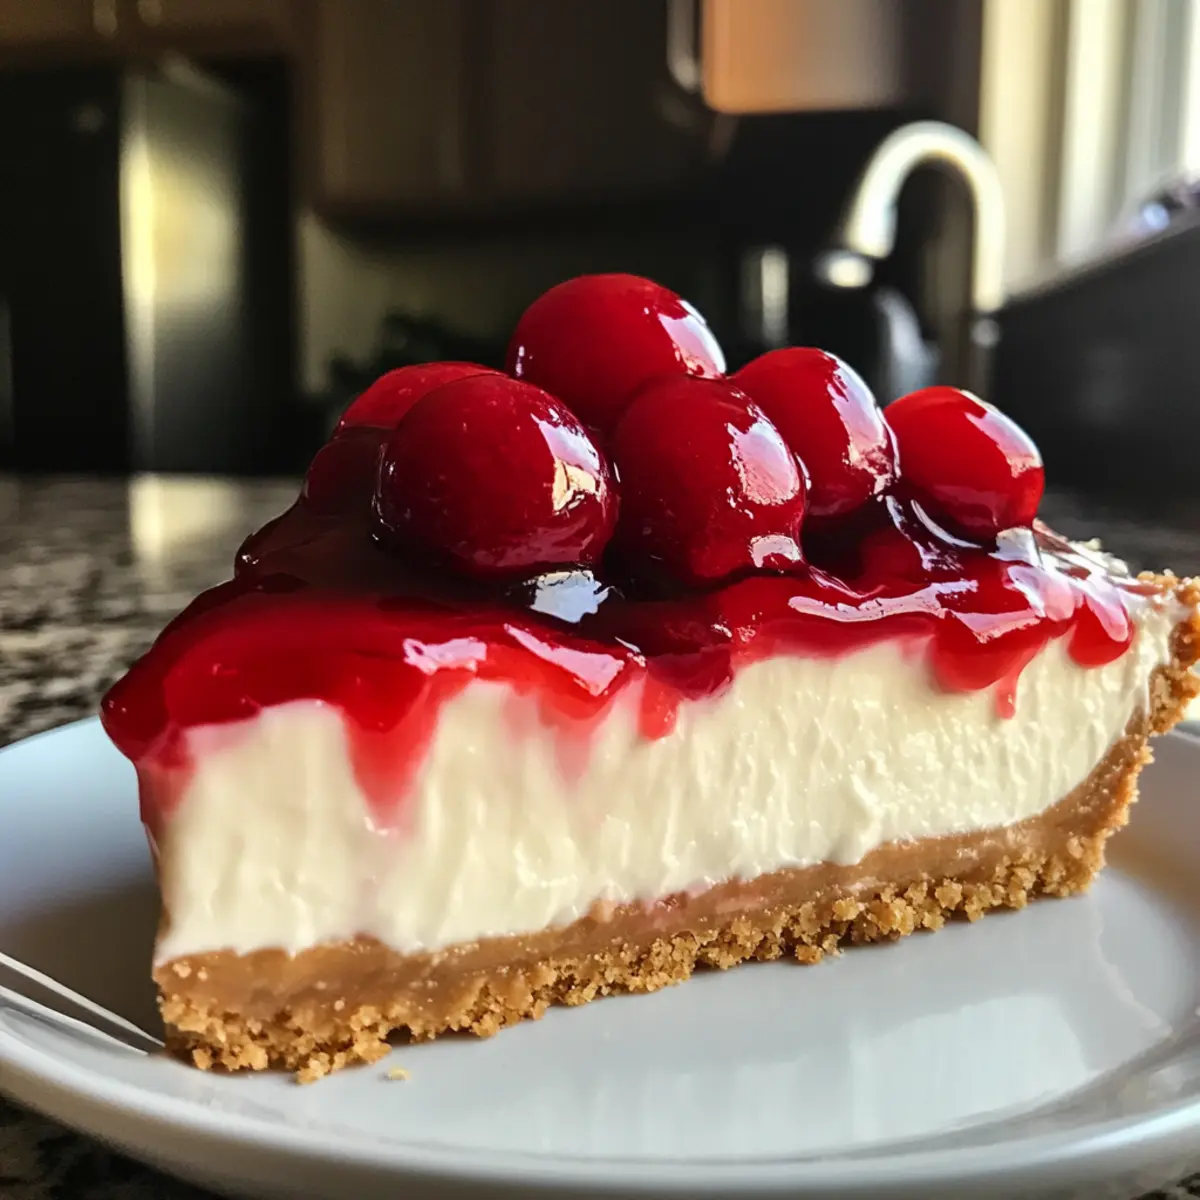
While sorting through my collection of cherished summertime desserts, I discovered an absolute gem: No-Bake Cherry Cheesecake. This is not just any dessert; it’s a creamy concoction of sweetness and tartness, nestled in a delicious graham cracker crust. With the ease of preparation, this recipe allows me to whip up a show-stopping treat without even turning on the oven! It’s the ultimate crowd-pleaser, ready to impress at barbecues or cozy gatherings. The best part? You can tailor it with your favorite fruits like strawberries or blueberries for a unique twist. Are you ready to dive into this delightful no-bake marvel? Let’s get started!
Why Is No-Bake Cherry Cheesecake a Must-Try?
Simplicity at Its Finest: You don’t need to be a pro chef to create this exquisite dessert. The easy, no-bake process means anyone can enjoy the creamy goodness without the hassle.
Versatile Toppings: Enjoy it as is with cherry pie filling, or switch it up with fresh strawberries, blueberries, or peaches for a refreshing twist. The possibilities are deliciously endless!
Crowd-Pleasing Delight: This dessert is sure to make you the star of any summer gathering. Its vibrant look and creamy texture are irresistibly delightful, making it a favorite among friends and family.
Quick to Prepare: With minimal effort and ingredients, you can have this cheesecake chilling in the fridge in no time. It’s perfect for spontaneous get-togethers or when you need a sweet treat fast.
Flavor Balance: Each slice delivers a harmonious blend of creamy sweetness from the cheesecake and tartness from the cherries, giving you a gourmet experience right at home.
Make-Ahead Magic: Ideal for busy days, prepare it a day in advance to let the flavors meld beautifully. Just remember to keep it in the fridge to maintain its creamy perfection!
For more summery delights, check out my recipes for Mini Pumpkin Cheesecakes or explore the refreshing taste of a Lemon Meringue Cheesecake.
Cherry Cheesecake Ingredients
• Embrace the sweetness of summer with these simple ingredients!
-
For the Crust
-
Graham Cracker Crumbs – Forms the sweet, crumbly base for your no-bake cherry cheesecake; use store-bought or crush whole graham crackers as a substitute.
-
Unsalted Butter – Adds richness and binds the crust together; substitute with coconut oil for a dairy-free option.
-
For the Filling
-
Cream Cheese – Key for a creamy filling; ensure it’s at room temperature to avoid lumps and achieve a smooth texture; Neufchâtel can be used for a lighter option.
-
Powdered Sugar – Sweetens the filling perfectly; granulated sugar can be substituted if powdered is not available, but it will change the texture slightly.
-
Whipped Topping – Provides fluffiness and lightness; replace with homemade whipped cream for a delightful twist.
-
Vanilla Extract – Enhances the flavor profile beautifully; try almond extract for a unique variation.
-
For the Topping
-
Cherry Pie Filling – This topping adds fruity sweetness and vibrant color; you can also use fresh cherries, strawberries, blueberries, or peaches for a fun twist!
Step‑by‑Step Instructions for No-Bake Cherry Cheesecake
Step 1: Prepare the Crust
Start by finely crushing graham crackers in a food processor until you reach a sand-like consistency, about 30 seconds. In a mixing bowl, combine the crumbs with melted unsalted butter, stirring until moistened. Press the mixture firmly into the bottom and up the sides of a greased 9-inch springform pan. Place this crust in the freezer for 15 minutes to set while you prepare the filling.
Step 2: Make the Cheesecake Filling
In a large mixing bowl, beat together soft cream cheese and powdered sugar with an electric mixer on medium speed until well combined and smooth, about 2-3 minutes. Gradually add in vanilla extract and fold in the whipped topping gently, mixing just until blended. The cheesecake mixture should be light and fluffy, ready to make your no-bake cherry cheesecake truly delicious.
Step 3: Assemble the Cheesecake
Once the crust is chilled and firm, pour the cheesecake filling into the crust, spreading it evenly with a spatula. Make sure to smooth the top for an appealing finish. Return the cheesecake to the refrigerator and let it chill for at least 1 hour, allowing flavors to meld and the filling to firm up properly.
Step 4: Top with Cherry Filling
After the cheesecake has chilled and set, take out your no-bake cherry cheesecake and spoon the cherry pie filling evenly over the top. Allow the vibrant cherries to cascade beautifully down the cheesecake. For added flair, feel free to stir in some fresh fruit pieces if desired. This step will enhance both the flavor and presentation!
Step 5: Final Chill Before Serving
Return the topped cheesecake to the refrigerator for another 30 minutes. This final chilling time ensures the cherry filling melds with the cheesecake beneath, creating a harmonious blend of flavors. When ready to serve, remove the springform pan outer layer, slice into wedges, and enjoy this refreshing no-bake cherry cheesecake!
What to Serve with No-Bake Cherry Cheesecake?
There’s nothing like enjoying a creamy indulgence alongside delicious sides that elevate the dining experience.
-
Fresh Fruit Salad: A medley of seasonal fruits adds a bright, refreshing contrast to the richness of the cheesecake. It’s a colorful way to cleanse the palate.
-
Creamy Chocolate Mousse: The light, airy texture of mousse complements the cheesecake beautifully, creating a delightful balance of flavors and indulgence.
-
Zesty Lemon Sorbet: This frozen treat offers a tangy note that cuts through the sweetness, providing a refreshing end to your meal on a warm day.
-
Whipped Cream Topping: Adding extra dollops of homemade whipped cream introduces a luxurious creaminess that enhances every slice of cheesecake, encouraging indulgent bites.
-
Iced Tea or Lemonade: A chilled glass of iced tea or lemonade brings a casual vibe, quenching thirst and adding a refreshing touch that pairs well with dessert.
-
Chocolate-Dipped Strawberries: These sweet bites are romantic and visually appealing, making them perfect for a festive occasion alongside the cheesecakes’ creamy texture.
-
Homemade Biscotti: Serve with the cheesecake for a delightful crunch. Their crisp texture contrasts with the velvety cheesecake, creating a fulfilling bite.
-
Caramel Sauce: Drizzling some homemade caramel over each slice adds a sweet, gooey richness that elevates the dish to heavenly heights.
-
Espresso or Coffee: Rich coffee or espresso rounds out the meal perfectly, providing a robust flavor that marries well with the sweetness of the cheesecake.
-
Frozen Yogurt: A scoop of tangy frozen yogurt makes for an ideal pairing, offering a cool, creamy texture that perfectly complements the cherry cheesecake.
Make Ahead Options
These No-Bake Cherry Cheesecakes are ideal for busy home cooks looking to save time! You can prepare the crust and filling up to 24 hours in advance; simply follow the instructions to make the crust and filling, then store them separately in airtight containers in the refrigerator. This keeps the crust nice and crispy and the filling fluffy. When you’re ready to serve, just assemble the cheesecake by pouring the filling into the crust, topping it with the cherry pie filling, and allowing it to chill for an additional 30 minutes before slicing. Making this classic dessert ahead means you’ll impress your guests without the last-minute stress!
Expert Tips for No-Bake Cherry Cheesecake
-
Softened Cheese: Ensure your cream cheese is at room temperature for a smooth filling. Cold cream cheese can lead to lumps and a less creamy texture.
-
Chill Properly: Allow your cheesecake to chill for at least one hour to set. For the best flavor, chilling overnight is ideal, letting the ingredients meld beautifully.
-
Pack the Crust: When pressing down the graham cracker crust, pack it tightly! This helps maintain its structure when slicing and ensures that each piece holds its shape.
-
Fruit Flexibility: While cherry pie filling is classic, feel free to switch it up! Fresh cherries, strawberries, or blueberries all work wonderfully for a refreshing twist on your cherry cheesecake.
-
Avoid Moisture: If using fresh fruits as toppings, pat them dry to avoid excess moisture. This will keep your cheesecake from becoming soggy and ensure a delightful bite!
Storage Tips for Cherry Cheesecake
-
Fridge: Keep your no-bake cherry cheesecake refrigerated, covered loosely with plastic wrap or aluminum foil, for up to 5 days. This ensures it remains fresh and delicious.
-
Freezer: For longer storage, freeze individual slices wrapped tightly in plastic wrap and then aluminum foil for up to 2 months. Thaw in the fridge overnight before serving.
-
Reheating: While this cheesecake is best served chilled, if you prefer it slightly warmer, remove it from the fridge and let it sit for 10-15 minutes before indulging.
-
Best Served Fresh: For optimal flavor, enjoy your cherry cheesecake within the first few days after preparation. The fresh cherries or toppings may lose their vibrant texture over time, but the cream cheese filling remains delightful!
Cherry Cheesecake Variations & Substitutions
Feel free to make this recipe your own by exploring delightful twists and substitutes that enhance flavor and cater to your dietary preferences!
-
Fruit Swap: Replace cherry pie filling with fresh strawberries, blueberries, or peaches for a fruity makeover. Each fruit brings its own unique sweetness and character to the cheesecake!
-
Dairy-Free Delight: Use coconut cream instead of cream cheese for a creamy, dairy-free version. This will give your cheesecake a tropical flair, making it a refreshing change.
-
Sugar Alternatives: For a lower-sugar version, swap out powdered sugar for erythritol or another sweetener of your choice. Just remember to adjust to taste since some sweeteners can be sweeter than sugar!
-
Flavor Infusion: Add a hint of almond or lemon extract to the filling for an unexpected pop of flavor. These small additions can elevate the cheesecake experience to something extraordinary!
-
Chocolate Lovers: Mix in some cocoa powder into the whipped topping or drizzle melted chocolate on top for a decadent chocolate cherry cheesecake. The combination is a match made in dessert heaven!
-
Nutty Crunch: Incorporate chopped nuts, like pecans or walnuts, into the crust for a delightful crunch. This adds a new layer of texture and flavor that pairs beautifully with the creamy filling.
-
Citrus Zest: Adding a teaspoon of lime or lemon zest to the filling can deepen the flavor profile while offering a bright, refreshing twist. It’s a fantastic way to enhance the overall taste of your cheesecake.
Check out my other recipes like Lemon Cheesecake Mousse for more ways to enjoy cheerful summer flavors, or try making a No-Bake Toffee Cheesecake for a sumptuous treat!
No-Bake Cherry Cheesecake Recipe FAQs
How do I select ripe cherries for the topping?
Absolutely! When choosing cherries, look for ones that are plump, firm, and shiny. The color should be vivid, whether they are sweet dark red or bright yellow. Avoid cherries with dark spots or wrinkled skin, as these can indicate overripeness.
How should I store leftovers?
To keep your no-bake cherry cheesecake fresh, store it in the refrigerator, covered loosely with plastic wrap or aluminum foil, for up to 5 days. This helps retain its creaminess while protecting it from other strong odors in the fridge.
Can I freeze my no-bake cherry cheesecake?
Very! To freeze, slice your cheesecake, then tightly wrap each piece in plastic wrap followed by aluminum foil. This helps prevent freezer burn. It can be stored for up to 2 months. When you’re ready to enjoy, just thaw it overnight in the fridge for the best texture!
What if my cheesecake filling is lumpy?
If your filling turns out lumpy, it’s likely because the cream cheese wasn’t softened enough. To troubleshoot, ensure that the cream cheese is at room temperature before mixing. If you’ve already mixed it and find lumps, try blending it on higher speed for an additional minute or two to smooth it out.
Are there any allergies I should consider for this recipe?
Yes, definitely! This no-bake cherry cheesecake contains dairy, specifically cream cheese and whipped topping, so it’s not suitable for those with dairy allergies. For a dairy-free version, you can use vegan cream cheese and coconut whipped cream instead. Always check your toppings as well; some canned cherry fillings may have added preservatives or allergens!
Can I make this cheesecake ahead of time?
Absolutely! In fact, making it a day in advance is a fantastic idea! This allows the flavors to meld beautifully and gives the cheesecake time to set properly. Just remember to keep it refrigerated, and avoid adding fresh fruits until you’re close to serving it to maintain their texture.
No-Bake Cherry Cheesecake for Effortless Summer Indulgence
Ingredients
Equipment
Method
- Finely crush graham crackers in a food processor until sand-like, about 30 seconds.
- Combine crumbs with melted unsalted butter, stir until moistened, and press into the bottom of a greased springform pan.
- Place the crust in the freezer for 15 minutes to set.
- In a mixing bowl, beat the cream cheese and powdered sugar until combined and smooth.
- Add vanilla extract and fold in whipped topping gently until blended.
- Pour the cheesecake filling into the crust and smooth the top.
- Chill in the refrigerator for at least 1 hour.
- Spoon cherry pie filling evenly over the top.
- Return the cheesecake to the refrigerator for another 30 minutes before serving.
Leave a Reply