
As I stirred the bubbling pot, memories of afternoons in my grandmother’s kitchen flooded back to me. The sweet aroma of melting sugar whisked me away to simpler times, where homemade honeycomb candy was a cherished treat, brightening up holidays and weeknight cravings alike. This Easy Honeycomb Candy recipe is your ticket to creating a nostalgic delight that’s both gluten-free and vegan-friendly, so everyone can join in on the fun. With just a handful of ingredients and minimal prep time, you’ll unlock a world of airy sweetness, especially when you pair each piece with a rich chocolate coating. Whether you’re making these crunchy pieces for a festive gathering or simply indulging in yourself, I promise this homemade candy will take you back while bringing joy to your kitchen today. Curious about how to whip up this delightful treat? Let’s dive in!
Why is Honeycomb Candy so Irresistible?
Nostalgic Treat: Nothing captures childhood joy like making honeycomb candy! Each bubbly bite radiates the charm of days gone by and evokes shared moments with family during special occasions.
Quick & Easy: With a few simple ingredients, you can whip up this candy in no time—perfect for last-minute cravings or impromptu gatherings.
Customizable Flavor: Make it your own! Experiment with chocolate coatings or different extracts to create unique flavors that suit your taste preferences. You can also explore our other recipes for chocolate-coated candy for even more options!
Dietary-Friendly: Whether you’re gluten-free or following a vegan diet, this recipe ensures that everyone can indulge in a homemade treat.
Crowd-Pleasing Delight: Perfect for sharing at parties or gatherings, this honeycomb candy is sure to be a hit with friends and family alike!
Honeycomb Candy Ingredients
• To create this delightful honeycomb candy, gather the following ingredients!
For the Candy Base
- White Sugar – Sweetness and structure; consider substituting with organic cane sugar for a cleaner taste.
- White Vinegar – Reacts with baking soda for that iconic airy texture; apple cider vinegar can be used for a fruity twist.
- Dark Corn Syrup – Prevents crystallization and ensures a smooth texture; light corn syrup or brown rice syrup are good alternatives.
- Baking Soda – This is what gives the candy its light, airy quality; ensure it’s fresh for the best results.
For the Chocolate Coating (Optional)
- Chocolate Melting Wafers – Adds richness and a delicious contrast in flavor; choose gluten-free or vegan options if needed.
Feel free to get creative with your flavor profile while making this irresistible honeycomb candy!
Step‑by‑Step Instructions for Irresistibly Crunchy Easy Honeycomb Candy
Step 1: Prepare the Pan
Start by lining an 8×8 inch casserole dish with non-stick foil. This ensures easy removal of your honeycomb candy once it sets. Press the foil firmly into the corners while leaving some overhang for easy lifting. Set the prepared dish aside as you move onto the next step of creating the bubbly candy base.
Step 2: Combine and Heat
In a heavy-bottomed saucepan, combine white sugar, white vinegar, and dark corn syrup. Place the pan over medium heat while stirring continuously. Keep an eye on the mixture as it transforms from granular to smooth and clear, which should take about 5 minutes. Once fully dissolved, you’re ready to let the magic happen!
Step 3: Cook to Hard Crack
Bring the mixture to a boil, stopping stirring. Allow it to cook until a candy thermometer reads 300°F, known as the hard crack stage. This process takes about 10-15 minutes, during which the mixture will bubble and transform into a deep golden syrup. Keep a close watch to prevent burning, and look for a lovely amber color before removing it from the heat.
Step 4: Add Baking Soda
Carefully remove your saucepan from the heat and immediately stir in the baking soda. Be prepared for a delightful foaming reaction as the baking soda transforms the mixture into a lighter, airy candy consistency. Stir gently to combine, ensuring there are no lumps, as this is the key to achieving the perfect honeycomb texture.
Step 5: Pour into Pan
Quickly pour the foamed mixture into your prepared casserole dish. Avoid scraping the pan, as that may alter the final texture of your honeycomb candy. Allow gravity to spread the mixture evenly across the dish, making sure it fills the corners. This step is crucial for achieving that airy, crunchy candy we all love.
Step 6: Cool Undisturbed
Let the honeycomb candy cool completely without moving it, which will take about 2 hours. During this time, it will harden and take on its crisp texture. Resist the temptation to touch or disturb the candy, as doing so can affect its airy quality.
Step 7: Break into Pieces
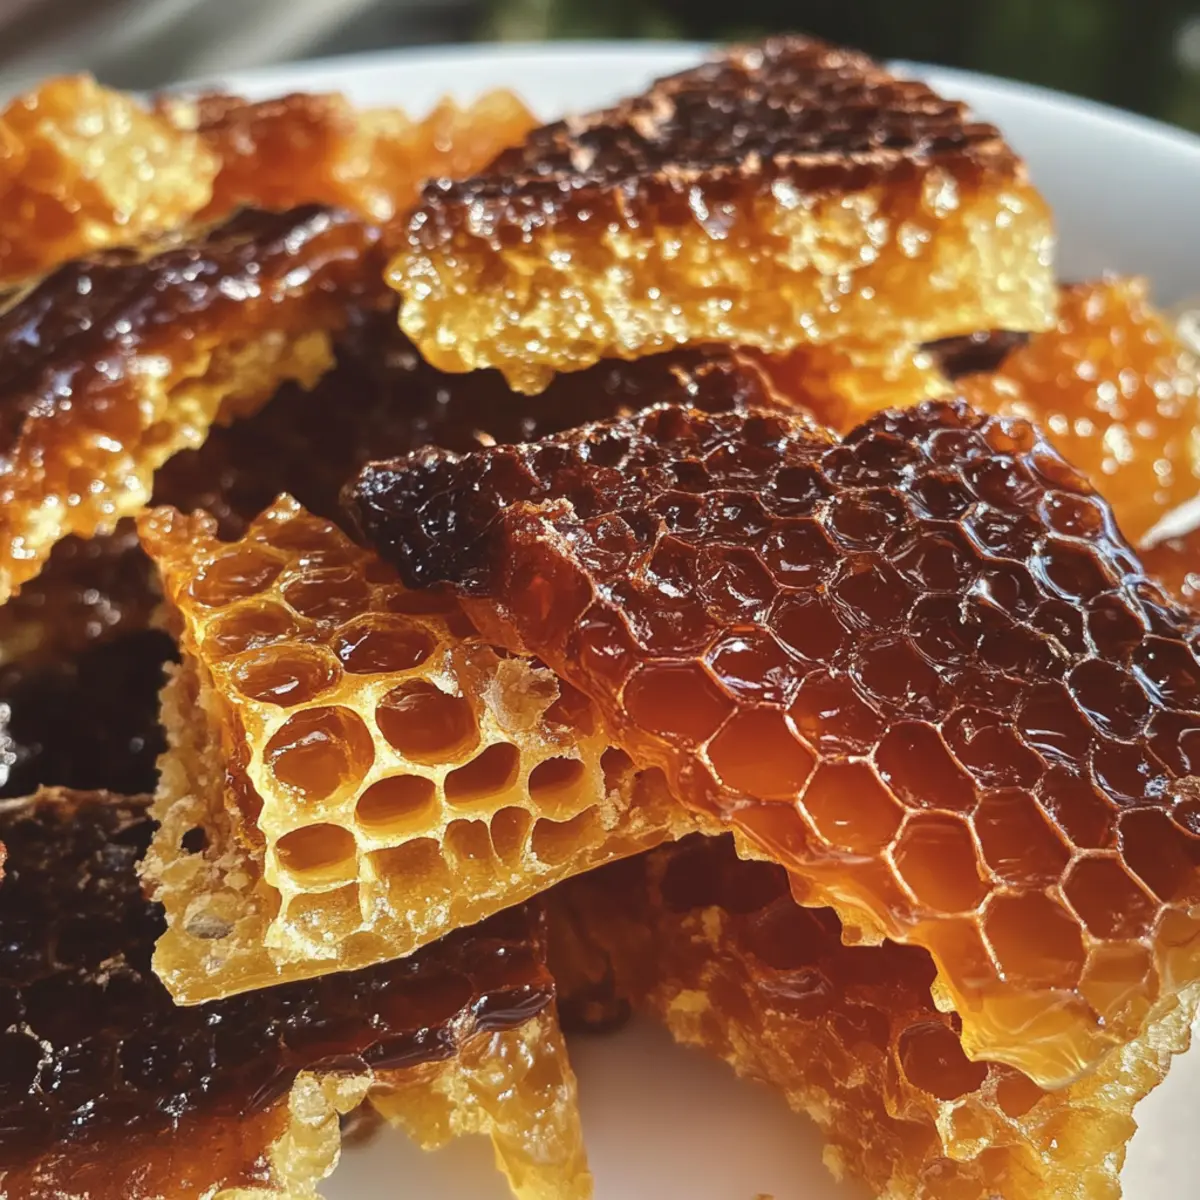
Once fully set, carefully lift the honeycomb candy out of the dish using the foil overhang. Break it into bite-sized chunks using your hands, allowing the natural honeycomb shape to form. Enjoy the satisfying snap-crackle of each piece as you revel in the joy of homemade honeycomb candy.
Step 8: Chocolate Coating (optional)
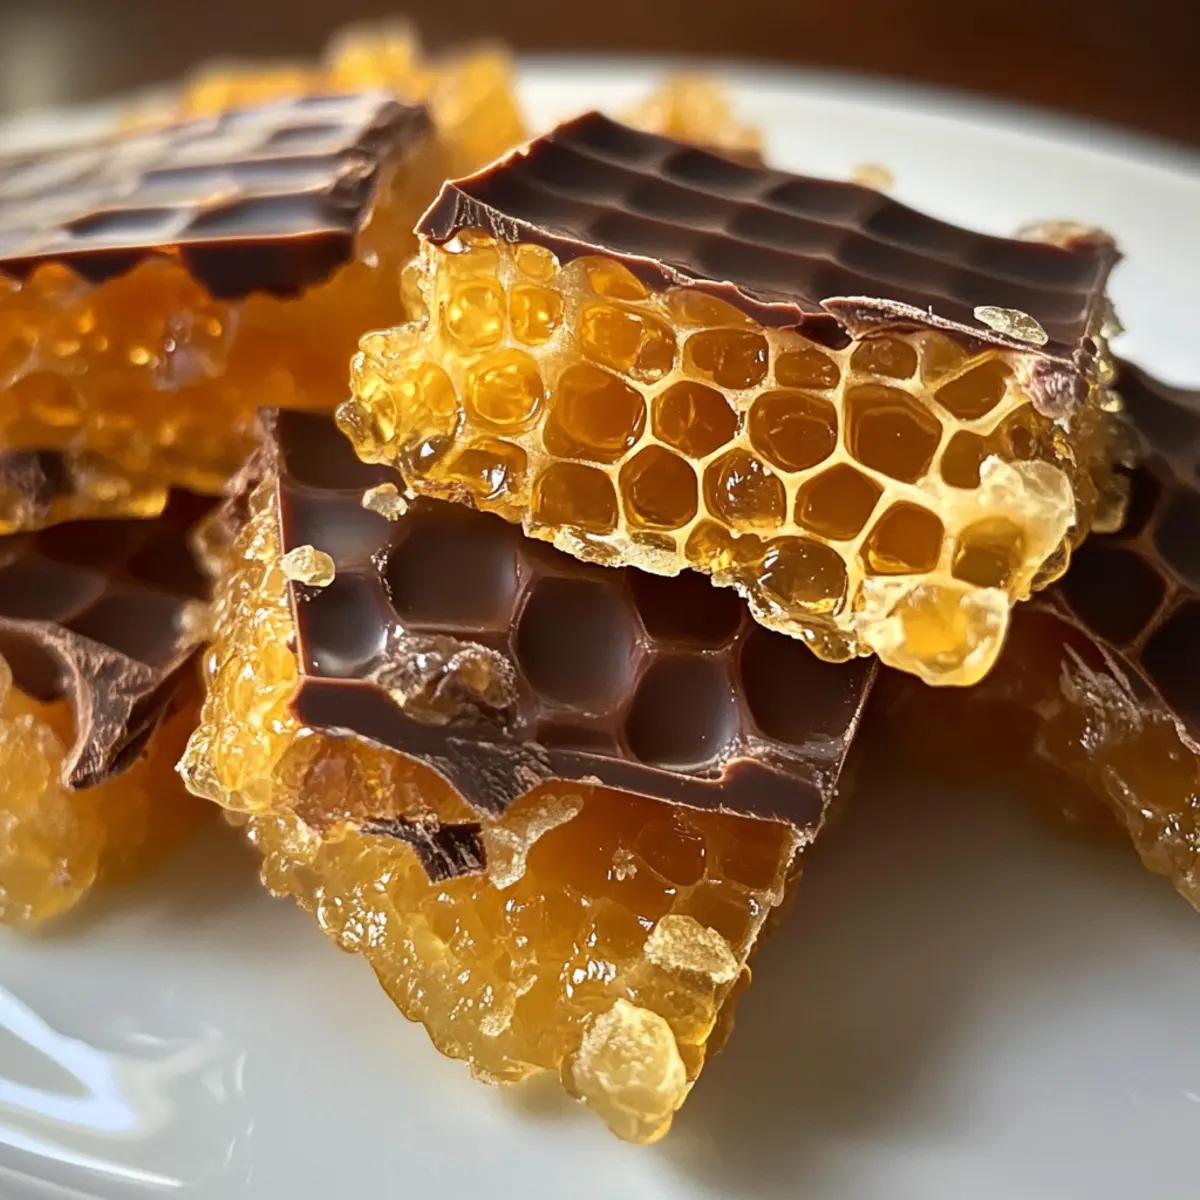
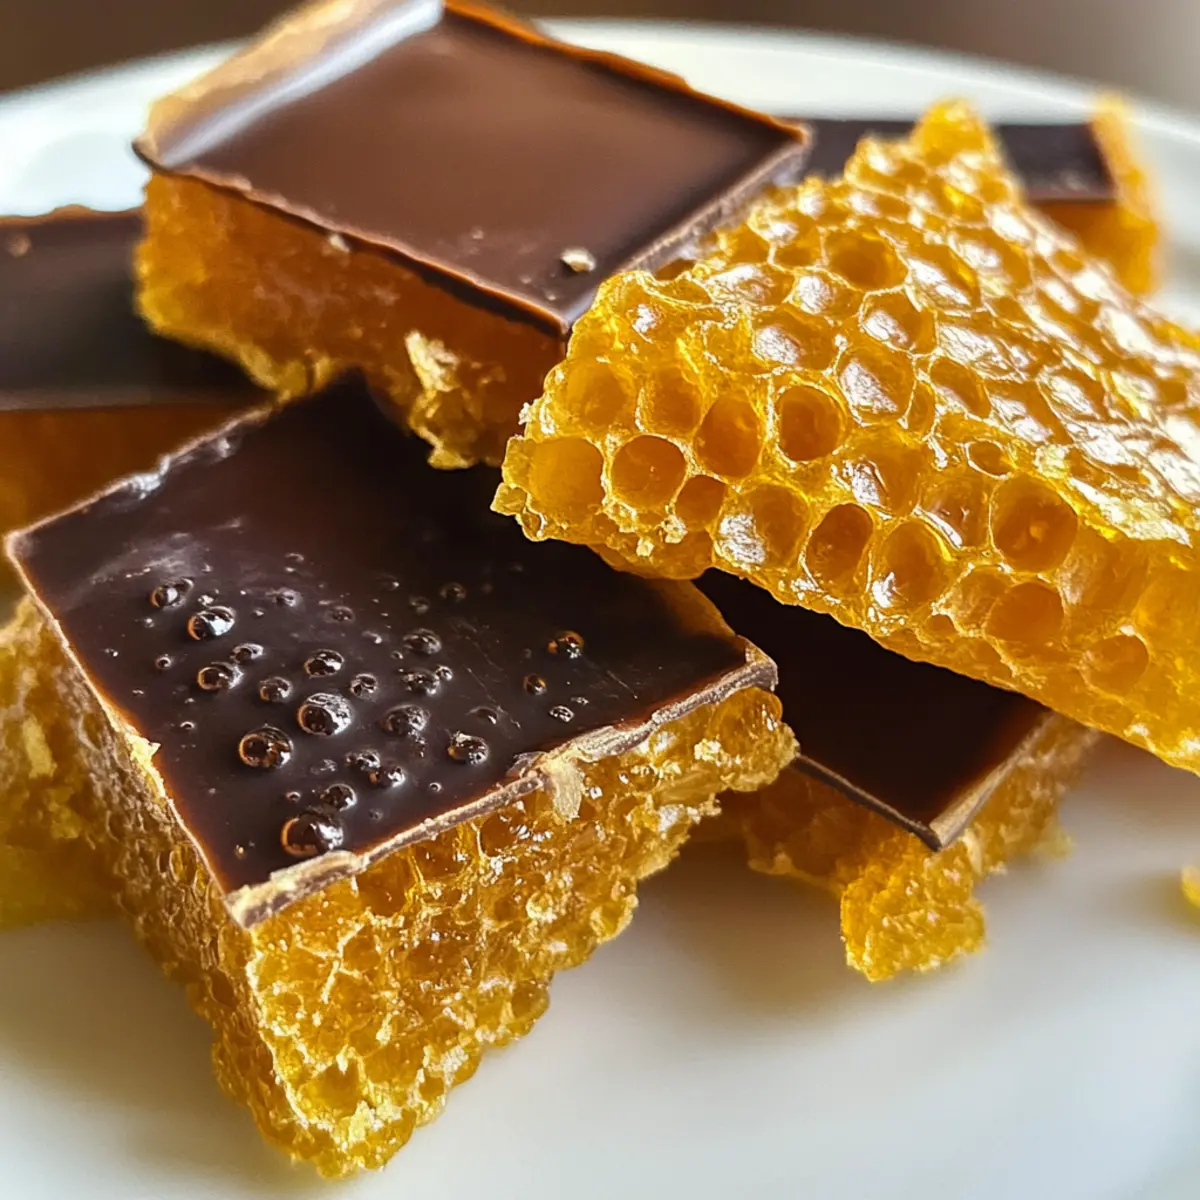
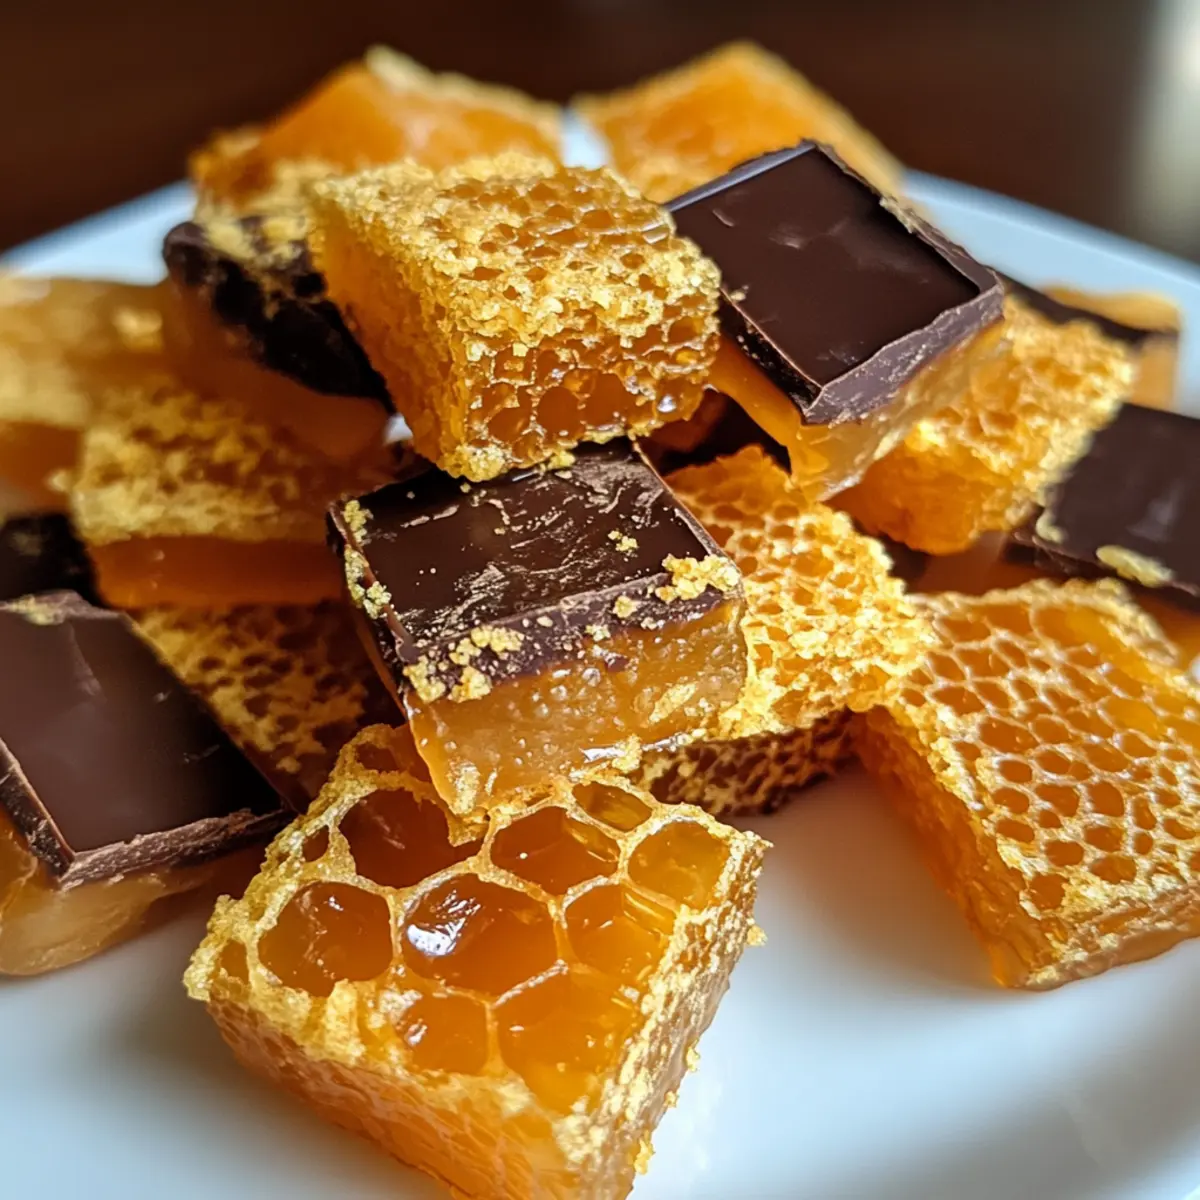
If you desire a decadent touch, melt your chocolate wafers according to package instructions. Dip each piece of honeycomb candy into the warm chocolate, ensuring you cover it well. Place the coated pieces on wax paper and let them set until the chocolate hardens, creating a delightful contrast to the sweet, airy candy.
Expert Tips for Making Honeycomb Candy
Perfect Temperature: Ensure your candy thermometer reads exactly 300°F for the ideal hard crack stage, which creates the perfect crunchy texture.
Stir Wisely: Avoid stirring the sugar mixture after it reaches a boil; this prevents crystallization and ensures that your honeycomb candy remains light and airy.
Cooling Is Key: Allow the honeycomb candy to cool completely without moving it for about 2 hours; any disturbance can ruin its airy structure.
Mind the Moisture: Never refrigerate your honeycomb candy as moisture can soften its signature crunch. Store it in an airtight container at room temperature.
Coating Timing: If you choose to add chocolate coating, dip the pieces just before serving to maintain their glossy finish and crisp texture.
Storage Tips for Honeycomb Candy
Room Temperature: Store honeycomb candy in an airtight container at room temperature to maintain its crunch and texture for up to 3 weeks.
Avoid Refrigeration: Keeping honeycomb candy in the fridge can introduce moisture, which will soften its delightful crunch, so be sure to keep it away from humidity.
Freezing: If you need to store honeycomb candy for longer, wrap it securely in plastic wrap and foil, and freeze for up to 1 month. Let it thaw at room temperature before enjoying.
Reheating: No need to reheat honeycomb candy! Simply enjoy it as is for the best texture and flavor experience.
Honeycomb Candy Variations & Substitutions
Get ready to unleash your creativity in the kitchen! There are countless ways to tailor this delightful honeycomb candy to suit your flavor and dietary preferences.
- Vegan Option: Use maple syrup instead of dark corn syrup for a vegan-friendly twist without compromising sweetness. Meanwhile, experiment with various crunchy toppings to cater to different tastes.
- Spiced Delight: Add a pinch of cayenne or cinnamon to the sugar mixture for a warm, spicy kick that elevates each bite. This unexpected twist makes a delightful conversation starter!
- Chocolate Swap: Choose milk or white chocolate instead of dark for a creamy sweetness that appeals to everyone, especially kids. Don’t shy away from trying flavored chocolates like orange or mint!
- Nutty Addition: Incorporate chopped nuts like almonds or pecans into the warm mixture before pouring it into the pan. The nuts add a lovely crunch and contrast to the sweet candy.
- Extract Infusion: Add flavored extracts such as vanilla or almond to the sugar mixture for a unique twist, bringing a hint of nostalgia to each bite. Try using almond extract alongside a chocolate coating for added richness.
- Interrupt the Sweetness: Drizzle your cooled candy with a touch of sea salt or top with flaky sea salt right before it sets, creating a lovely balance between sweet and savory. Salty-sweet combinations are always a hit!
- Festive Colors: For holiday fun, mix in edible food colorings right before pouring the candy into the pan, giving your honeycomb candy a vibrant and festive aesthetic that will please everyone.
- Flavorful Dippers: Serve honeycomb pieces drizzled with caramel sauce or honey for an indulgent touch. pair your candy with hot cocoa, or add them to a charcuterie board for a delightful surprise!
Feel free to explore and enjoy each variation, and don’t forget to check out our other recipes featuring tantalizing sweets to expand your homemade candy repertoire!
What to Serve with Easy Honeycomb Candy
Create a delicious spread that highlights the airy sweetness and crunch of your homemade treat!
- Creamy Vanilla Ice Cream: The cool creaminess perfectly balances the crunchy texture of honeycomb candy, melting together in every heavenly bite.
- Sparkling Fruit Punch: A refreshing, fruity drink that enhances the sweetness of the candy and adds a celebratory touch to your gathering. It’s not too heavy, ensuring all flavors shine!
- Fresh Berries: Juicy strawberries or raspberries provide a tart contrast that cuts through the sweetness of honeycomb, creating a harmonious balance on your palate.
- Nutty Trail Mix: Combine crunchy nuts and dried fruits for a satisfying texture contrast. This mix provides the perfect nibble alongside your candy, making for a delightful snack time!
- Chocolate-Covered Pretzels: The salty crunch of pretzels paired with chocolate mirrors the flavors of honeycomb, creating an irresistible combination that keeps everyone coming back for more.
- Homemade Hot Cocoa: Creamy and rich, this warm drink warms the heart and complements each light piece of honeycomb with its roaring depth. Dashed with marshmallows, it invites a cozy evening!
- Mini Cheesecakes: The smooth, tangy flavor of cheesecake contrasts beautifully with the airy, sweet note of your honeycomb candy. Perfect for a dessert platter that wows!
- Chardonnay or Pinot Grigio: A glass of chilled wine accentuates the candy’s sweetness while offering a touch of elegance to your dessert table.
Make Ahead Options
These Easy Honeycomb Candy pieces are perfect for busy home cooks wanting to save time without sacrificing flavor! You can prepare the honeycomb base up to 24 hours in advance. Simply follow the instructions until you’ve poured the mixture into the pan, then allow it to fully cool. Once set, store the honeycomb in an airtight container at room temperature to maintain its crunchiness. When you’re ready to enjoy, break it into pieces and, if desired, dip in melted chocolate for a rich treat just before serving. This approach keeps your homemade honeycomb candy just as delightful, ensuring that you have a deliciously sweet snack at hand whenever cravings strike!
Easy Honeycomb Candy Recipe FAQs
What type of sugar is best for honeycomb candy?
Absolutely! White sugar is the primary ingredient for honeycomb candy as it creates the sweetness and structure needed. However, you can substitute it with organic cane sugar for a cleaner flavor if you prefer. Just make sure any substitute you choose has the same granularity for optimal results!
How should I store homemade honeycomb candy?
To keep your honeycomb candy crunchy and delightful, store it in an airtight container at room temperature. This way, it can last up to 3 weeks! Keep it away from humid areas, as moisture can lead to a softened texture that detracts from its irresistible crunch.
Can I freeze honeycomb candy for later?
Very! If you’d like to store your honeycomb candy for a longer period, wrap it tightly in plastic wrap and then in aluminum foil before placing it in the freezer. It can stay fresh for up to 1 month. When you’re ready to enjoy it, simply let it thaw at room temperature; there’s no need to reheat, as this may compromise its crispy texture.
What if my honeycomb mixture doesn’t foam up after adding baking soda?
If your mixture doesn’t foam as expected, it might be due to a few possible issues; make sure your baking soda is fresh. If it’s expired, the reaction won’t happen. Additionally, ensure you’ve heated your sugar mixture to the hard crack stage at exactly 300°F, as insufficient heat can prevent the correct texture.
Is this honeycomb candy recipe suitable for vegan or gluten-free diets?
Absolutely! This easy honeycomb candy recipe is naturally gluten-free as it only uses sugar, vinegar, and baking soda. If you’re looking for a vegan option, just switch the chocolate coating with plant-based chocolate wafers. That way, everyone can enjoy this nostalgic little treat!
Delightful Homemade Honeycomb Candy That's Naturally Crunchy
Ingredients
Equipment
Method
- Start by lining an 8x8 inch casserole dish with non-stick foil. Press the foil firmly into the corners while leaving some overhang for easy lifting.
- In a heavy-bottomed saucepan, combine white sugar, white vinegar, and dark corn syrup. Place the pan over medium heat while stirring continuously for about 5 minutes.
- Bring the mixture to a boil, stopping stirring, and allow it to cook until a candy thermometer reads 300°F.
- Carefully remove the saucepan from the heat and immediately stir in the baking soda.
- Quickly pour the foamed mixture into your prepared casserole dish.
- Let the honeycomb candy cool completely without moving it for about 2 hours.
- Once fully set, carefully lift the honeycomb candy out of the dish using the foil overhang and break it into bite-sized chunks.
- If you desire a decadent touch, melt your chocolate wafers according to package instructions and dip each piece of honeycomb candy into the warm chocolate.
Leave a Reply