
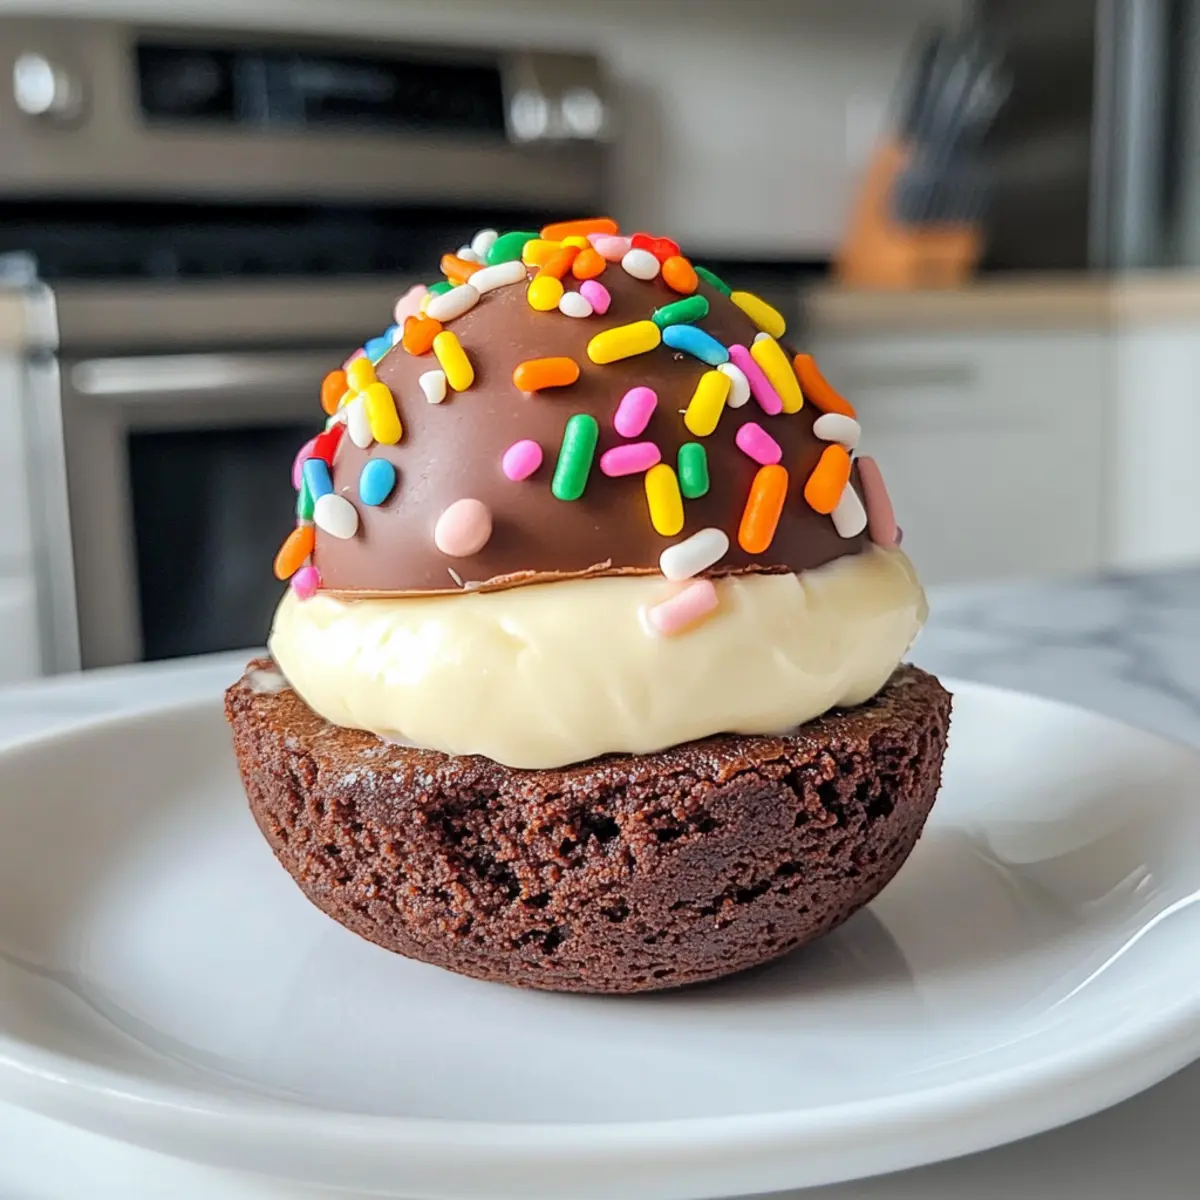
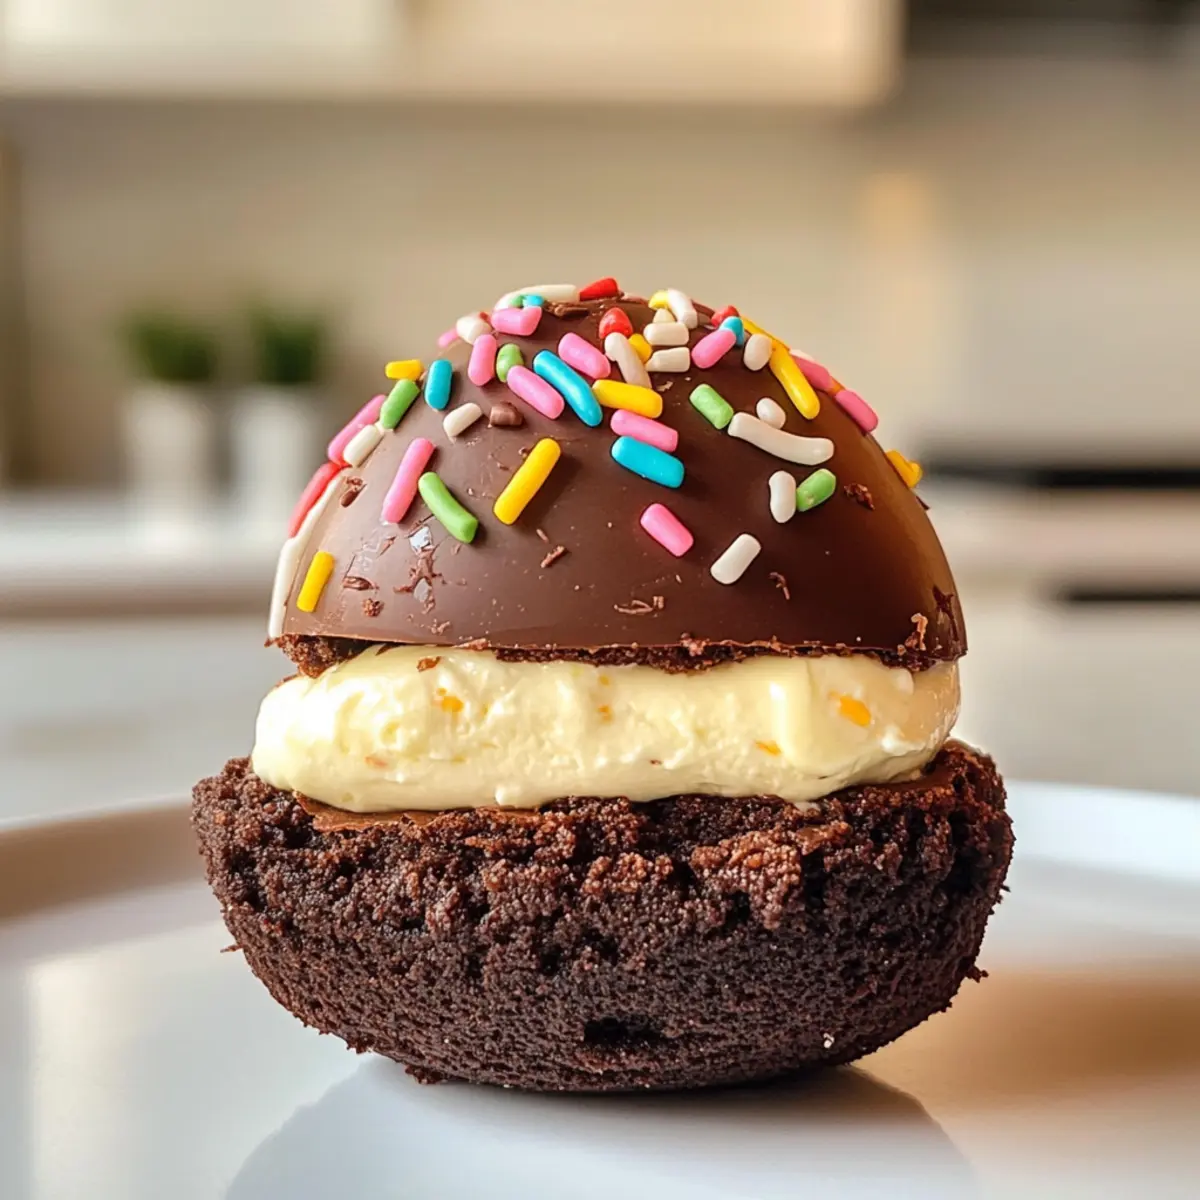
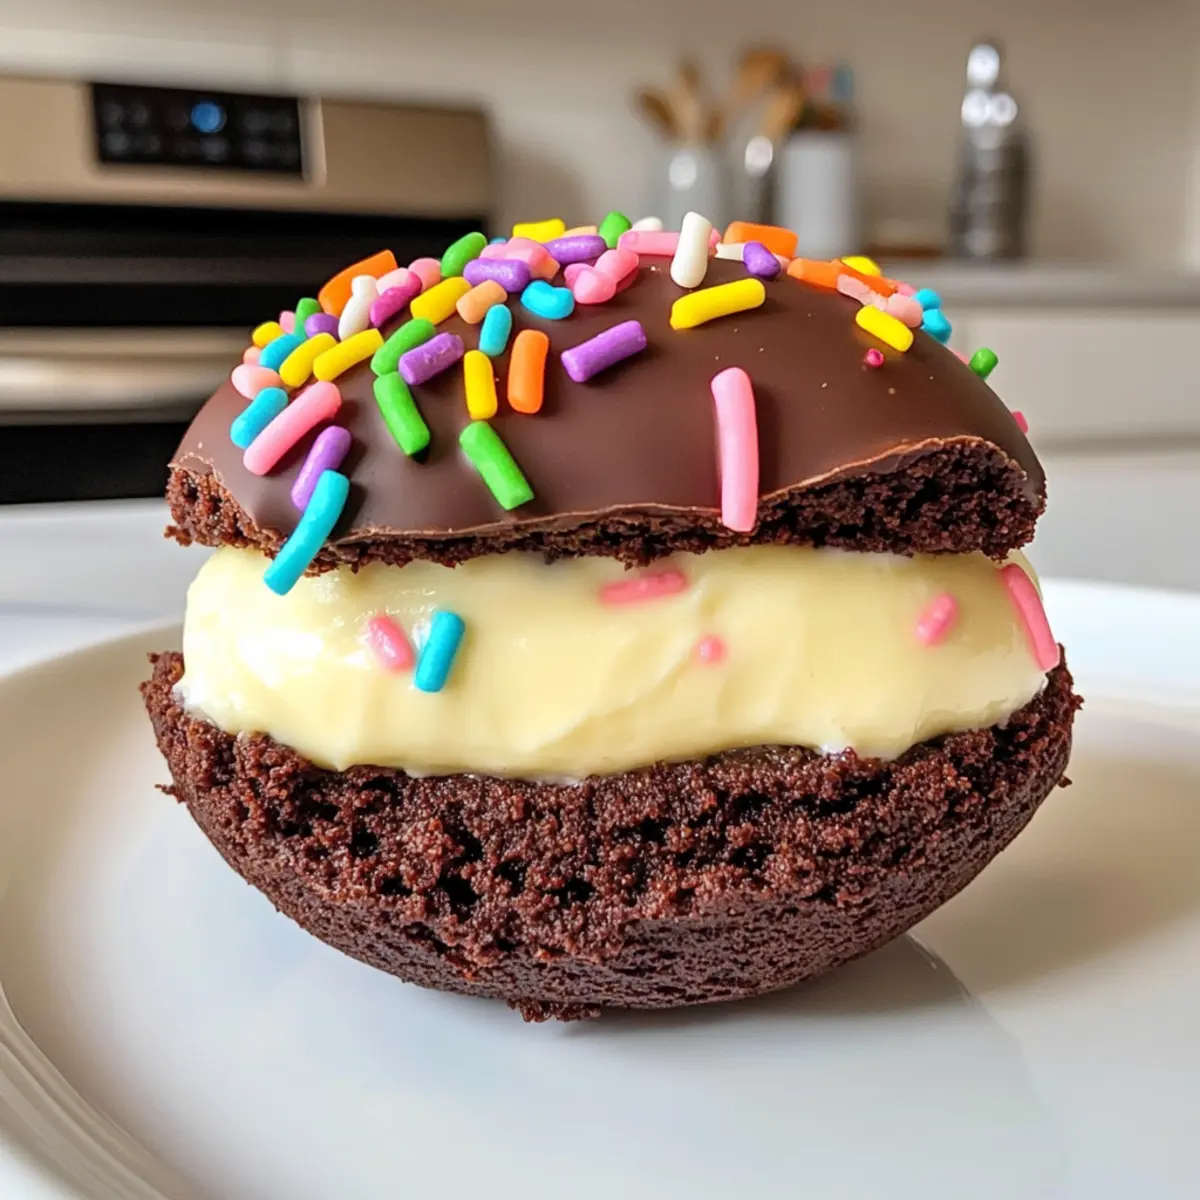
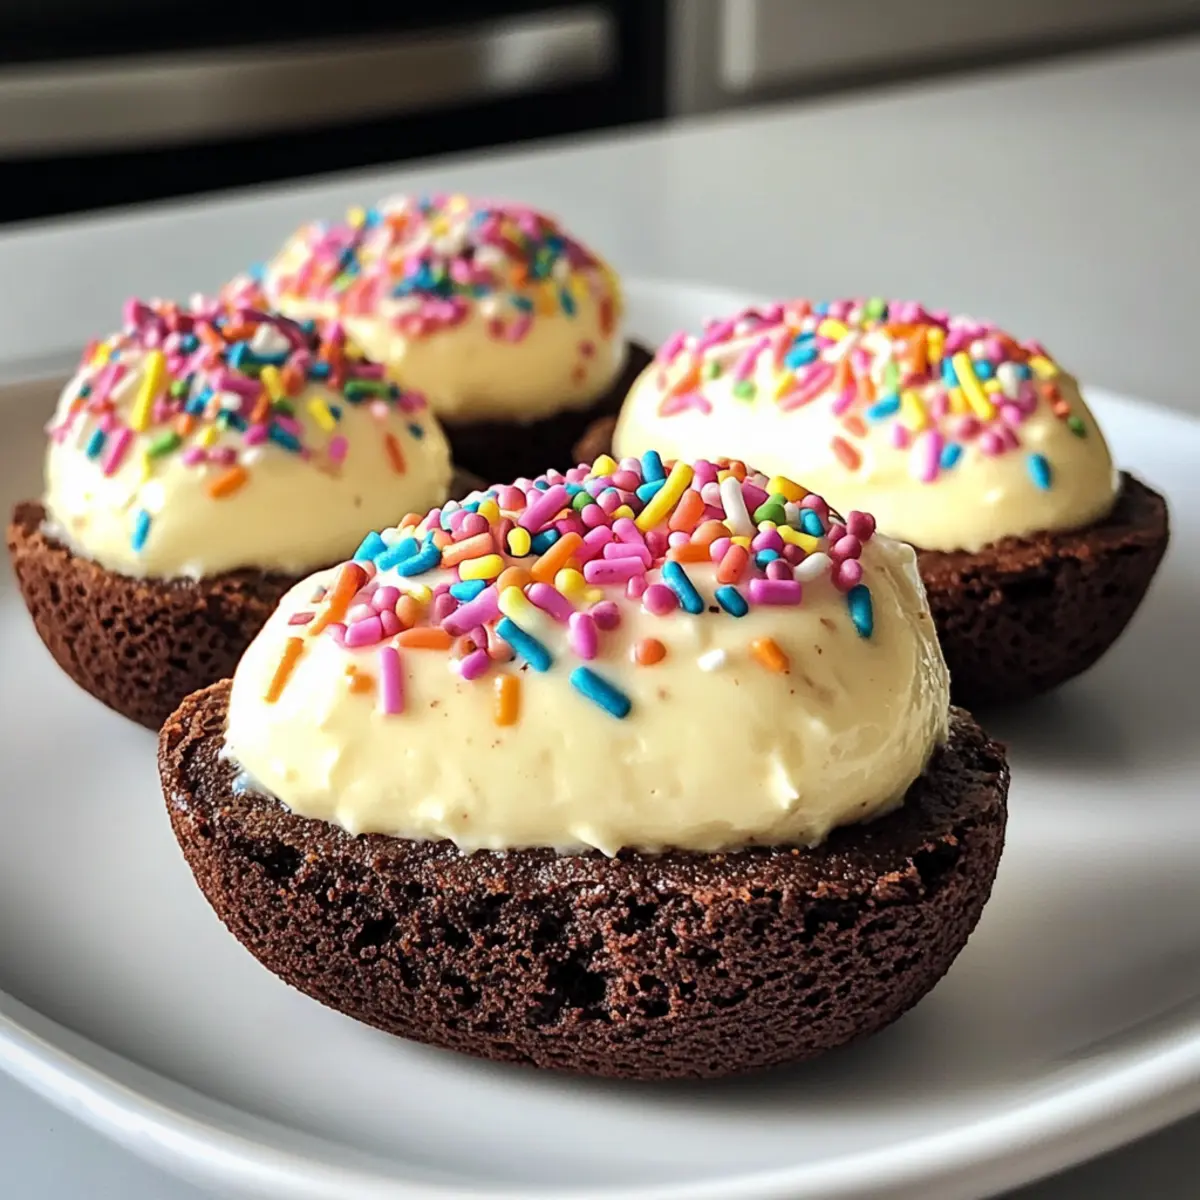
In the heart of every kitchen, there’s magic waiting to happen. These Deviled Brownies are not just desserts; they’re playful, egg-shaped delights that bring a taste of spring to life. With a rich chocolate exterior and a tangy cream cheese filling, they’re the perfect combination of textures to brighten any gathering. What makes them even better? They’re a breeze to whip up, using a simple box brownie mix that makes baking feel effortless. Plus, these festive treats are an instant crowd-pleaser, making them ideal for Easter gatherings or just a sweet pick-me-up any day of the week. Ready to dive into a fun baking adventure? Let’s get started on creating these charming treats!
Why Are These Deviled Brownies Special?
Festive Touch: These delightful treats perfectly capture the spirit of Easter, making them a show-stopper at any gathering.
Effortless Preparation: With the help of a simple box brownie mix, you’ll be able to whip up these delicious brownies without the fuss—perfect for busy bakers!
Irresistible Texture: The combination of rich chocolate and tangy cream cheese offers a unique texture that will leave your guests asking for more.
Customization Options: Feel free to adapt the filling with options like peanut butter or colorful sprinkles, ensuring everyone gets a taste they love.
Perfect for Sharing: Whether it’s a family get-together or a bake sale, these brownies are sure to be a hit, delighting all who take a bite!
Deviled Brownies Ingredients
Indulge in these delightful egg-shaped treats!
For the Brownie Base
• Brownie Mix – Use an 18.3 oz box mix to create a quick and easy base for your deviled brownies.
• Water – Necessary to help moisten the mix; follow package instructions for the right amount.
• Oil – Enhances the brownie’s richness; vegetable or canola oil works perfectly.
• Eggs – Essential for binding; typically, you’ll need 2 large eggs as per the mix instructions.
For the Creamy Filling
• Cream Cheese – The star ingredient that adds creaminess and tang; be sure it’s softened for easy mixing.
• Marshmallow Cream – Provides a sweet, fluffy element to balance the filling; can be swapped with buttercream for a different twist.
For the Decoration
• Sprinkles – Use these colorful toppings to add a festive flair; apply right before serving to maintain their vibrancy.
Feel free to customize your deviled brownies by adding peanut butter to the filling for an extra treat! Enjoy your baking adventure!
Step‑by‑Step Instructions for Deviled Brownies
Step 1: Preheat Oven
Begin by preheating your oven to 350°F (175°C). This ensures that your deviled brownies bake evenly and develop the perfect texture. While your oven heats up, you can prepare your baking molds, which will hold the delicious brownie batter.
Step 2: Prepare Brownie Batter
In a large mixing bowl, combine the brownie mix with the required ingredients from the package—typically water, oil, and eggs. Stir until just combined, making sure there are no lumps, and the batter is rich and chocolatey. This step creates the delicious base for your deviled brownies.
Step 3: Grease Molds
To prevent sticking, lightly grease your silicone egg-shaped molds with nonstick cooking spray. Ensure each cavity is well-coated, so your brownies easily pop out after baking. This is key to achieving a lovely shape reminiscent of Easter eggs, adding to the festive appeal of your deviled brownies.
Step 4: Fill Mold
Using a 2-tablespoon scoop, carefully fill each cavity of your prepared molds with the brownie batter. Aim for an even distribution to ensure uniform baking. Don’t overfill them—leave a bit of space at the top for rising. This helps maintain the perfect shape and ensures a beautiful presentation.
Step 5: Bake Brownies
Place your filled molds in the preheated oven and bake for 24-26 minutes. Keep an eye on them, and check for doneness by inserting a toothpick into the center; it should come out clean or with a few moist crumbs attached. This ensures your deviled brownies are perfectly cooked.
Step 6: Create Divots
As soon as the brownies come out of the oven, use a ½ teaspoon to press gently into the center of each brownie to create a divot. This little indent will be essential for holding your creamy filling later on. Allow the brownies to cool slightly but do this while they are still warm for the best results.
Step 7: Cool Brownies
Let the brownies cool completely in the molds—about 15-20 minutes. Cooling is crucial because warm brownies can easily break apart when removed. Once they’re cool to the touch, carefully remove each brownie from its mold, ensuring they maintain their delightful egg shapes.
Step 8: Prepare Filling
While your brownies cool, prepare the filling by beating softened cream cheese and marshmallow cream together in a bowl. Mix until the mixture is smooth and creamy, with no clumps. This filling will add a delightful tangy sweetness to your deviled brownies, elevating their flavor profile.
Step 9: Pipe Filling
Transfer the cream cheese filling into a pastry bag fitted with a 1M tip. Carefully pipe the creamy filling into the divots of each brownie, filling them generously. The filling should sit just above the surface for a lovely look. This step transforms your brownies into the festive deviled brownies that shine.
Step 10: Chill
Finally, refrigerate your deviled brownies until you’re ready to serve, ideally for at least 30 minutes. Chilling not only firms up the filling but also enhances the overall texture. Once chilled, these delightful treats are ready to be decorated and enjoyed at your special occasion!
Expert Tips for Deviled Brownies
• Room Temperature Cream Cheese: Ensure your cream cheese is softened before mixing. This will give your filling a smooth, creamy texture that blends perfectly with the marshmallow cream.
• Don’t Rush Cooling: Allow the brownies to cool completely in the molds. Rushing this step can lead to broken brownies; a little patience goes a long way in achieving that perfect egg shape!
• Piping Technique: Use a pastry bag for piping the cream cheese filling. This not only makes it easier but also helps you to create a more polished look, with a lovely swirl on top.
• Decorating Tips: Add sprinkles or colored sugar just before serving to keep them vibrant. If added too early, they may bleed, affecting the visual appeal of your deviled brownies.
• Filling Variations: For a fun twist, try mixing in peanut butter or flavored extracts to the filling before piping. These variations can elevate your festive treats to new flavor heights!
How to Store and Freeze Deviled Brownies
Fridge: Keep the deviled brownies in an airtight container in the refrigerator for up to 3-4 days. This helps maintain their moisture and freshness while preserving that delightful cream cheese filling.
Freezer: For longer storage, freeze the brownies in a single layer, wrapped in plastic wrap and then aluminum foil, for up to 2 months. Thaw in the fridge before serving to keep the texture intact.
Preparation for Serving: If you’ve prepped and stored your deviled brownies, simply bring them to room temperature or lightly chill them again before serving for that cool, delicious creaminess!
Reheating: If you prefer a warm treat, reheat in the microwave for 10-15 seconds until just warmed through, but keep in mind that freshness is best when they are served chilled!
Deviled Brownies: Variations & Substitutions
Feel free to let your creativity shine by customizing these delightful deviled brownies to suit your taste!
-
Dairy-Free: Swap cream cheese with a dairy-free cream cheese alternative and use almond milk for the brownie mix.
-
Nutty Addition: Stir in 2-3 tablespoons of almond or peanut butter into the cream cheese filling for a deliciously nutty twist. It adds a rich flavor that pairs beautifully with chocolate.
-
Fruit-Flavored Filling: Incorporate a splash of vanilla or almond extract in the filling to elevate its flavor. A little twist can create a whole new dessert experience!
-
Gluten-Free: Use a gluten-free brownie mix to ensure that your deviled brownies can be enjoyed by everyone. It doesn’t sacrifice flavor but makes them inclusive for those with dietary restrictions.
-
Colorful Touch: Tint the cream cheese filling with pastel food coloring to match the Easter palette. It not only looks delightful but adds a whimsical touch to your presentation.
-
Cookie Dough Surprise: Add mini chocolate chips or cookie dough pieces in the filling for a fun surprise. This yummy surprise inside takes these brownies to the next level!
-
Chili Heat: For those who enjoy a little heat, mix in a pinch of cayenne pepper into the brownie batter. The heat contrasts wonderfully with the sweet cream cheese filling.
-
Fruity Accents: Top the cream filling with fresh berries like raspberries or strawberries just before serving for a refreshing burst of flavor that complements the richness of chocolate.
These variations are designed to inspire your baking and create the perfect treat for any occasion. Need more ideas? Consider pairing with a homemade vanilla ice cream on the side, or enjoy them alongside a warm cup of espresso coffee for the ultimate indulgence!
What to Serve with Deviled Brownies
Elevate your dessert experience by pairing these delightful treats with delicious accompaniments that harmonize beautifully.
-
Fresh Berries: The bright acidity of strawberries or raspberries cuts through the richness, adding a refreshing contrast to your brownies.
-
Whipped Cream: Light and airy, a dollop of whipped cream brings an extra layer of decadence and pairs well with the creamy filling.
-
Ice Cream: Creamy vanilla or mint chocolate chip ice cream complements the brownies, making every bite a delightful indulgence.
-
Coffee: A warm cup of coffee enhances the chocolate flavor, making it a perfect pairing for your brownies during afternoon gatherings.
-
Milk: A classic choice, a glass of cold milk balances the sweetness and provides a comforting companion to each rich bite.
-
Caramel Sauce: Drizzling warm caramel over your brownies introduces a sweet, buttery flavor that enhances the overall experience.
For a delightful Easter gathering, consider serving the brownies alongside fresh fruit and whipped cream for a touch of color and balance!
Make Ahead Options
These Deviled Brownies are a perfect treat to prepare ahead of time, making your busy weeknights a little easier! You can mix the brownie batter and fill the molds up to 24 hours in advance. Just store the filled molds covered in the refrigerator to keep them fresh. Bake the brownies when you’re ready, then create the divots while they are warm for easy filling. As for the cream cheese filling, it can be made up to 3 days ahead; just keep it refrigerated in an airtight container. When it’s time to serve, pipe the filling into the cooled brownies and refrigerate them again to allow the flavors to meld beautifully. With these make-ahead tips, you’ll have delightful treats ready to impress with minimal last-minute effort!
Deviled Brownies Recipe FAQs
What type of brownie mix should I use for Deviled Brownies?
Absolutely! I recommend using an 18.3 oz box of your favorite brownie mix. Choose one that you love for its flavor and texture, as this will be the base for your deviled brownies. Just make sure to follow the package instructions regarding the required ingredients like water, oil, and eggs.
How long can I store Deviled Brownies?
Keep these delightful treats in an airtight container in the refrigerator for up to 3-4 days. This ensures they stay fresh and the cream cheese filling maintains its creamy texture. Just remember to let them come to room temperature before serving for the best taste.
Can I freeze Deviled Brownies?
Very! To freeze your Deviled Brownies, wrap them individually in plastic wrap and then place them in an airtight container or a resealable freezer bag. They can be frozen for up to 2 months. When you’re ready to enjoy them, simply thaw them in the refrigerator overnight to ensure the texture stays lovely.
What should I do if my brownies break when removing them from the mold?
Don’t worry! It happens to the best of us. If your brownies break, it’s usually because they were still warm when you tried to remove them. Always let them cool completely for at least 15-20 minutes in the mold. If they’re stubborn, try gently wiggling the mold or gently pushing from the bottom to release them.
Are Deviled Brownies safe for pets?
No, it’s best to keep these deviled brownies away from pets, especially because of the cream cheese and sugar content. Some chocolate ingredients can also be harmful to dogs and other pets, so they should stick to their own treats!
Can I modify the filling in Deviled Brownies?
Absolutely! Feel free to experiment with your filling! You can add 2-3 tablespoons of peanut butter to the cream cheese mixture for a nutty twist. You can also tint the cream cheese filling with food coloring to create pastel shades for a festive look. Just cater it to your taste preferences!
Deviled Brownies: Festive Chocolate Treats with Creamy Filling
Ingredients
Equipment
Method
- Preheat your oven to 350°F (175°C).
- Combine brownie mix with required ingredients and stir until just combined.
- Lightly grease silicone egg-shaped molds with nonstick spray.
- Fill each cavity of the molds with brownie batter using a scoop.
- Bake for 24-26 minutes and check for doneness.
- Press gently to create divots in each brownie while warm.
- Let brownies cool completely in the molds for 15-20 minutes.
- Beat softened cream cheese and marshmallow cream until smooth.
- Pipe filling into the divots of each brownie.
- Refrigerate until ready to serve for at least 30 minutes.
Leave a Reply