
As I stood in my kitchen, the aromas of melted cheese and fresh garlic danced through the air, instantly transporting me to my favorite childhood snacking moments. These Easy Cheesy Garlic Ritz Bits are my go-to remedy when cravings hit and the urge for homemade goodness pulls at my heart. They come together effortlessly, making them an ideal snack recipe for any occasion—perfectly crispy on the outside with a gooey, delicious center! Best part? You can customize these little delights to suit your taste, ensuring that each bite is just as irresistible as the last. Whether you’re hosting a cozy gathering or simply indulging yourself on a lazy afternoon, these homemade snacks offer a comforting twist on classic munchies. Are you ready to dive into a cheesy, garlicky adventure?

Why Are These Ritz Bits So Irresistible?
Crispy Perfection: Each bite delivers a satisfying crunch that makes snacking truly enjoyable. Gooey Goodness: Experience a luscious, melted cheese center that perfectly complements the crispy Ritz crackers. Customizable Flavors: Feel free to experiment with different cheeses or spices to create your unique flavor twist. Enjoy them warm as a delightful appetizer at your next gathering, or savor them while catching up on your favorite show. Plus, with tips to make ahead and store, you can indulge anytime! These bites are even easier than making delicious Butter Garlic Crab or Garlic Herb Roasted Potato Skins!
Cheesy Garlic Ritz Bits Ingredients
Get ready to create these delightful bites!
For the Ritz Bits
• Ritz Crackers – The perfect base, offering a crispy, light texture that’s irresistible.
• Shredded Cheddar Cheese – Freshly shredded is best for melty, gooey goodness in your Cheesy Garlic Ritz Bits.
• Fresh Garlic – Brings aromatic richness; substitute with garlic powder for convenience if needed.
• Butter – Unsalted butter enhances the flavor and promotes beautiful browning.
For Optional Seasonings
• Smoked Paprika – Add a pinch for a smoky twist that heightens flavor complexity.
• Roasted Garlic Powder – For an extra garlicky kick without using fresh garlic.
These fresh ingredients come together to form the magical bites you’ll want to enjoy time and time again!
Step‑by‑Step Instructions for Easy Cheesy Garlic Ritz Bits
Step 1: Preheat the Oven
Begin by preheating your oven to 325°F (163°C). This temperature will ensure that your Cheesy Garlic Ritz Bits bake evenly, allowing the crackers to become perfectly crispy while the cheese melts into a gooey delight. It’s always a good idea to set your oven before starting preparation, so it’s ready when you are.
Step 2: Assemble the Ritz Sandwiches
Take two Ritz crackers and place a small amount of freshly shredded cheddar cheese and a sprinkle of finely minced fresh garlic between them. Gently press them together to create little sandwiches. Make sure not to overfill, as a small, even layer of cheese is key to preventing them from becoming soggy during baking.
Step 3: Prepare the Baking Sheet
Line a baking sheet with parchment paper for easy cleanup. Carefully place the assembled Cheesy Garlic Ritz Bits on the sheet, leaving a little space between each sandwich to allow for even baking. This spacing will help each bit to crisp up nicely without sticking together.
Step 4: Brush with Butter
Melt some unsalted butter and, using a pastry brush, generously brush the tops of each Ritz sandwich. This step not only enhances flavor but also contributes to a beautiful golden color as they bake. The melted butter will marry beautifully with the garlic and cheese, creating a dreamy snacking experience.
Step 5: Bake the Ritz Bits
Place the baking sheet in your preheated oven and bake for 8 to 10 minutes. Keep an eye on them, as you want the Ritz crackers to turn golden and the cheese to become molten and bubbling. The smell of garlic and cheese will fill your kitchen, tantalizing your taste buds!
Step 6: Cool and Serve
Once out of the oven, allow the Cheesy Garlic Ritz Bits to cool on the baking sheet for a couple of minutes. This cooling period is crucial as it helps lock in the crispiness while the cheese remains perfectly warm. After they’ve cooled slightly, transfer them to a serving platter and you’re ready to snack!
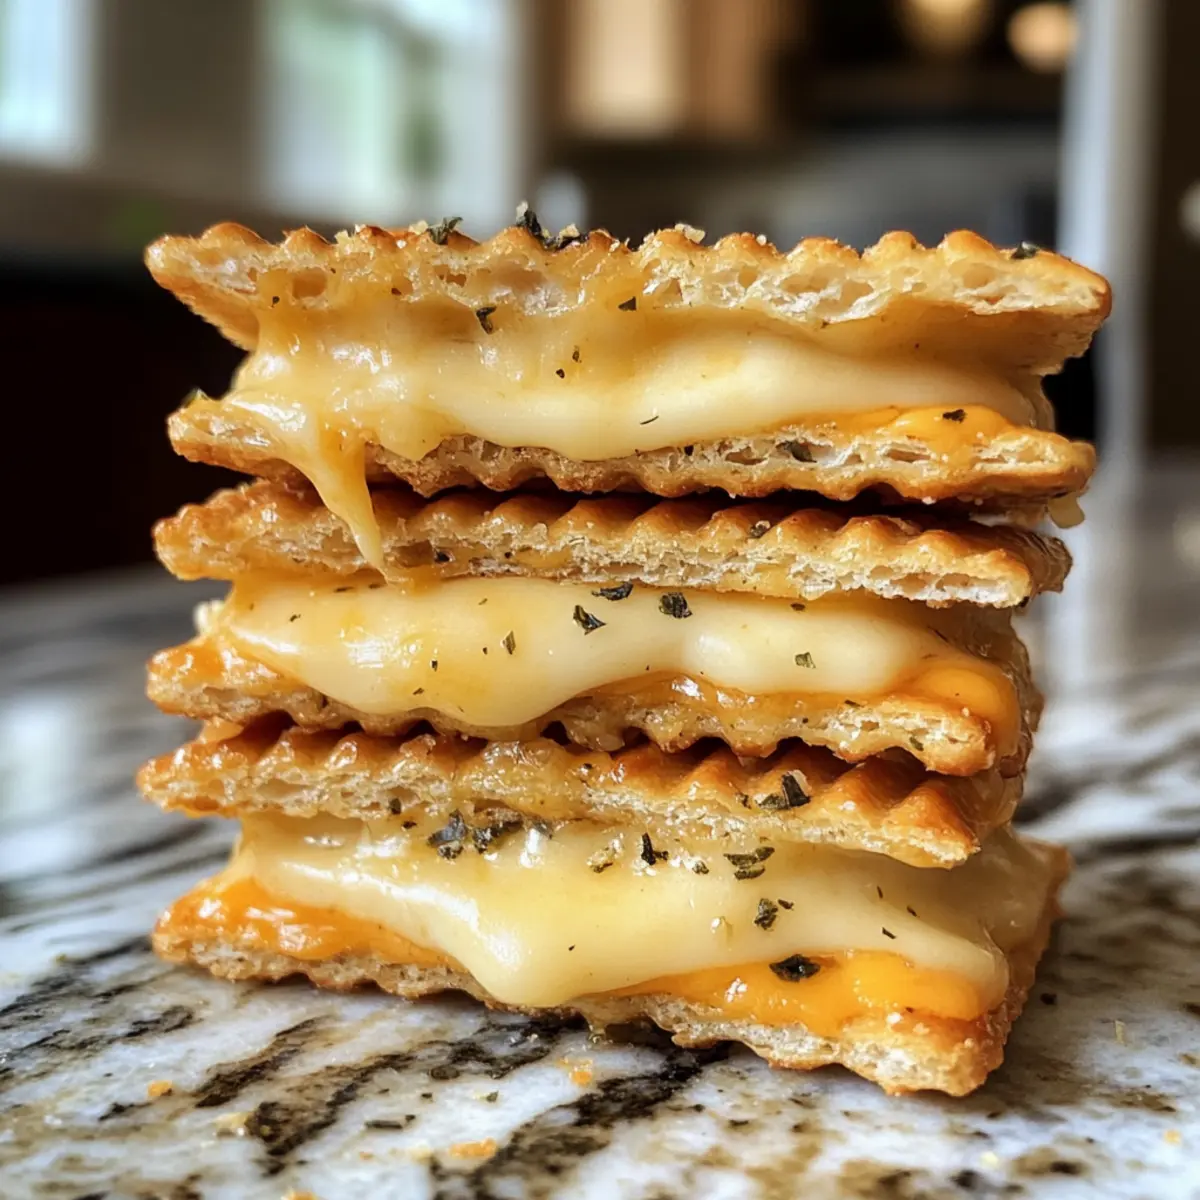
Cheesy Garlic Ritz Bits Variations
Feel free to let your creativity shine and customize these tasty bites to suit your preferences!
-
Gouda Twist: Mix half cheddar with smoked gouda for an irresistibly rich flavor. It adds depth and sophistication, making every bite a gourmet delight.
-
Spicy Kick: Swap cheddar for pepper jack cheese to introduce a spicy flair. This variation is perfect for those who crave a little heat with their snacks.
-
Herbed Delight: Incorporate dried herbs like oregano or thyme into your butter before brushing. This will elevate the flavor and create a lovely aromatic experience.
-
Caramelized Onions: Add a layer of caramelized onions between the cheese for a sweet and savory combination. This will add a delightful richness and complexity to your Ritz Bits.
-
Smoky Paprika: Sprinkle a pinch of smoked paprika on top before baking for a warm, cozy flavor twist. It brings a comforting smokiness that resonates beautifully with the cheese.
-
Cheesy Trio: Combine three different cheeses, such as mozzarella, cheddar, and provolone. This melty medley will enhance the texture and flavor profile, ensuring no two bites are the same.
-
Garlic Lovers: For an extra punch of garlicky goodness, incorporate roasted garlic in addition to fresh garlic. The roasted variety adds sweetness that balances beautifully with the saltiness of the crackers.
-
Nutty Flavor: Top each assembled sandwich with a sprinkle of finely chopped nuts, like pecans or walnuts, before baking. It adds crunch and a delightful nuttiness that transforms your snack.
These delightful variations ensure that your Cheesy Garlic Ritz Bits can cater to every taste! And if you’re seeking more delicious ideas, consider trying the Cheesy Pumpkin Ricotta or Mussels in Garlic Miso for a fun culinary adventure!
Make Ahead Options
These Easy Cheesy Garlic Ritz Bits are perfect for meal prep, allowing you to enjoy fresh snacks with minimal fuss! You can assemble the Ritz cracker sandwiches up to 24 hours in advance. Simply layer the shredded cheddar cheese and fresh garlic between the Ritz crackers, then place them in an airtight container and refrigerate. To maintain their crispy texture, avoid brushing them with melted butter until you’re ready to bake. When it’s time to serve, simply brush the tops with butter and bake directly from the fridge for 8-10 minutes, until golden brown and bubbling. This way, you’ll have delicious, homemade snacks ready in no time!
What to Serve with Easy Cheesy Garlic Ritz Bits
As you indulge in these scrumptious bites, consider savory accompaniments that elevate your snacking experience and tantalize your taste buds!
-
Fresh Veggie Platter: Crisp, colorful veggies like carrots, cucumbers, and bell peppers create a refreshing contrast to the cheesy richness. Serve with hummus for added flavor!
-
Classic Tomato Soup: The comforting and tangy notes of tomato soup provide a lovely dip for your Ritz Bits, enhancing their cheesy goodness with a hint of sweetness.
-
Spicy Salsa: A zesty salsa can bring in bold flavors. The fiery kick pairs extraordinarily well with the creamy texture of the Cheesy Garlic Ritz Bits!
-
Creamy Spinach Dip: This luscious dip is great for scooping, offering a rich and decadent layer that complements the crispy exterior of the Ritz Bits perfectly.
-
Herbed Salad: A light, herby salad with mixed greens and a squeeze of lemon dressing can balance the richness of your snacks, adding a freshness that elevates the overall meal.
-
Chilled White Wine: A glass of chilled Sauvignon Blanc or a light Chardonnay provides a crisp and refreshing element, perfectly offsetting the savory flavors.
-
Dark Chocolate: For a sweet finish, opt for a small piece of dark chocolate. The bittersweet notes create an unexpected but delightful contrast to the cheesy bites, leaving you with a satisfying end to your snack.
How to Store and Freeze Cheesy Garlic Ritz Bits
Fridge: Store leftover Cheesy Garlic Ritz Bits in an airtight container for up to 3 days. This will help maintain their flavor and texture, but they’re best enjoyed fresh.
Freezer: If you want to enjoy them later, freeze the assembled sandwiches before baking. Wrap them tightly in plastic wrap; they can be kept for up to 2 months.
Reheating: For the best results, bake frozen Cheesy Garlic Ritz Bits straight from the freezer at 350°F (177°C) for about 10-12 minutes, or until crisp. Avoid microwaving to preserve their crunchy texture.
Expert Tips for Cheesy Garlic Ritz Bits
• Fresh Cheese Only: Always shred cheese fresh for optimal melt; pre-packaged cheese can lead to rubbery pockets.
• Mindful Filling: Avoid adding too much cheese; an even small layer prevents sogginess and ensures a perfect bite.
• Bake for Crispiness: For a delightful crunch, use the oven to reheat leftovers instead of microwaving, which can soften the texture.
• Make Ahead: Prepare and refrigerate the assembled sandwiches ahead of time; bake them just before serving to maintain that ideal warmth and crunch.

Easy Cheesy Garlic Ritz Bits Recipe FAQs
What type of Ritz crackers should I use?
I recommend using original Ritz crackers for the best balance of flavor and texture. They provide the perfect crispy base for your Cheesy Garlic Ritz Bits. If you prefer something a bit different, whole wheat or flavored Ritz varieties can also work well for a fun twist!
How long can I store leftover Cheesy Garlic Ritz Bits?
Store your leftovers in an airtight container in the fridge for up to 3 days. This helps maintain their flavor, but keep in mind that they’re best enjoyed fresh out of the oven. If you notice them becoming soft, you can crisp them up again in the oven briefly before enjoying!
Can I freeze Cheesy Garlic Ritz Bits?
Absolutely! To freeze, assemble your Ritz sandwiches, but do not bake them. Instead, wrap each sandwich tightly in plastic wrap and then place them in a freezer-safe bag. They can be kept for up to 2 months. When you’re ready to bake, simply pop them in the oven straight from the freezer!
What should I do if my cheese is not melting well?
If your cheese isn’t melting as expected, it might be due to the type of cheese used. I recommend using fresh shredded cheddar for optimal melting. Pre-packaged cheeses often have anti-caking agents that prevent them from melting smoothly. If it still doesn’t melt well, try increasing the baking time by a minute or two, but keep an eye on them to prevent burning!
Can pets safely enjoy Cheesy Garlic Ritz Bits?
While your dogs may beg for a bite, it’s best to keep these snacks away from pet companions. The garlic used in the recipe can be harmful to dogs. If you want to share a special treat with your furry friend, consider making a pet-friendly version without any garlic or seasoning!
What can I substitute for fresh garlic?
If you don’t have fresh garlic on hand, garlic powder can be a suitable substitute! Use approximately 1/8 teaspoon of garlic powder for every clove of garlic. While it won’t provide the same aromatic richness, it still adds that familiar garlicky flavor to your Cheesy Garlic Ritz Bits.
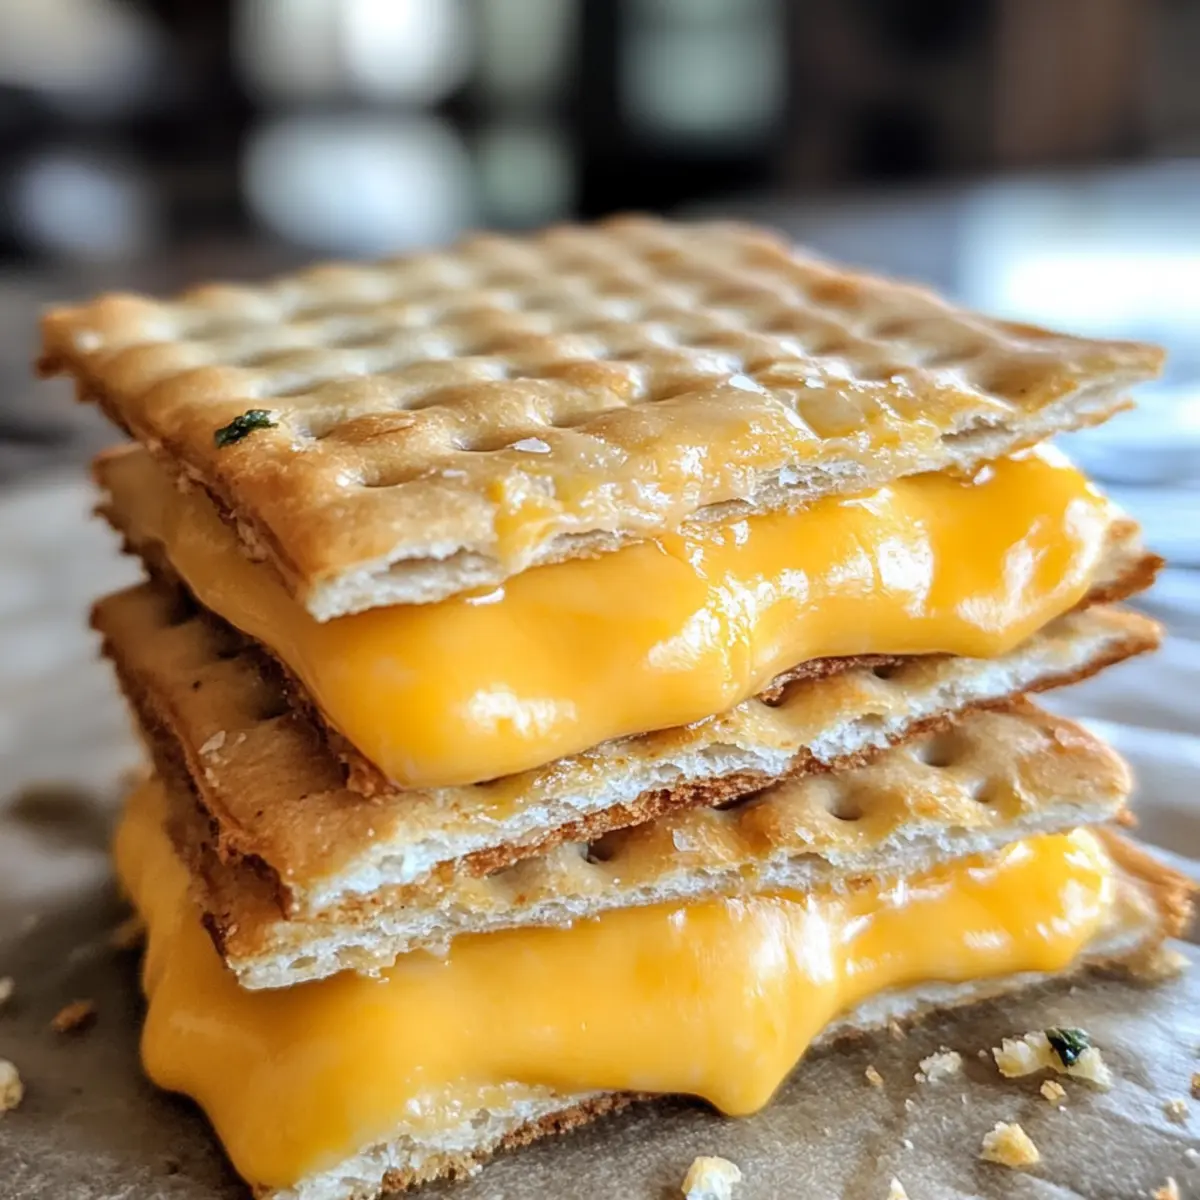
Irresistibly Crunchy Cheesy Garlic Ritz Bits for Snacking Fun
Ingredients
Equipment
Method
- Preheat your oven to 325°F (163°C).
- Assemble by placing shredded cheddar cheese and minced garlic between two Ritz crackers.
- Prepare a baking sheet lined with parchment paper and arrange the assembled Ritz bits.
- Melt butter and brush the tops of each Ritz sandwich.
- Bake in the oven for 8 to 10 minutes until golden and bubbling.
- Allow to cool for a couple of minutes before serving.
Leave a Reply