
As I was preparing for this year’s Halloween gathering, I found myself daydreaming about delightful sweets that would both astonish my guests and satisfy their cravings. That’s when inspiration struck: Mummy Chocolate-Covered Strawberries! These spooky chocolate-covered berries are not only a quick and easy dessert—ready in under 30 minutes—but they also transform fresh, juicy strawberries into playful little mummies that are perfect for Halloween celebrations. The combination of sumptuous dark chocolate and whimsical white chocolate drizzles creates a treat that’s visually striking and oh-so-delicious, making them an instant hit for any gathering. Curious about how to create these charming confections? Let’s dive into the recipe!

Why are these Mummy Strawberries a must-try?
Simplicity at Its Best: The step-by-step process ensures you can whip up these spooky delights even if you’re a baking novice.
Quick to Make: Ready in under 30 minutes, these treats will have your Halloween gathering buzzing with excitement without taking up your whole day.
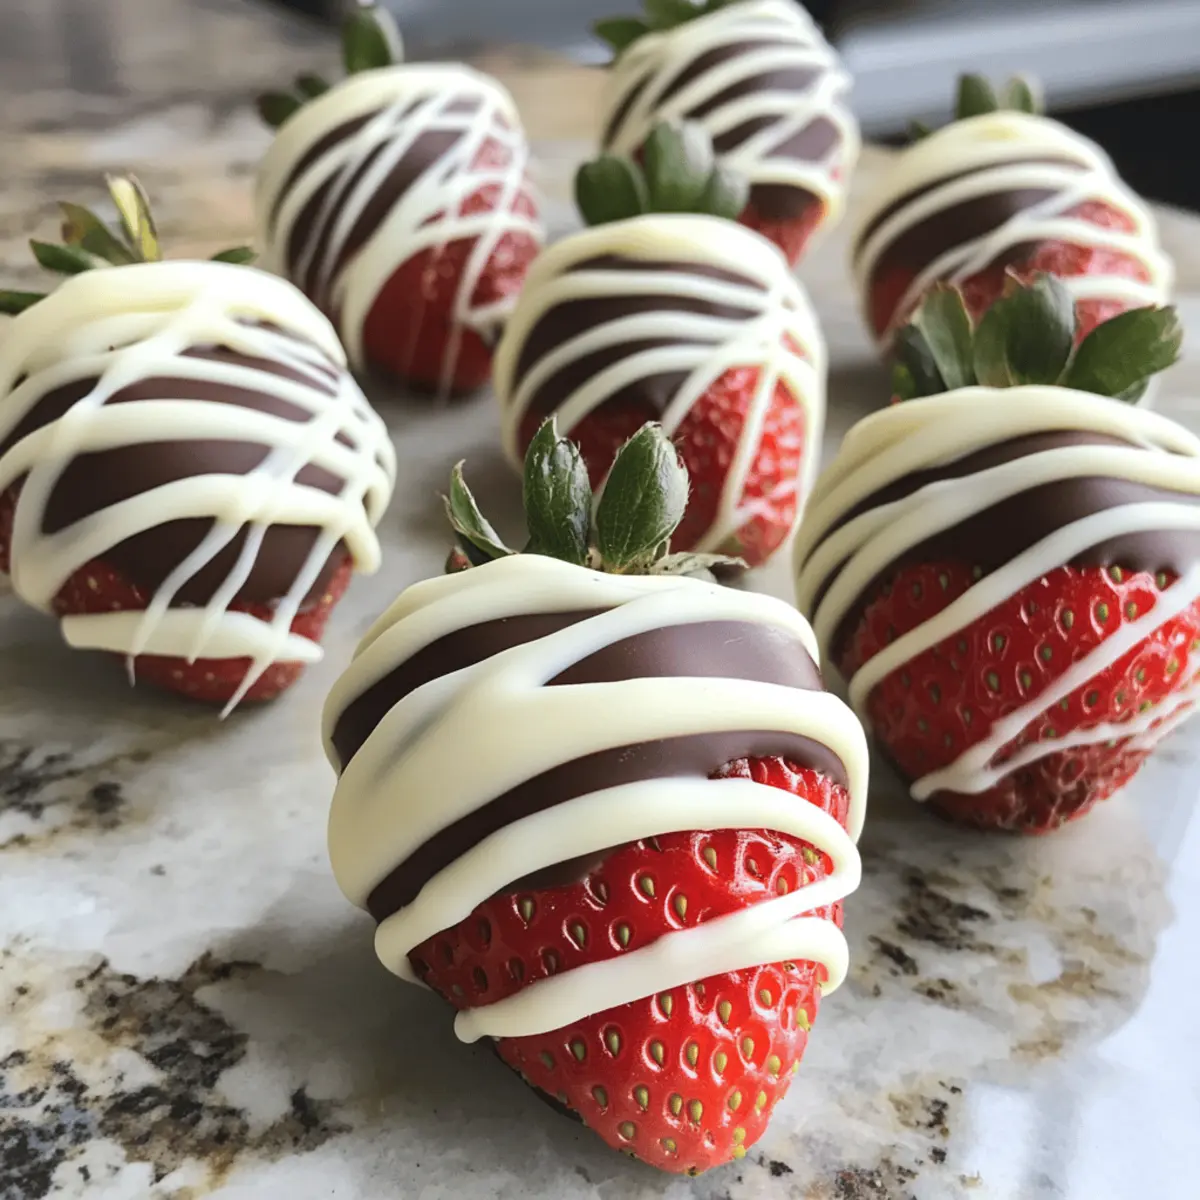
Gorgeous Presentation: The contrast of dark and white chocolate creates an eye-catching display that looks as impressive as it tastes—perfect for impressing guests!
Sweet and Juicy: Each bite combines rich chocolate with the fresh taste of strawberries, offering a delightful balance of flavors that’s hard to resist.
Versatile Fun: Customize with different chocolate types or decorations, or pair them with other Halloween treats like Dirt Cake Cookies for a fun dessert spread!
Whether you’re looking to surprise guests or simply indulge your sweet tooth, these Mummy Chocolate-Covered Strawberries will be the star of the show!
Spooky Chocolate Covered Berries
• Prepare to enchant your guests with these delightful treats!
For the Strawberries
- Fresh Strawberries – Choose firm, ripe strawberries for the perfect combination of sweetness and juiciness.
For the Chocolate Coating
- Dark Chocolate Chips – This rich chocolate creates a delicious base; consider using semisweet if you crave something sweeter.
- Coconut Oil – Optional, but it helps give the chocolate a smoother finish; use it if you want a silkier texture.
For the Mummy Details
- White Chocolate Chips – Drizzling these creates the adorable mummy bandages; substitute with vanilla melting wafers for a fun twist.
- Candy Eyes – These fun decorations are essential for adding personality to your spooky treats; try using chocolate decorations if candy eyes are unavailable.
With these ingredients at hand, you’re all set to create your own Spooky Chocolate Covered Berries, perfect for any Halloween celebration!
Step‑by‑Step Instructions for Spooky Chocolate Covered Berries
Step 1: Prepare the Strawberries
Start by washing the fresh strawberries thoroughly under cool water, ensuring to gently remove any dirt. Once washed, dry each strawberry completely with paper towels or a clean kitchen cloth. This step is crucial because any moisture can cause the chocolate to seize, ensuring your spooky chocolate covered berries have a smooth, beautiful coating.
Step 2: Melt the Dark Chocolate
In a microwave-safe bowl, combine dark chocolate chips and, if desired, a teaspoon of coconut oil. Microwave the mixture in 20-30 second intervals, stirring in between, until the chocolate is fully melted and smooth, which should take about 1 to 2 minutes. This rich chocolate will serve as the perfect base for your mummy treats, so ensure there are no lumps left.
Step 3: Dip the Strawberries
Grasp each dry strawberry by the green leaves, then dip it into the melted dark chocolate, covering about three-quarters of the strawberry. Gently shake off excess chocolate and place the dipped strawberries on a parchment-lined baking sheet. Look for an even coating without drips, which will make your spooky chocolate covered berries look professional and enticing.
Step 4: Add the Eyes
Before the dark chocolate sets, carefully press two candy eyes onto the top of each strawberry. Be sure to do this while the chocolate is still wet; this will help the eyes adhere securely. Position the eyes so they are centered and slightly spaced apart, giving your mummies their adorable spooky expressions.
Step 5: Melt the White Chocolate
Using the same method, melt the white chocolate chips in a clean microwave-safe bowl. Heat for 20-30 second intervals, stirring until fully smooth. This white chocolate will serve as the fabulous mummy bandages, creating a striking contrast against the dark chocolate coating of your spooky chocolate covered berries.
Step 6: Create Mummy Wraps
Transfer the melted white chocolate into a piping bag or a zip-top bag with a small corner snipped. Drizzle the white chocolate back and forth over the dipped strawberries, simulating the appearance of mummy bandages. Be careful to avoid the eyes to maintain their visibility. This playful detail is what will really make your spooky chocolate covered berries stand out at any Halloween gathering.
Step 7: Set and Serve
Once decorated, let your spooky chocolate covered berries sit at room temperature until the chocolate hardens, which may take about 10-15 minutes. For quicker results, you can refrigerate them for about 10 minutes. Once set, enjoy these delightful mummies right away or store them in an airtight container in the fridge, but remember they are best served fresh!
Expert Tips for Spooky Chocolate Covered Berries
-
Strawberry Selection: Choose ripe, firm strawberries for maximum juiciness. Overripe berries can lead to sloppy treats that won’t hold their shape.
-
Drying is Key: Thoroughly dry each strawberry before dipping; even a drop of moisture can cause the chocolate coating to seize, ruining your spooky chocolate covered berries.
-
Chocolate Melting Technique: Melt chocolate in short intervals, stirring in between to ensure it remains smooth without burning. Avoid high heat; patience pays off!
-
Use Piping Bags: For the best control over the white chocolate drizzle, use a piping bag or a zip-top bag with a small corner cut off. This will make your mummy details pop!
-
Decorate While Wet: Press candy eyes into the chocolate while it’s still wet to ensure they stick. Waiting too long may mean they slide off or won’t adhere properly.
-
Enjoy Freshness: For the best flavor and texture, serve your spooky chocolate covered berries soon after they’re made, as moisture can dull the chocolate.
Spooky Chocolate Covered Berries Variations
Feel free to get creative with these fun variations to make the Mummy Chocolate-Covered Strawberries your own!
-
Milk Chocolate: Swap dark chocolate for milk chocolate for a sweeter, creamier taste your guests will love.
-
Candy Decorations: Instead of traditional candy eyes, use small chocolate chips or colorful icing to add a personal touch. These small tweaks can transform the look entirely!
-
Flavored Chocolate: Experiment with flavored chocolates such as orange or mint to give your mummies an unexpected twist. A hint of peppermint would add an enchanting bite.
-
Chocolate Drizzle: For added flair, drizzle extra chocolate over the dried strawberries in different patterns for a more artistic mummy design.
-
Gummy Worms: Add gummy worms sticking out of the chocolate as a playful detail. This could create a delightful surprise for kids and adults alike!
-
White Chocolate Color: Use colored white chocolate or candy melts, like green or purple, to match any themed party or spooky aesthetic.
-
Spiced Chocolate: Mix in a little cinnamon or pumpkin spice into your melted chocolate for an autumnal flavor like no other. It complements the strawberries beautifully.
For a devilishly delightful Halloween spread, consider pairing these treats with Ghost Smores Dip or serving them alongside a platter of festive Dirt Cake Cookies. Happy haunting!
How to Store and Freeze Spooky Chocolate Covered Berries
Fridge: Keep your spooky chocolate covered berries in a single layer in an airtight container lined with parchment for up to 3 days. This preserves their freshness and prevents sticking.
Freezer: If you need to freeze them, place the strawberries in a single layer on a baking sheet, freeze until solid, then transfer to an airtight container for up to 2 months.
Reheating: To enjoy after freezing, thaw in the fridge for a few hours. Avoid using a microwave as it can cause the chocolate to lose its crispiness.
Serving Tip: For best flavor and texture, serve fresh; they’re most delightful when enjoyed shortly after preparation!
What to Serve with Mummy Chocolate-Covered Strawberries
Looking to create a delightful Halloween spread that pairs perfectly with your whimsical treats?
-
Crispy Pumpkin Spice Cookies: These festive cookies add a cozy fall flavor, balancing the sweetness of the strawberries with their spiced goodness.
-
Ghoulish Chocolate Cupcakes: Rich chocolate cupcakes topped with eerie frosting create a visually appealing dessert table, complementing the chocolate-covered strawberries nicely.
-
Spooky Fruit Salad: A medley of seasonal fruits, like orange slices and grapes, will brighten up your spread with fresh flavors and contrasting textures.
-
Apple Cider Punch: This refreshing drink, with notes of cinnamon and cloves, brings warmth and festivity to your Halloween gathering, perfectly pairing with dessert.
-
Pretzel Rods with Halloween Sprinkles: Crunchy pretzel rods dipped in white chocolate and adorned with spooky sprinkles provide a savory contrast to the sweet treats.
-
Ghostly Meringue Cookies: Light and airy meringues shaped like ghosts add a fun and whimsical element that echoes your mummy strawberries while offering a melt-in-your-mouth experience.
-
Chocolate Dipped Mini Marshmallows: These sweet treats are a hit with kids and adults alike, adding variety and keeping the chocolate theme going.
-
Warm Cinnamon Apples: Baked cinnamon apples provide a warm, comforting option that contrasts beautifully with the cold, juicy strawberries.
-
Haunted Cheese and Crackers Platter: Include a selection of cheeses and savory crackers for those seeking something salty—this will entice guests to indulge in both sweet and savory.
-
Pumpkin Spice Latte: As the perfect warm beverage, this iconic fall drink delivers a cozy ambiance, enhancing the overall Halloween experience with every sip.
Make Ahead Options
These Mummy Chocolate-Covered Strawberries are perfect for busy home cooks looking to save time during festive gatherings! You can prep the strawberries by washing and drying them up to 24 hours in advance; just be sure they’re completely dry to prevent the chocolate from seizing. Additionally, you can melt the dark chocolate (with coconut oil if desired) and white chocolate beforehand, storing them separately in airtight containers at room temperature for up to 3 days. When it’s time to serve, simply dip the prepped strawberries in the melted dark chocolate, add the candy eyes, and drizzle with white chocolate to create the mummy bands. This way, you’ll have these whimsical treats ready to impress your guests with minimal effort!

Mummy Chocolate-Covered Strawberries Recipe FAQs
What type of strawberries should I use?
Choose firm, ripe strawberries for the best results. They should be vibrant red with a sturdy green stem. Avoid those with dark spots or a mushy texture, as they can lead to a less enjoyable experience.
How do I store Mummy Chocolate-Covered Strawberries?
Store your Mummy Chocolate-Covered Strawberries in a single layer in an airtight container lined with parchment paper. They can be kept in the fridge for up to 3 days, preserving their delicious flavor and texture.
Can I freeze Mummy Chocolate-Covered Strawberries?
Absolutely! To freeze, lay the strawberries in a single layer on a baking sheet and place them in the freezer until solid. Once fully frozen, transfer them to an airtight container with parchment between layers. They can be kept for up to 1 month. Just remember, freezing may somewhat alter their texture.
What if my chocolate seizes during melting?
If your chocolate seizes, it typically means moisture has interfered. To rescue it, try adding a teaspoon of coconut oil or shortening to help smooth it out. If it doesn’t return to a pourable consistency, you may need to start over with fresh chocolate, ensuring all your tools are dry.
Are these strawberries safe for dogs or other pets?
While strawberries are generally safe for dogs in moderation, the chocolate coating is not safe for them or many other pets. Always consult your veterinarian before sharing any human food with your furry friends to ensure their safety.

Spooky Chocolate Covered Berries for a Ghoulish Treat
Ingredients
Equipment
Method
- Wash the fresh strawberries under cool water and dry them thoroughly with paper towels.
- Melt dark chocolate chips with coconut oil in the microwave in short intervals until smooth.
- Dip each strawberry into the melted dark chocolate, covering about three-quarters, and place on a parchment-lined baking sheet.
- Before the chocolate sets, press two candy eyes onto each dipped strawberry.
- Melt white chocolate chips in the microwave until smooth, then drizzle over the dipped strawberries for mummy bandages.
- Let the decorated strawberries sit at room temperature until chocolate hardens, or refrigerate for quicker results.
- Serve immediately or store in an airtight container.
Leave a Reply