
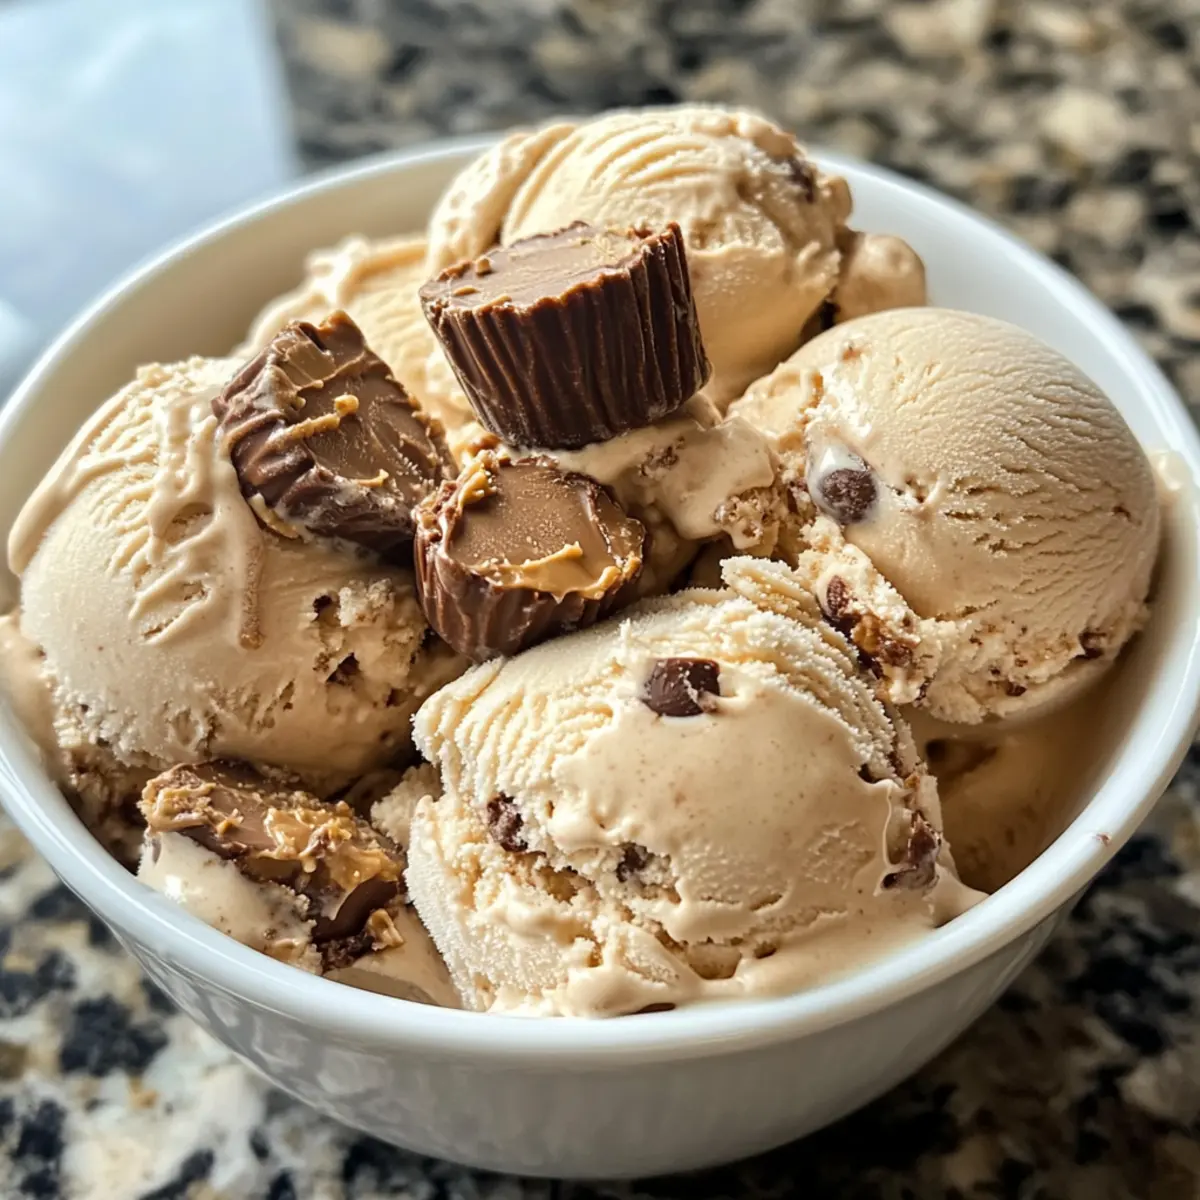
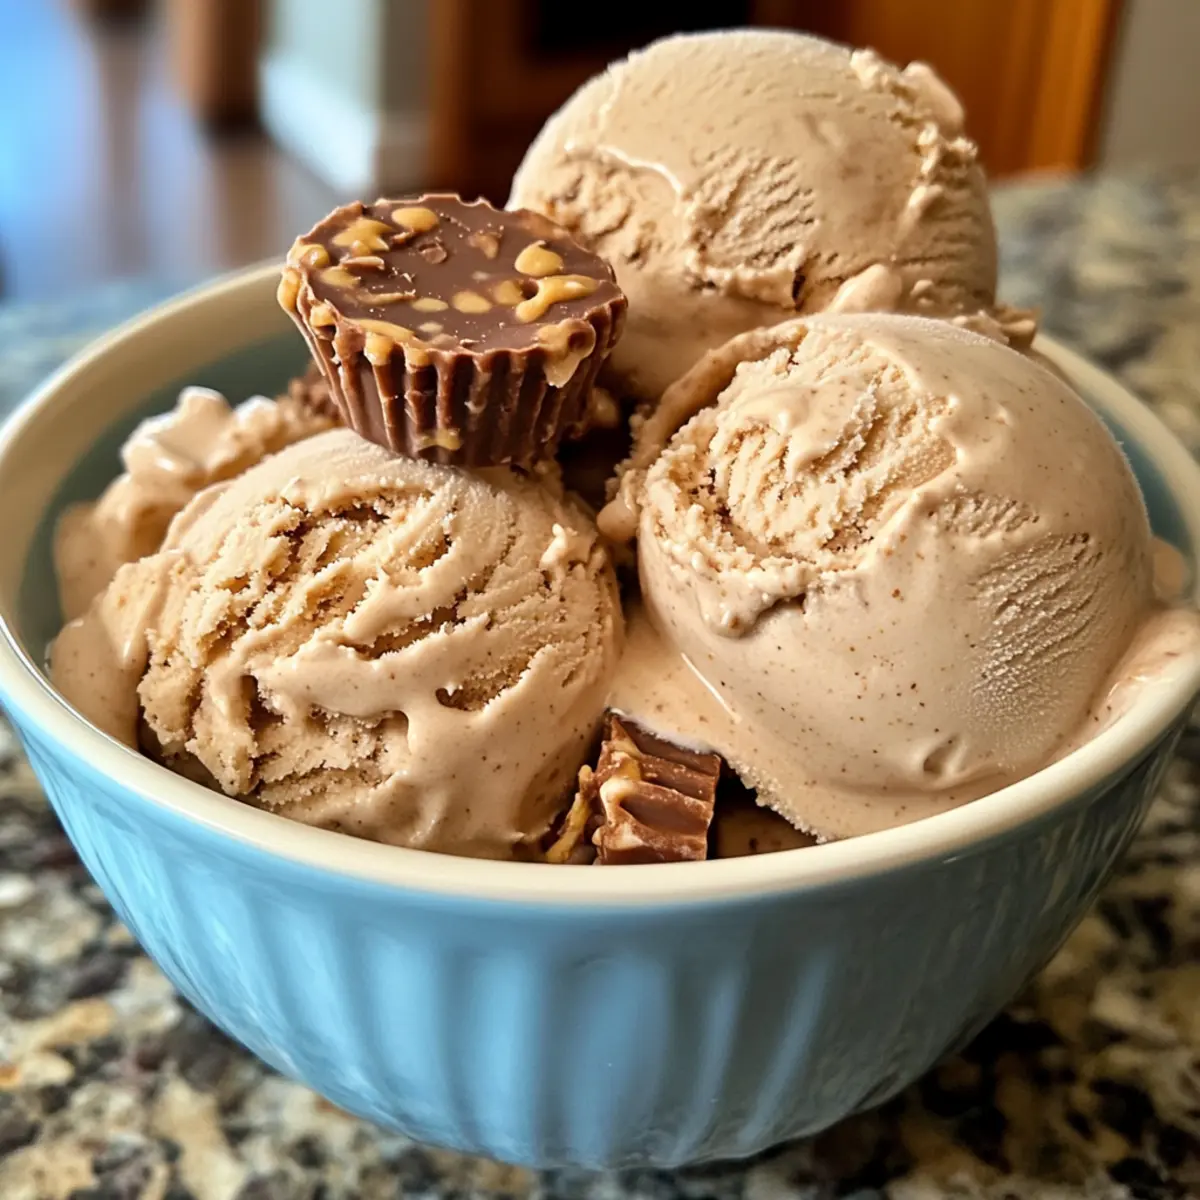
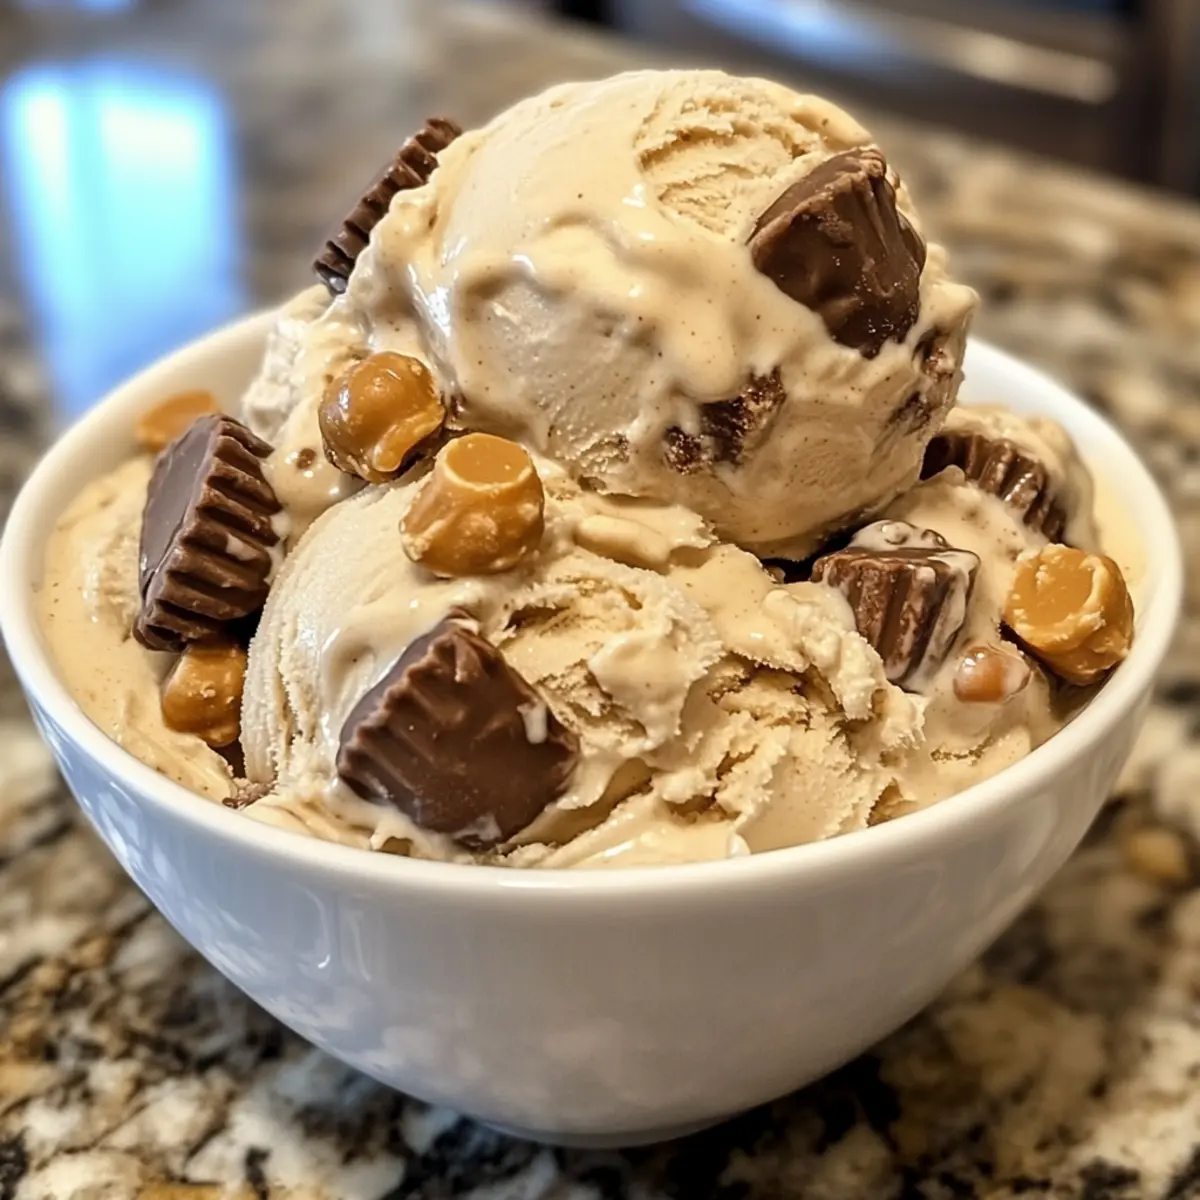
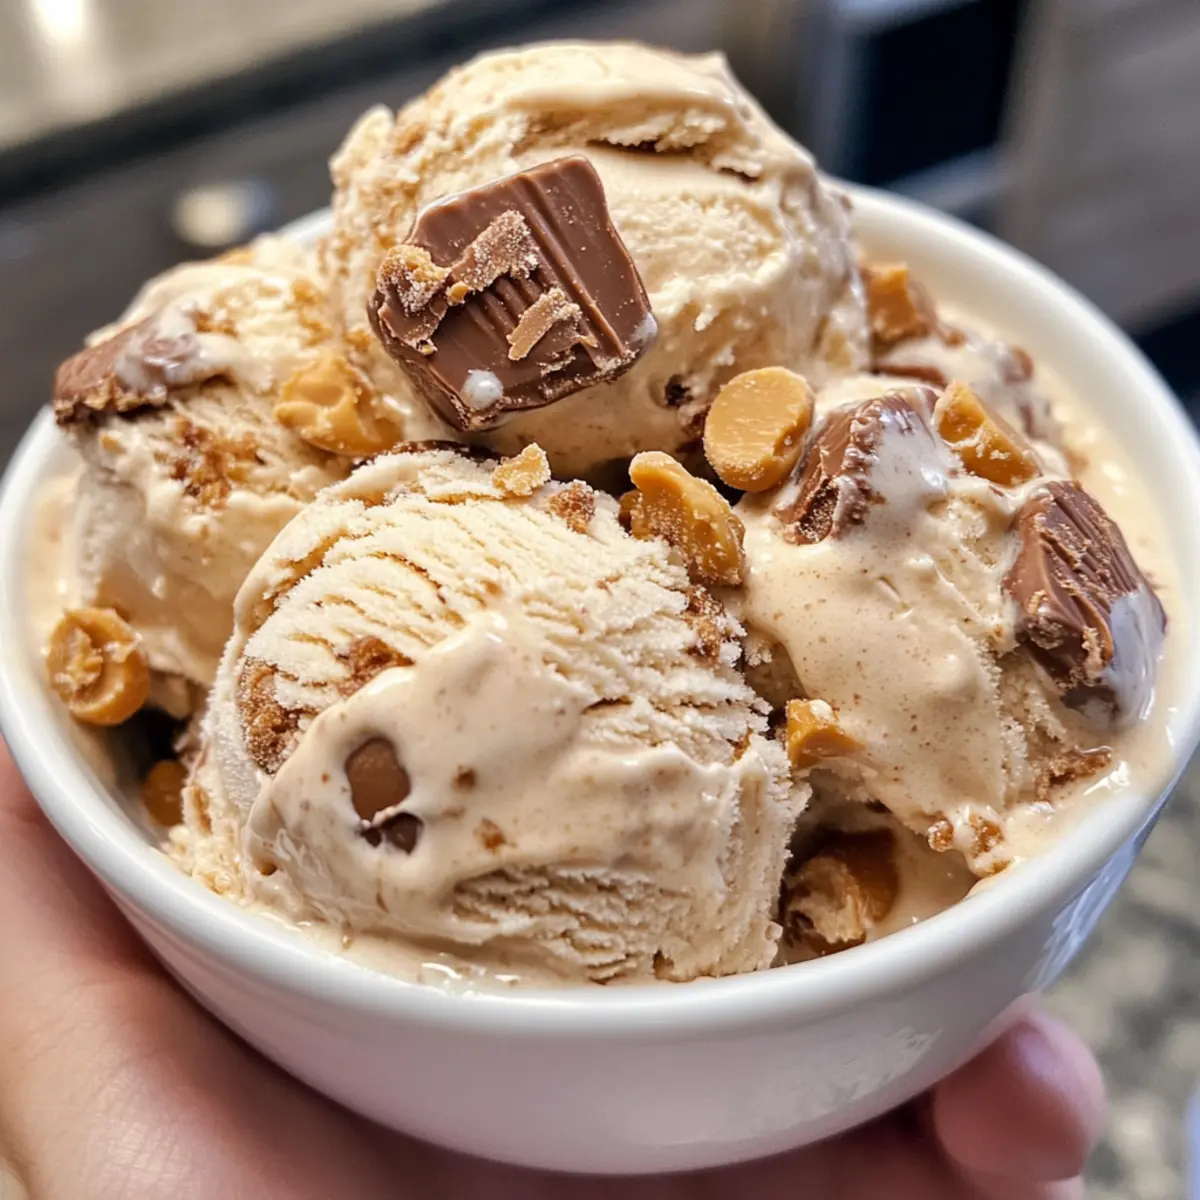
A delightful symphony of textures and flavors awaits with every scoop of this creamy Ninja Creami Peanut Butter Cup Ice Cream! Imagine the sheer joy of combining luscious peanut butter and rich cream cheese, creating an indulgent dessert that satisfies your sweet tooth and takes just 10 minutes of prep. This recipe not only promises a smooth, velvety treat but is also a quick solution for those evenings when you crave something special without the fuss of complex steps. Plus, with mini peanut butter cup surprises sprinkled throughout, it’s the perfect way to impress family and friends alike. Are you ready to embark on this culinary adventure? Let’s dive into the gooey goodness!
Why is this ice cream so irresistible?
Indulgent Flavor: Each scoop delivers a rich, creamy experience that’s hard to resist, perfectly balancing the delectable taste of peanut butter with velvety cream cheese.
Quick & Easy: In just 10 minutes of prep, you can whip up this delightful dessert, making it an ideal choice for those busy evenings.
Fun Textures: The mini peanut butter cup chunks are like little treasures in every bite, adding delightful crunch and flavor bursts throughout.
Homemade Goodness: You’ll love knowing exactly what goes into your ice cream, ensuring it’s both delicious and made with care—unlike store-bought options.
Crowd-Pleaser: Serve it at gatherings or family dinners, and watch it disappear! This ice cream is sure to impress everyone, from kids to adults. For those who love similar treats, check out Potter Butterbeer Cupcakes or Reeses Cupcakes Homemade for even more sweet inspiration!
Ninja Creami Peanut Butter Cup Ingredients
• Get ready to create an indulgent treat!
For the Ice Cream Base
- Whole Milk – Adds creaminess and base flavor; use full-fat for the best results.
- Heavy Cream – Contributes richness and smooth texture; full-fat is ideal, avoid lower fat options.
- Creamy Peanut Butter – Provides flavor and a smooth base; opt for a standard brand like Jif for consistency.
- Granulated Sugar – Sweetens the ice cream and enhances creaminess; no substitutions recommended.
- Cream Cheese – Ensures a smooth texture and slight tang; use full-fat for maximum creaminess.
- Vanilla Extract – Adds aromatic flavor to amplify the overall taste.
- Fine Sea Salt – Balances sweetness and enhances flavors; use it sparingly.
For the Mix-Ins
- Mini Peanut Butter Cups – Adds delightful texture and extra peanut butter flavor; roughly chop before mixing in.
Now, gather your ingredients and get ready to elevate your dessert game with this deliciously creamy Ninja Creami Peanut Butter Cup ice cream!
Step‑by‑Step Instructions for Ninja Creami Peanut Butter Cup
Step 1: Prepare the Base
In a microwave-safe bowl, combine creamy peanut butter and softened cream cheese. Microwave the mixture for about 20-30 seconds until it becomes slightly warm and easy to mix. Whisk together until completely smooth and well blended. This creates a rich foundation for your Ninja Creami Peanut Butter Cup ice cream.
Step 2: Mix Ingredients
Stir in the granulated sugar and a pinch of fine sea salt, mixing until fully incorporated. Gradually add the heavy cream while whisking continuously to achieve a homogeneous mixture. Finally, pour in the whole milk and vanilla extract, whisking again until the mixture is smooth and creamy, ensuring every delicious flavor is evenly distributed.
Step 3: Freeze Base
Pour the ice cream base into the Ninja Creami pint, making sure to fill it to the maximum line. Seal the lid tightly and place the pint in the freezer. Allow it to freeze for at least 24 hours until it is completely solid, providing the perfect texture for your indulgent Ninja Creami Peanut Butter Cup ice cream.
Step 4: Process Ice Cream
Once frozen, remove the pint lid and insert the container into the Ninja Creami. Select the ‘ICE CREAM’ program and let the machine process the mixture until it’s creamy and smooth, typically a couple of minutes. If the ice cream appears crumbly, add 1 tablespoon of milk and re-spin for a perfect creamy texture.
Step 5: Incorporate Mix-ins
Create a hole in the center of the processed ice cream and add the chopped mini peanut butter cups. Run the ‘MIX-IN’ cycle to evenly distribute the delightful chunks throughout your enticing Ninja Creami Peanut Butter Cup ice cream, enhancing both flavor and texture.
Step 6: Serve or Re-Freeze
Serve the ice cream immediately for a soft-serve experience or transfer it back to the freezer for 1-2 hours for a firmer, scoopable consistency. Each scoop reveals the creamy ice cream with delightful pockets of peanut butter cups, ready to be enjoyed!
Ninja Creami Peanut Butter Cup Variations
Feel free to get creative and make this delightful recipe your own with these easy and fun twists!
-
Nut-Free: Substitute creamy peanut butter for sunflower seed butter, preserving the indulgent creaminess without the nuts. This makes it perfect for school treats or gatherings where allergies might be a concern.
-
Chocolate Delight: Swirl in chocolate fudge or caramel when mixing the ingredients for a rich flavor boost. This decadent addition will make your ice cream irresistibly indulgent, perfect for chocolate lovers!
-
Healthier Option: Replace granulated sugar with a natural sweetener like maple syrup or agave nectar. This keeps the deliciousness while cutting down on refined sugar, making your creamy dessert feel a bit lighter.
-
Vegan Friendly: Use coconut milk and a plant-based cream substitute instead of dairy ingredients and dairy-free cream cheese. Your ice cream will still be creamy, indulgent, and completely vegan while satisfying those sweet cravings.
-
Flavor Adventure: Experiment with different nut butters like almond or cashew for a unique twist. Feel free to combine them for an exotic flavor explosion that’s sure to surprise your taste buds.
-
Fruity Surprise: Enhance your ice cream by folding in fresh raspberries or strawberries during the mix-in stage. The fruity burst will contrast beautifully with the rich peanut butter flavor, adding a refreshing touch.
-
Heat It Up: For those who enjoy a little spice, sprinkle in a dash of cayenne pepper or a swirl of hot fudge. This unexpected kick will tantalize your taste buds and make the experience unforgettable.
-
Cookie Crunch: Swap mini peanut butter cups for crushed cookies like Oreos or Nutter Butters. You’ll create a fun and crunchy texture that adds a whole new layer of flavor, perfect for cookie lovers.
Feel free to check out other delightful treats like Potter Butterbeer Cupcakes or some delightful Reeses Cupcakes Homemade for more inspiration!
Make Ahead Options
This creamy Ninja Creami Peanut Butter Cup Ice Cream is perfect for meal prep enthusiasts! You can prepare the ice cream base up to 24 hours in advance; simply mix all ingredients and freeze in the Ninja Creami pint. To maintain quality, ensure your freezer is set to below 0°F (-18°C), allowing the ice cream to set completely. When you’re ready to serve, just process it in the Ninja Creami using the ‘ICE CREAM’ program. If it’s too crumbly, add a tablespoon of milk and re-spin for that velvety texture you love. By prepping ahead, you’ll have a delicious treat ready in minutes, making it a perfect indulgence for busy weeknights!
What to Serve with Ninja Creami Peanut Butter Cup Ice Cream
Elevate your dessert experience by pairing this creamy delight with complementary flavors and textures that will delight your taste buds.
- Warm Chocolate Brownies: The fudgy goodness of warm brownies contrasts beautifully with the cold, creamy ice cream, creating a heavenly combination.
- Salted Caramel Sauce: Drizzling a bit of salted caramel enhances the sweet and salty balance, complementing the peanut butter flavor perfectly.
- Fresh Berries: Juicy strawberries or raspberries add a refreshing tartness that cuts through the richness, balancing each decadent bite.
- Crunchy Graham Crackers: The crispy texture of graham crackers offers a delightful crunch and sweetness that pairs charmingly with the creamy smoothness of ice cream.
- Chilled Milkshake: Blend up a quick peanut butter milkshake for a double dose of indulgence. The creamy texture mirrors the ice cream while boosting that beloved peanut flavor.
- Espresso or Coffee: A cup of bold espresso or rich coffee acts as a robust contrast, enhancing the flavors and providing a delightful end to your meal.
- Chocolate Chip Cookies: Warm, gooey chocolate chip cookies serve as classic accompaniments, providing delightful bites to dip or scoop with your ice cream.
- Apple Pie: The warm spice of apple pie creates a comforting contrast, offering a delightful flavor journey with each scoop of ice cream.
- Chocolate Sauce Drizzle: For those who can’t get enough chocolate, drizzling chocolate sauce adds an extra layer of sweetness that melds perfectly with the ice cream.
Expert Tips for Ninja Creami Peanut Butter Cup Ice Cream
- Full-Fat Dairy: Use full-fat whole milk and heavy cream for the best creamy texture. Low-fat versions can lead to a grainy ice cream that loses the indulgent quality.
- Proper Freezing: Ensure your fridge is set to below 0°F (-18°C) to freeze the base thoroughly. A well-frozen mixture is key for achieving that satisfying Ninja Creami Peanut Butter Cup ice cream consistency.
- Re-Spin Trick: If your ice cream comes out too crumbly, don’t worry! Simply add a tablespoon of milk and run the ‘RE-SPIN’ cycle in the Ninja Creami to restore that luscious creaminess.
- Check Ingredient Quality: Choosing a popular brand of creamy peanut butter ensures a stable mixture and prevents separation, making it perfect for this recipe.
- Texture Forward: For a delightful mix-in experience, chop the mini peanut butter cups into even sizes. This allows the pieces to distribute evenly throughout the ice cream, enhancing each bite.
How to Store and Freeze Ninja Creami Peanut Butter Cup Ice Cream
- Fridge: Store any leftover prepared ice cream in the Ninja Creami pint with the lid securely attached for up to 3 days; however, note that the texture may become less creamy over time.
- Freezer: For optimal freshness, freeze the ice cream in the covered Ninja Creami pint for up to 2 weeks. Return to the Ninja Creami before serving to restore creaminess.
- Re-freezing: If you’ve already served some ice cream, re-process in the Ninja Creami after an hour in the freezer for a smoother texture.
- Serving Tips: For a soft-serve consistency, let the ice cream sit at room temperature for a few minutes before scooping; this makes it easier to serve!
Ninja Creami Peanut Butter Cup Ice Cream Recipe FAQs
How do I choose the right peanut butter for this recipe?
Absolutely! For the best results, opt for a standard creamy peanut butter like Jif or Skippy. These brands maintain a consistent texture and flavor, preventing separation during the ice cream-making process. Natural peanut butters, while tasty, can be too oily or gritty for this indulgent treat.
How should I store leftover ice cream?
Very! Store any leftover Ninja Creami Peanut Butter Cup ice cream directly in the covered Ninja Creami pint for up to 3 days in the fridge. However, to maintain the creamy texture, I recommend freezing it instead, which keeps it delicious for up to 2 weeks. Before serving, simply return it to the Ninja Creami and re-spin for that ultra-smooth consistency.
Can I freeze this ice cream for longer?
Of course! You can store the Ninja Creami Peanut Butter Cup ice cream in the freezer for up to 2 weeks, but for best texture, use it within the first week. If it becomes too hard upon re-freezing, let it sit at room temperature for a few minutes or run it through the Ninja Creami again to restore its creamy goodness.
What should I do if my ice cream turns out too crumbly?
Not a problem! If you find that your ice cream is crumbly, simply place it back into the Ninja Creami, add 1 tablespoon of milk, and select the ‘RE-SPIN’ cycle. This process should revive the creamy texture you’re aiming for and give you that luscious mouthfeel you desire.
Are there any allergens in this recipe I should be aware of?
Absolutely! This recipe contains common allergens such as dairy from whole milk, heavy cream, and cream cheese, as well as peanuts from the peanut butter and mini peanut butter cups. If you’re serving this treat to others, just check for any peanut allergies or lactose intolerances, and enjoy safely!
Ninja Creami Peanut Butter Cup Ice Cream You’ll Crave!
Ingredients
Equipment
Method
- In a microwave-safe bowl, combine creamy peanut butter and softened cream cheese. Microwave for about 20-30 seconds until slightly warm and easy to mix. Whisk until completely smooth.
- Stir in the granulated sugar and salt, mixing until fully incorporated. Gradually add the heavy cream while whisking continuously, then add the whole milk and vanilla extract, whisking until smooth.
- Pour the ice cream base into the Ninja Creami pint, seal tightly and place in the freezer for at least 24 hours until completely solid.
- Remove the pint lid and insert it into the Ninja Creami. Select the 'ICE CREAM' program and process until creamy and smooth.
- Create a hole in the processed ice cream and add the chopped mini peanut butter cups. Run the 'MIX-IN' cycle to distribute the chunks.
- Serve immediately for soft-serve or transfer back to the freezer for 1-2 hours for firmer consistency.
Leave a Reply