
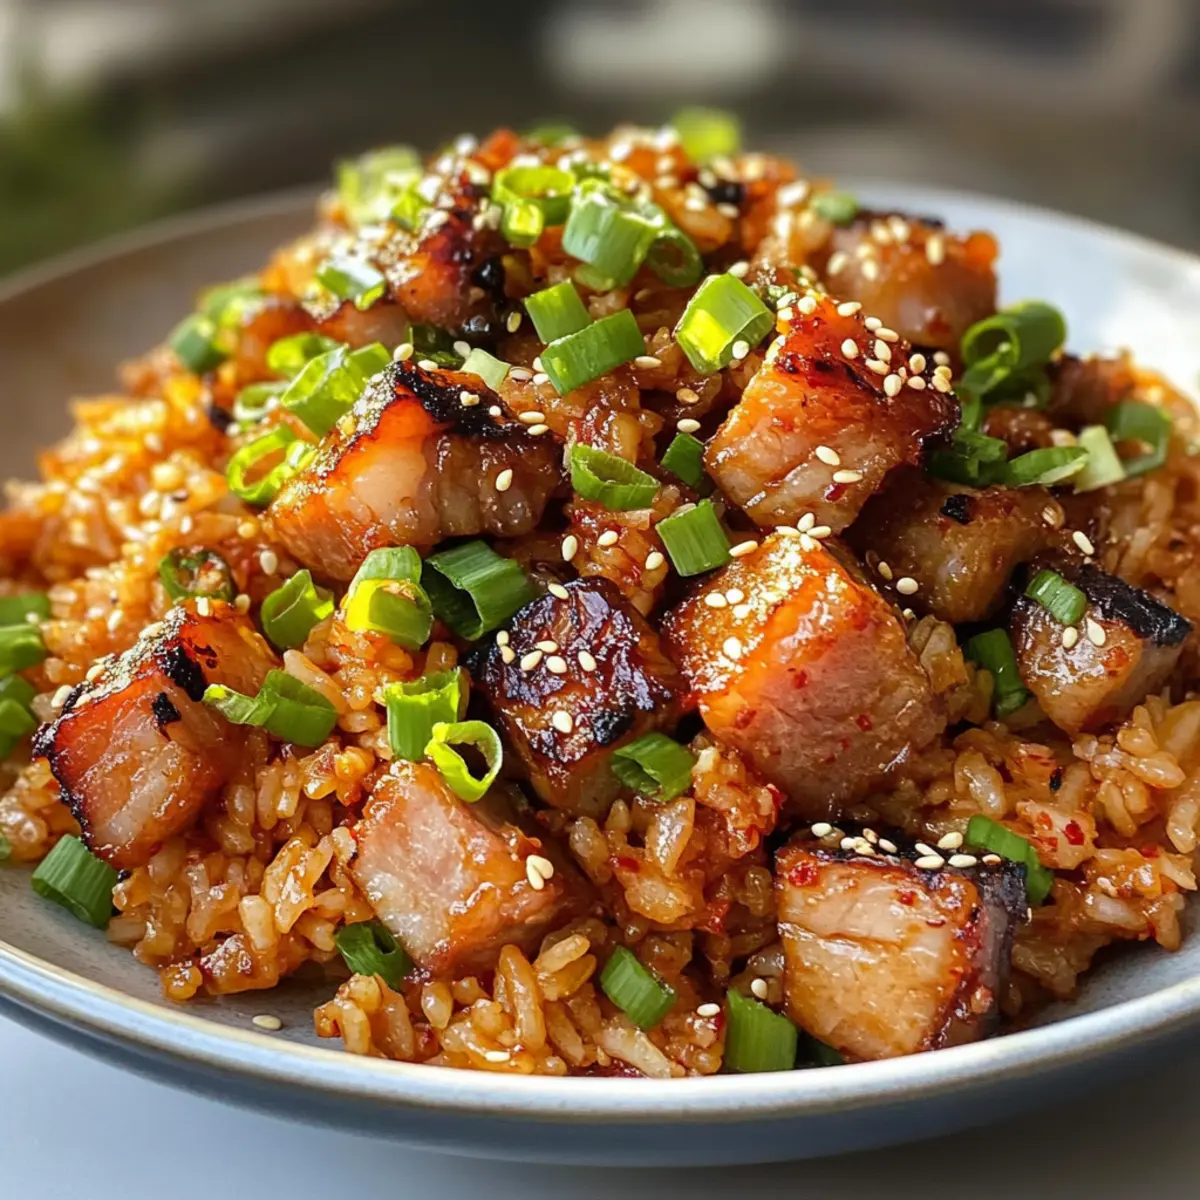
As I stood in my kitchen, the savory aroma of sizzling pork belly filled the air, instantly transporting me to the bustling streets of Seoul. This Easy Kimchi Fried Rice, or Kimchi Bokkeumbap, is my go-to recipe when I crave a hearty, flavorful meal. It’s a comforting blend of spicy, tangy kimchi and rich marinated pork that comes together in under an hour—ideal for those hectic weeknights when you want to avoid takeout. Not only does this dish satisfy your hunger, but it’s also versatile enough to cater to everyone at your table, whether you want to whip up a meaty indulgence or a vegetarian delight. Are you ready to dig into this delicious Korean classic and perhaps even recreate it your way? Let’s dive in!
Why is Kimchi Fried Rice So Irresistible?
Flavor Explosion: Each bite of this Easy Kimchi Fried Rice is a delicious adventure, featuring a perfect blend of spicy, tangy, and savory notes that excite your palate.
Versatile Meal: Whether you’re in the mood for hearty pork or a lighter vegetarian version with tofu, this dish easily adapts to your cravings.
Time-Saving Magic: With just 30 minutes of prep, you can serve up a delightful meal that brings warm comfort to the dinner table—no more fast food fatigue!
Crowd-Pleasing Comfort: Ideal for family dinners or gathering friends, this dish is bound to impress and lead to requests for seconds, just like Autumn Wild Rice.
Healthy and Wholesome: Packed with ingredients that are not only delicious but also nutritious, your body will thank you for ditching takeout!
Texture Harmony: With fluffy rice, tender pork, and crispy edges, the textural contrast elevates your dining experience, making each forkful truly satisfying!
Kimchi Fried Rice Ingredients
-
For the Pork Belly
• Marinated Pork Belly – Essential for a rich, savory flavor; substitute with boneless pork shoulder or diced chicken thighs if preferred. -
For the Rice
• Steamed Short-Grain Rice – The base of the meal, offering starchy goodness; day-old rice works best for texture.
• Chopped Kimchi (plus juices) – The core ingredient that provides flavor and texture; aged kimchi is recommended for the best outcome. -
For the Flavor
• Gochujang (Korean Chili Paste) – Adds heat and depth; for less spice, simply use less paste.
• Low Sodium Soy Sauce – Enhances flavor without excess salt; regular soy sauce can be used but will increase sodium content.
• Sesame Oil – Provides a nutty aroma and richness; can substitute with olive oil, though flavor will differ. -
For the Aromatics
• Ginger (minced) – Brings warmth and zest; fresh ginger is best, while powdered ginger isn’t ideal.
• Garlic Clove – Contributes to a savory foundation; substitutions include garlic powder, but fresh is preferred. -
For the Cooking
• Vegetable Oil – For frying; any cooking oil can be used.
• Eggs (lightly beaten) – Essential for texture, they add richness; for a vegan alternative, omit or use tofu. -
For Garnishing
• Green Onions (thinly sliced) – Adds freshness and crunch; shallots or chives can be substituted if needed.
• Toasted Sesame Seeds – Enhance texture and garnish; these can be skipped if necessary.
• Furikake (optional) – A Japanese seasoning for added umami; feel free to omit or use other favorite toppings.
Now that you have all the ingredients for this Easy Kimchi Fried Rice, let’s continue to create a dish that not only fills the belly but also warms the heart!
Step‑by‑Step Instructions for Easy Kimchi Fried Rice
Step 1: Marinate Pork
In a mixing bowl, combine marinade ingredients such as gochujang, soy sauce, and sesame oil, then add diced pork belly and coat it evenly. Allow the marinated pork to sit for 30 minutes at room temperature so the flavors develop, ensuring a richer taste in your Easy Kimchi Fried Rice.
Step 2: Cook Pork
Heat 1 tablespoon of vegetable oil in a large wok or skillet over medium-high heat. Once shimmering, add the marinated pork belly and sauté for 4-5 minutes until it’s browned and cooked through. Once done, remove the pork from the skillet and let it rest, keeping the delicious juices for later steps.
Step 3: Prepare Eggs
In the same skillet, add the remaining 1 tablespoon of vegetable oil to the hot surface. Pour in the lightly beaten eggs and stir gently to create large scrambled pieces; this should take about 2 minutes. Once the eggs are softly set, remove them from the skillet and set aside, contributing to the creamy texture in your Easy Kimchi Fried Rice.
Step 4: Sauté Kimchi
Add 1 tablespoon of sesame oil to the skillet and warm it over medium heat. Mix in the chopped kimchi along with 2 tablespoons of low-sodium soy sauce, then sauté for 3-4 minutes until the kimchi caramelizes slightly, filling your kitchen with enticing aromas. This step is crucial for infusing flavor into your fried rice.
Step 5: Combine with Rice
Introduce 3 cups of steamed short-grain rice to the skillet, breaking it up gently with a spatula. Toss the rice with the sautéed kimchi to ensure every grain is coated. Add the cooked pork belly and scrambled eggs back into the skillet, then let everything cook together for an additional 4-5 minutes without stirring, allowing some rice edges to get crispy.
Step 6: Finishing Touches
Stir in 1/4 cup of thinly sliced green onions and 1 tablespoon of toasted sesame seeds directly into the mixture, removing the skillet from heat. The combination of flavors and textures will elevate your Easy Kimchi Fried Rice, making it even more appealing.
Step 7: Optional Fried Egg
If desired, in a separate skillet, fry a sunny-side-up egg over medium heat until the whites are set and the yolk remains runny, taking about 3-4 minutes. Place this on top of your finished kimchi fried rice as a delightful garnish, adding an extra layer of richness to your dish.
Kimchi Fried Rice Variations & Substitutions
Customize your dish to suit your taste buds and dietary needs with these delightful twists for Kimchi Fried Rice!
-
Meat-Free Delight: Swap the marinated pork belly for diced tofu or your favorite vegetables like bell peppers and broccoli for a fresh, meatless option that’s equally satisfying.
-
Spice Levels: Adjust the heat by adding chopped fresh chili peppers or gochugaru (Korean red pepper flakes) for an extra kick, letting you find the perfect balance for your palate.
-
Veggie Boost: Enhance nutrition by incorporating extra veggies such as peas, carrots, or spinach into the mix. They add vibrant colors and a delightful crunch to your fried rice experience.
-
Rice Variety: Feel free to replace short-grain rice with jasmine or brown rice for different textures and flavors, giving your kimchi fried rice a new twist that’s still delicious.
-
Flavor Enhancements: Stir in a spoonful of miso paste or add a sprinkle of furikake as a topping to elevate your dish with rich umami notes, creating layers of flavor that’s hard to resist.
-
Fried Egg Topper: For a traditional touch, try a runny egg on top—perfectly cooked sunny-side-up or poached. It complements the dish beautifully and adds a creamy richness to each bite.
-
Shrimp or Beef Additions: Add diced shrimp or cooked ground beef for a heartier option, making your fried rice more protein-packed and bursting with flavor, similar to the joy of Salmon Rice Savory.
-
Sweet & Spicy Twist: Mix in a drizzle of honey or syrup along with the kimchi for a sweet heat variation that balances the savory and tangy flavors well.
Embrace the art of cooking with these variations, and don’t hesitate to let your creativity shine through in your kitchen! Happy cooking!
What to Serve with Easy Kimchi Fried Rice
As the flavors of your Easy Kimchi Fried Rice dance in your kitchen, imagine complementing it with a variety of delightful side dishes and refreshing drinks that elevate your meal.
-
Pickled Radishes: This tangy, crunchy addition balances the spiciness of the fried rice, cleansing your palate with every bite.
-
Korean Cucumber Salad: A refreshing mix of cucumbers and seasoning, this cool salad contrasts beautifully with the warm, savory rice. It’s light, vibrant, and packed with flavor.
-
Spicy Tofu Stew: Rich and hearty, this stew adds depth to your meal. The silky tofu provides a soothing texture, making a great companion to the fried rice’s kick.
-
Miso Soup: This warm and savory broth is a classic side in Korean cuisine, offering comforting umami flavors that harmonize well with the spiciness of the kimchi.
-
Grilled Vegetables: Smoky and charred veggies like zucchini and bell peppers add earthy notes and a delightful crunch that complements the dish perfectly.
-
Korean BBQ Meat: Marinated and grilled meats, such as bulgogi or galbi, shine alongside your kimchi fried rice, providing a protein-packed heartiness that satisfies any appetite.
-
Soju or Makgeolli: These traditional Korean drinks bring a light sweetness that cuts through the richness of your meal. They are great choices to make your dining experience special.
-
Green Tea Ice Cream: For dessert, this creamy treat offers a subtly sweet finish, perfectly balancing the spice of the kimchi fried rice with its cool, creamy goodness.
Enhance your culinary adventure by exploring these delightful pairings and make your dinner a memorable feast!
Storage Tips for Kimchi Fried Rice
-
Room Temperature: Best enjoyed fresh, but if left out, consume within 2 hours for safety.
-
Fridge: Store leftovers in an airtight container in the refrigerator for up to 3 days. Make sure to cool completely before sealing.
-
Freezer: Freeze in an airtight container for up to 3 months. To prevent freezer burn, wrap tightly in plastic wrap before placing in the container.
-
Reheating: To restore texture, reheat in a skillet over medium heat for about 5-7 minutes, adding a splash of water to steam and avoid dryness.
Tips for the Best Kimchi Fried Rice
-
Use Aged Kimchi: The best kimchi fried rice comes from well-fermented kimchi, which offers richer flavors and textures compared to fresher varieties.
-
Perfect Rice: Day-old rice is crucial for achieving a fluffier texture. Fresh rice may clump together, making it hard to get that signature fried rice consistency.
-
Avoid Overcooking: Be cautious with the pork belly; overcooking can lead to tough meat. Aim for a nice brown color while keeping it juicy and tender.
-
Customize the Heat: If you’re sensitive to spice, adjust the amount of gochujang to suit your taste. You can always start with less and add to it later.
-
Tasty Garnishes: Don’t skip the green onions and sesame seeds; they add important freshness and texture to your delicious kimchi fried rice.
-
Mix and Match: Feel free to experiment with extra veggies or proteins. This recipe is easily adaptable, so cater to your dietary preferences while keeping it a delightful kimchi fried rice!
Make Ahead Options
These Easy Kimchi Fried Rice bowls are perfect for busy home cooks looking to save time during the week! You can marinate the pork belly up to 24 hours in advance, enhancing its flavor. Additionally, you can cook the rice a day before and store it in the refrigerator to maintain its fluffy texture. To maintain the quality, keep the cooked kimchi and pork separate until you’re ready to serve; this prevents sogginess. When it’s time to enjoy your meal, simply sauté the kimchi, add the pre-cooked rice and pork, and stir in scrambled eggs. You’ll have your delicious kimchi fried rice ready with minimal effort!
Kimchi Fried Rice Recipe FAQs
How do I choose the right kimchi for this recipe?
Absolutely! For the best flavor and texture, I recommend using aged kimchi that’s been fermented for several weeks. Look for kimchi that is slightly sour with a deep color; avoid fresh varieties that can be too crunchy and lack the depth of flavor.
What is the best way to store leftovers?
Very! Store your leftover Kimchi Fried Rice in an airtight container in the refrigerator for up to 3 days. Make sure it’s cooled completely before sealing to keep it fresh and flavorful. When you’re ready to enjoy it again, simply reheat in a skillet!
Can I freeze Kimchi Fried Rice?
Absolutely! Freezing is a great option if you want to save some for later. Place your cooled fried rice in an airtight container or zip-top freezer bag, and it will keep well in the freezer for up to 3 months. For best results, wrap tightly in plastic wrap before placing it in the container to prevent freezer burn.
What should I do if my fried rice is too mushy?
Oh no! If your Kimchi Fried Rice turns out mushy, don’t fret. First, try adding a little additional toasted sesame oil in the reheating process; it can help. Make sure to heat it in a skillet, allowing it to sit without stirring for a few minutes to help it dry out a bit and regain some of that lovely texture.
Are there any allergy considerations I should keep in mind?
Yes! If you or someone you’re serving has soy allergies, you can substitute low sodium soy sauce with tamari or coconut aminos for a gluten-free option. Always check ingredient labels if you’re using store-bought kimchi as some varieties may include fish sauce.
How can I make this dish vegetarian or vegan?
Very! To create a vegetarian version of Kimchi Fried Rice, simply omit the pork belly and substitute it with diced tofu or your favorite vegetables such as bell peppers and carrots. For a vegan version, you can replace the eggs with scrambled tofu, and ensure you’re using vegetable broth or a soy sauce variant without animal products.
Delicious Kimchi Fried Rice: Quick Comfort Food Delight
Ingredients
Equipment
Method
- In a mixing bowl, combine marinade ingredients such as gochujang, soy sauce, and sesame oil, then add diced pork belly and coat it evenly. Allow the marinated pork to sit for 30 minutes.
- Heat 1 tablespoon of vegetable oil in a large wok or skillet over medium-high heat. Once shimmering, add the marinated pork belly and sauté for 4-5 minutes until browned and cooked through. Remove the pork and let it rest.
- In the same skillet, add the remaining 1 tablespoon of vegetable oil. Pour in the lightly beaten eggs and stir gently for about 2 minutes. Once softly set, remove from the skillet.
- Add 1 tablespoon of sesame oil to the skillet and warm it over medium heat. Mix in the chopped kimchi and 2 tablespoons of low-sodium soy sauce, then sauté for 3-4 minutes until the kimchi caramelizes slightly.
- Introduce 3 cups of steamed short-grain rice to the skillet, breaking it up gently with a spatula. Toss with the sautéed kimchi, then add the cooked pork belly and scrambled eggs back into the skillet. Cook for an additional 4-5 minutes without stirring.
- Stir in 1/4 cup of thinly sliced green onions and 1 tablespoon of toasted sesame seeds. Remove from heat.
- Optional: In a separate skillet, fry a sunny-side-up egg until the whites are set and the yolk remains runny, about 3-4 minutes. Place on top of the finished kimchi fried rice.
Leave a Reply