
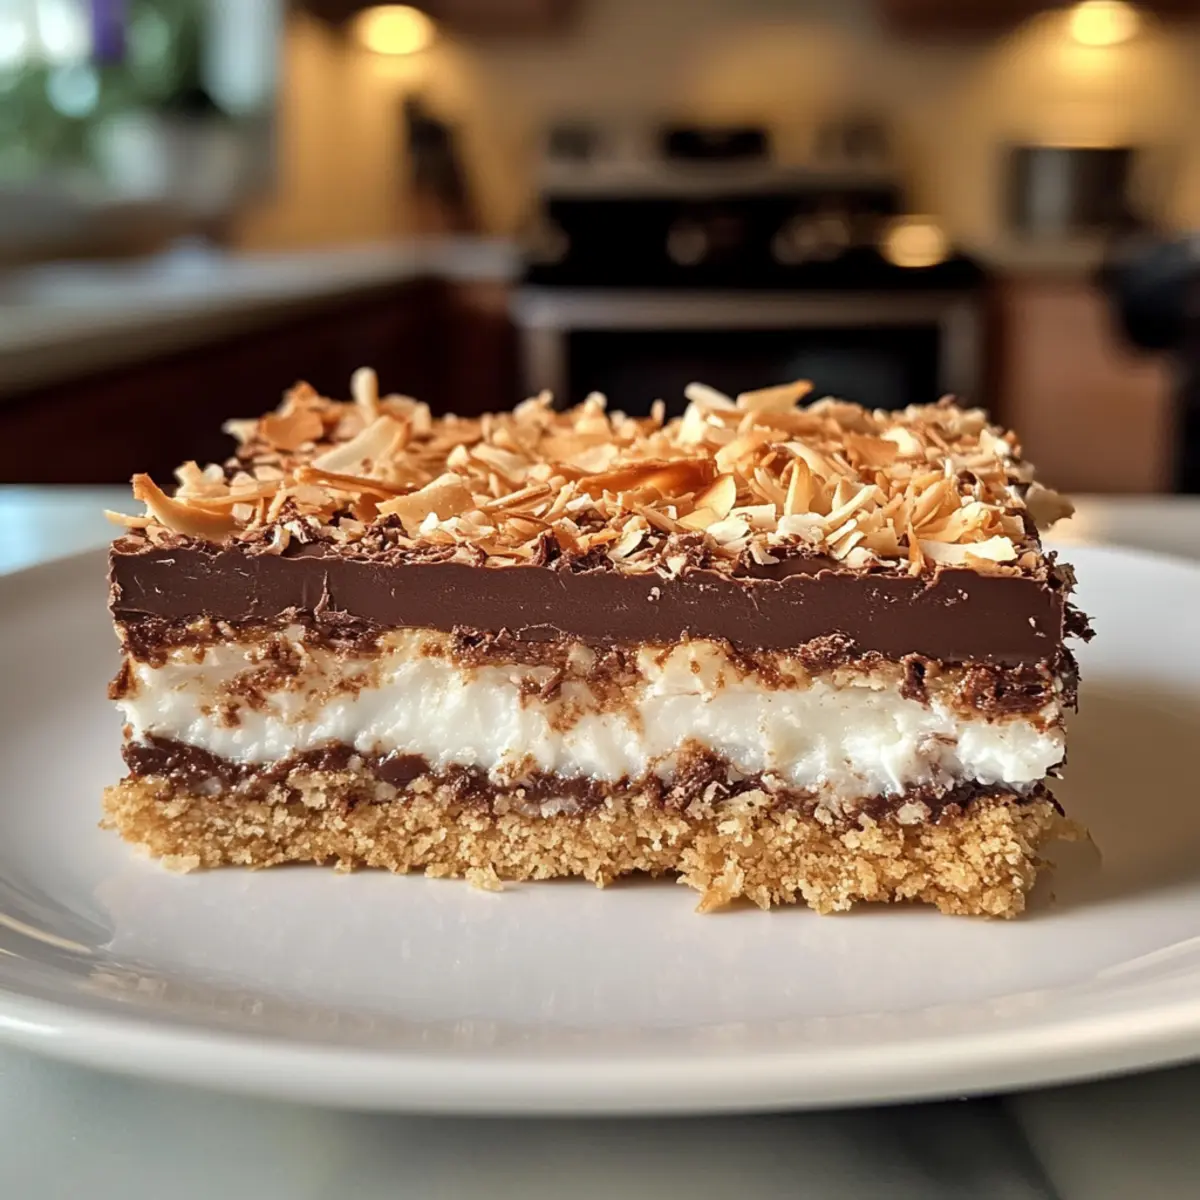
A whispered conversation drifted from the kitchen, “These are the best!” My heart soared—they were talking about my Chocolate Coconut Bars! This delightful dessert seamlessly blends a buttery graham cracker crust with a gooey layer of rich chocolate and sweetened condensed milk, all topped with toasted coconut. The best part? These Coconut Chocolate Bars are quick to whip up, taking just 10 minutes of your time, making them the perfect choice for spontaneous gatherings or that evening craving for something sweet. With every bite, you’ll experience the perfect balance of crunch and chew—a texture so satisfying, you’ll find it hard to eat just one! Are you ready to elevate your dessert game and impress friends and family? Let’s dive into this deliciously simple recipe!
Why are Coconut Chocolate Bars a Game Changer?
Simplicity, these Coconut Chocolate Bars come together in just 10 minutes, making them your go-to recipe for last-minute invitations or sweet cravings. Irresistible flavor combines the creamy richness of chocolate with the tropical delight of coconut for a harmonious treat. Versatile options allow you to mix in your favorite nuts or change up the chocolate types, providing endless flavor possibilities. Crowd-pleaser status assured—this recipe is a guaranteed hit at gatherings! Pair them with a scoop of vanilla ice cream for an extra indulgent experience. Don’t miss out on this quick dessert sensation!
Coconut Chocolate Bars Ingredients
• Here’s everything you need to create your delicious Coconut Chocolate Bars!
For the Crust
- Fine Graham Cracker Crumbs – Provides a sturdy base and delightful crunch; substitute with crushed cookies for a fun twist.
- Unsalted Butter (½ cup + 2 tbsp, melted) – Binds the crust together; try coconut oil for a dairy-free option.
- Fine Sea Salt (¾ tsp, separated) – Enhances the sweetness and flavor balance; you can use regular table salt, reducing the amount if desired.
For the Filling
- Sweetened Condensed Milk (1 can, 14 oz) – Creates the gooey texture crucial for Coconut Chocolate Bars; stick with this instead of evaporated milk.
- Semi-Sweet Chocolate Chips (1 cup) – Adds a rich, melty chocolate layer; use dark chocolate for a more intense flavor if you prefer.
For the Topping
- Unsweetened Coconut Flakes (¾ cup) – Provides that signature tropical touch and texture; consider desiccated coconut for a finer consistency.
- Fine Sea Salt (¼ tsp) – Sprinkled on top to elevate flavors and balance sweetness; a pinch goes a long way!
Now that you have all your ingredients ready, let’s get cooking on those scrumptious Coconut Chocolate Bars!
Step‑by‑Step Instructions for Coconut Chocolate Bars
Step 1: Preheat the Oven
Begin by preheating your oven to 350°F (175°C). While the oven warms up, grab an 8″x8″ baking dish and grease it generously with butter or cooking spray. This will ensure your Coconut Chocolate Bars release easily after baking.
Step 2: Prepare the Crust
In a mixing bowl, combine the fine graham cracker crumbs, melted unsalted butter, and ½ teaspoon of fine sea salt. Stir until the mixture resembles wet sand. Press this crumbly blend firmly and evenly into the bottom of the prepared baking dish, creating a solid foundation for your delicious bars.
Step 3: Layer the Ingredients
Next, pour the sweetened condensed milk evenly over the prepared crust, ensuring that every corner is covered. Sprinkle ¼ teaspoon of fine sea salt over the condensed milk to enhance the flavors. Then, scatter the semi-sweet chocolate chips and unsweetened coconut flakes on top, allowing the toppings to mingle with the milk layer.
Step 4: Press Down Gently
Using a fork, lightly press the coconut and chocolate toppings into the condensed milk layer. This step will help the toppings adhere during baking, ensuring that your Coconut Chocolate Bars come out perfectly unified and delicious.
Step 5: Bake
Carefully place the baking dish in your preheated oven. Bake the mixture for 28 to 30 minutes or until the coconut on top turns a lovely golden brown. Keep an eye on it to avoid overbaking—your kitchen will fill with an inviting aroma!
Step 6: Cool and Cut
Once baked, remove the dish from the oven and let it sit for a few minutes. Using a sharp knife, run it gently along the edges to loosen the bars. Allow the Coconut Chocolate Bars to cool completely, which should take at least 30 minutes. This cooling period is crucial for ensuring clean, nice cuts when you’re ready to serve.
Step 7: Slice and Serve
When fully cooled, cut the bars into 12 bars or 16 squares as desired. Use a spatula to lift them out of the baking dish carefully. Your Coconut Chocolate Bars are now ready to be enjoyed—perfect for sharing with friends or indulging in a delightful treat!
What to Serve with Chocolate Coconut Bars
Imagine a sweet gathering where the warm, inviting aroma of freshly baked treats harmonizes with the laughter of loved ones. The perfect accompaniment can elevate your Chocolate Coconut Bars into an unforgettable experience!
-
Creamy Vanilla Ice Cream: The smooth, rich flavor counterbalances the sweetness of the bars for a delightful contrast.
-
Fresh Berries Medley: Bright and tart berries like strawberries or raspberries add a refreshing touch, cleansing the palate between bites.
-
Chocolate Drizzle: A drizzle of warm chocolate creates a decadent finish, enhancing the chocolatey goodness of the bars for chocolate lovers.
For a truly indulgent option, consider serving them alongside a rich espresso. The bold coffee flavor beautifully complements the rich sweetness of the bars, creating a perfect harmony that coffee and dessert enthusiasts will adore.
-
Whipped Cream Topping: Light, airy whipped cream adds a delightful softness and balances the chewy texture of your Coconut Chocolate Bars.
-
Toasted Almonds: Sprinkling some toasted almonds on top introduces a crunchy element, enhancing both texture and flavor while adding a nutty finish.
Expert Tips for Coconut Chocolate Bars
-
Cooling Time Matters: Let your Coconut Chocolate Bars cool completely before cutting. This prevents them from falling apart due to the sticky condensed milk.
-
Grease Well: Ensure your baking dish is well-greased or use parchment paper for easy removal, avoiding the common mistake of bars sticking to the dish.
-
Watch the Bake Time: Keep an eye on the baking time; overbaking can make the coconut topping too dark and dry. Aim for a golden brown color.
-
Ingredient Variations: Feel free to experiment with different chocolate types or add nuts for a delicious twist; get creative to personalize your Coconut Chocolate Bars!
-
Storage Tips: Store your bars in an airtight container at room temperature for up to 4 days or freeze them for 2 months for a quick, sweet fix later.
Make Ahead Options
These Chocolate Coconut Bars are perfect for busy home cooks looking to save time! You can prepare the crust and layer the ingredients up to 24 hours in advance. Simply follow the steps to create the crust and layer the sweetened condensed milk, chocolate chips, and coconut, then cover the dish tightly with plastic wrap and refrigerate. This maintains freshness and ensures the ingredients meld beautifully. When you’re ready to enjoy, bake them straight from the fridge, adding a couple of extra minutes if needed to guarantee a golden top. With this make-ahead option, you’ll have decadent Chocolate Coconut Bars with minimal effort on your busy day!
Coconut Chocolate Bars Variations & Substitutions
Feel free to let your creativity shine by customizing these delightful Coconut Chocolate Bars to suit your taste!
-
Nutty Addition: Mix in ½ cup of chopped nuts, such as pecans or walnuts, for a satisfying crunch that complements the smooth chocolate and coconut.
-
Different Chocolate: Swap in white chocolate chips for a sweeter twist, or use dark chocolate for a rich, decadent flavor. Each choice transforms the bars into something special!
-
Gluten-Free Option: Use gluten-free graham cracker crumbs or crushed almond flour cookies as a base for a gluten-free version of these bars without sacrificing taste.
-
Vegan Delight: Replace the sweetened condensed milk with coconut milk mixed with a thickener like arrowroot or cornstarch, and opt for dairy-free chocolate chips for a vegan-friendly treat.
-
Coconutty Boost: For an intense coconut flavor, add ¼ cup of coconut cream to the condensed milk layer. This enhances the tropical vibe and creates an ultra-creamy texture.
-
Cacao Nib Crunch: Sprinkle cacao nibs on top before baking to add a delightful crunch and a hint of chocolatey depth. These will bring an interesting bite to every bar.
-
Spicy Kick: Add a pinch of cayenne or red pepper flakes to the chocolate chips for a surprising heat that balances the sweetness! It’s the perfect way to awaken your taste buds.
-
Caramel Swirl: Drizzle some caramel sauce over the top before baking for an indulgent twist. A little extra sweetness can take your Coconut Chocolate Bars to heavenly heights!
Be inspired to mix and match these ideas as you create your perfect Coconut Chocolate Bars! If you want to explore more delightful recipes, check out my Healthy Chocolate Protein donuts for another sweet fix or try the comforting Portuguese Coconut Cakes for a flavorful treat!
How to Store and Freeze Coconut Chocolate Bars
Room Temperature: Store the Coconut Chocolate Bars in an airtight container for up to 3-4 days, ensuring they remain fresh and ready for indulgence.
Fridge: For an extra cool treat, place the bars in the fridge; they can last up to a week in an airtight container, keeping that gooey center perfectly delectable.
Freezer: To enjoy later, wrap the bars in plastic wrap and then place them in an airtight container. They can be frozen for up to two months without losing flavor or texture.
Reheating: To serve warm, simply microwave a bar for about 15-20 seconds, allowing the chocolate to melt slightly while maintaining the delightful crunch from the coconut topping.
Coconut Chocolate Bars Recipe FAQs
How do I know if my coconut is fresh?
Absolutely! When selecting unsweetened coconut flakes, look for an even, creamy color without dark spots or an acrid smell. Fresh coconut flakes should smell sweet and pleasant; if there’s a strong odor or visible mold, it’s best to avoid it.
What’s the best way to store leftover Coconut Chocolate Bars?
Very! Store your Coconut Chocolate Bars in an airtight container at room temperature for up to 3-4 days. If you want to keep them longer, place them in the fridge for up to a week; they will retain their deliciousness.
Can I freeze Coconut Chocolate Bars? If so, how?
Absolutely! To freeze your Coconut Chocolate Bars, wrap each bar individually in plastic wrap, then place them in a airtight container. They can be stored in the freezer for up to 2 months. When you’re ready to enjoy a bar, simply remove it from the freezer and let it thaw at room temperature—or pop it in the microwave for 15-20 seconds for a warm treat!
What if my bars are too crumbly when cutting?
No worries! If your Coconut Chocolate Bars are crumbling, it might be because they didn’t cool long enough or the crust wasn’t pressed down firmly enough before baking. Ensure you allow them to cool completely (at least 30 minutes) before cutting, and try pressing the crust more firmly next time for better structure.
Are there any dietary considerations for this recipe?
Yes! These Coconut Chocolate Bars contain gluten from the graham crackers and dairy from the butter and sweetened condensed milk. For a gluten-free option, substitute the graham cracker crumbs with gluten-free cookie crumbs. If you’re looking for a dairy-free alternative, you can use coconut oil instead of butter and a suitable non-dairy condensed milk product. Always check for any allergies related to chocolate or coconut when serving!
Can I make these bars in advance for a party?
Absolutely! You can prepare your Coconut Chocolate Bars a day or two ahead of your gathering. Just store them in an airtight container at room temperature or in the fridge. They’ll be perfect for serving when friends and family arrive, saving you time and effort on the day of the event!
Decadent Coconut Chocolate Bars for Your Sweet Cravings
Ingredients
Equipment
Method
- Preheat the oven to 350°F (175°C) and grease an 8"x8" baking dish with butter or cooking spray.
- In a mixing bowl, combine fine graham cracker crumbs, melted butter, and ½ teaspoon of salt. Press into the bottom of the baking dish.
- Pour sweetened condensed milk over the crust, sprinkle ¼ teaspoon of salt on top, and scatter chocolate chips and coconut flakes.
- Lightly press toppings into the condensed milk layer with a fork.
- Bake for 28 to 30 minutes or until the coconut turns golden brown.
- Remove from the oven, cool for 30 minutes, and cut into bars.
- Serve and enjoy your Coconut Chocolate Bars!
Leave a Reply