
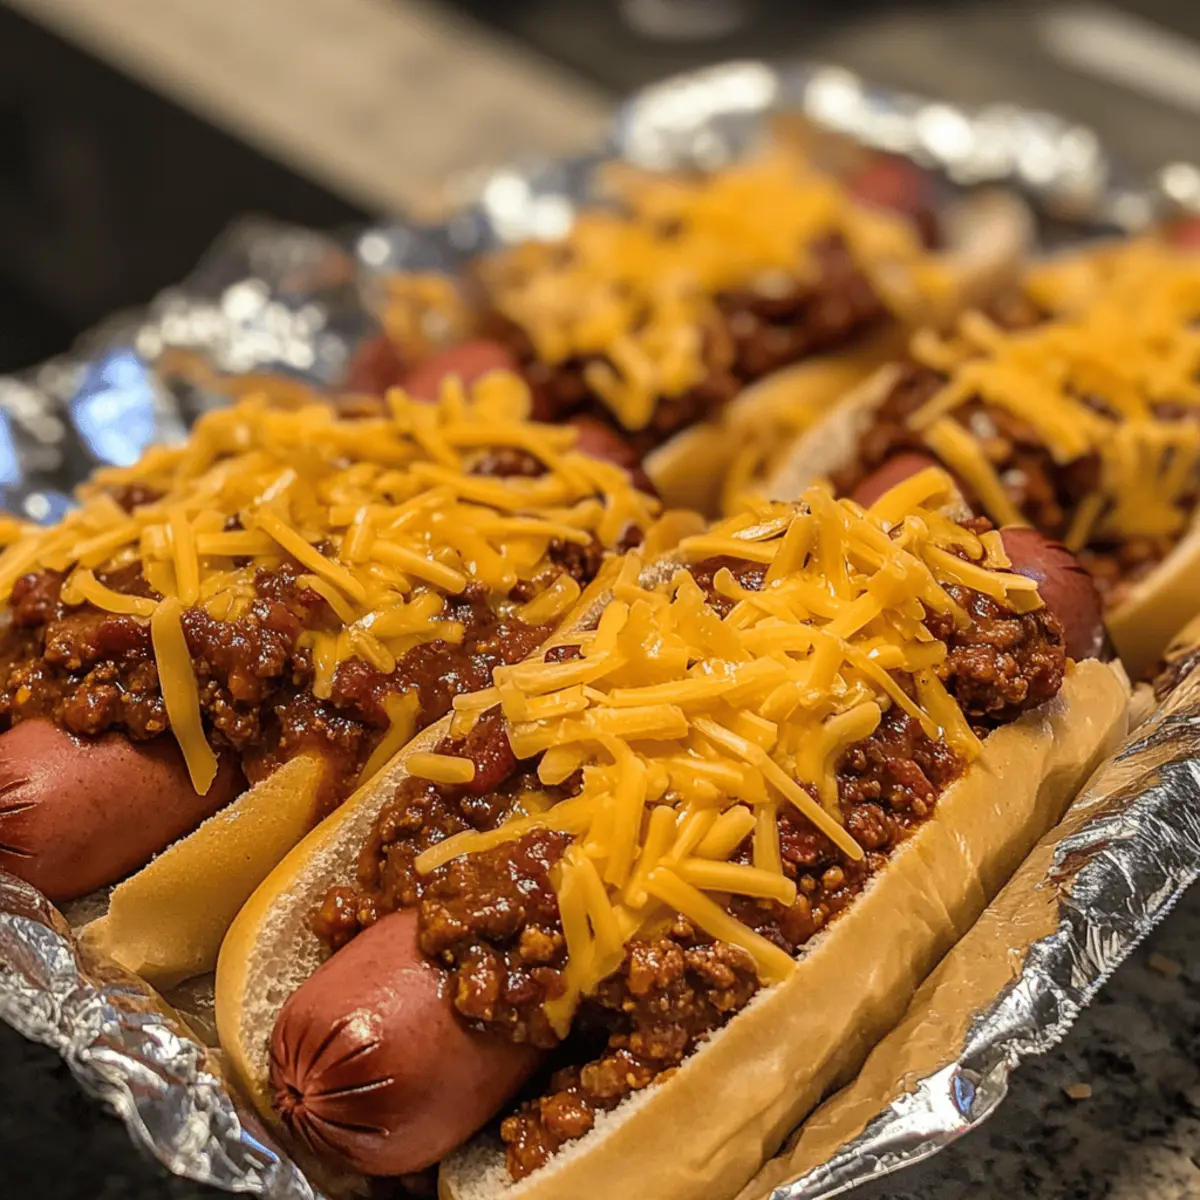
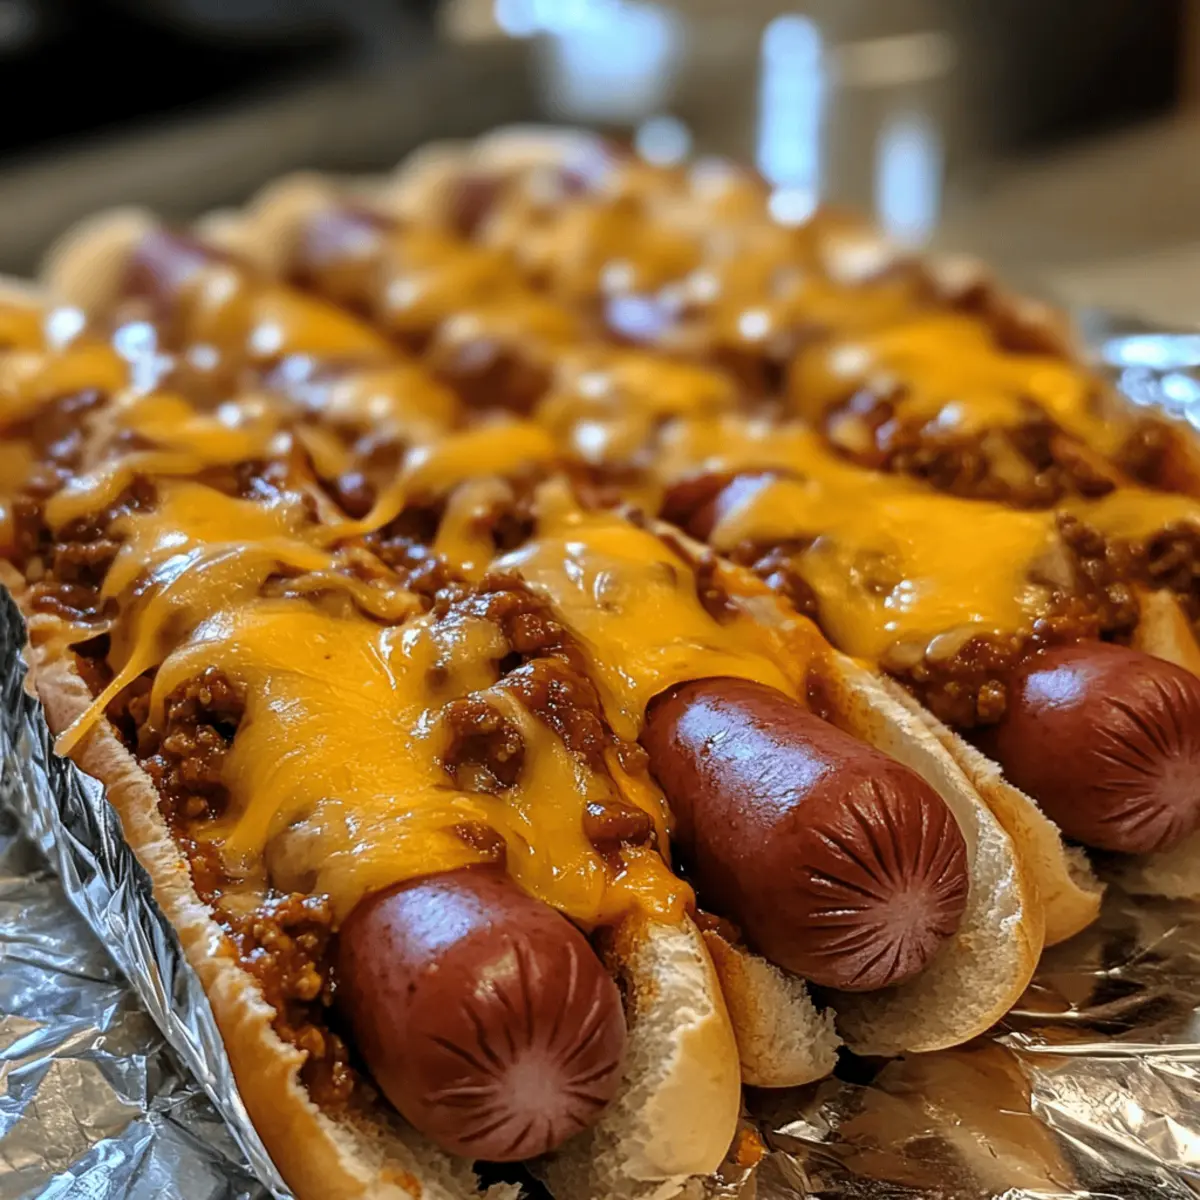
As the sun begins to dip below the horizon, the tantalizing aroma of sizzling hot dogs mingles with the crackle of a campfire, evoking memories of summer nights spent outdoors. With my Walking Chili Cheese Dogs, you can capture that nostalgic feeling in just 21 minutes. This easy camping snack is not only a huge crowd-pleaser but also comes together with minimal prep—perfect for those who want to avoid the hassle of fast food. Picture crunchy Funyun bags filled with warm chili, savory sliced hot dogs, and gooey cheddar cheese; it’s a delightful twist on a classic that both kids and adults can enjoy. Curious about how to whip up this portable treat that will elevate your outdoor gatherings? Let’s dive into the recipe together!
Why Love Walking Chili Cheese Dogs?
Quick and Easy: In just 21 minutes, you can create a flavorful feast, making it the perfect solution for busy weeknights or lazy weekends.
Portable Delight: These Walking Chili Cheese Dogs are designed for fun, fuss-free meals—ideal for camping trips, picnics, or tailgating. Just grab a bag and dig in!
Flavor Explosion: Experience the harmonious blend of rich chili, melted cheese, and savory hot dogs with a satisfying crunch from Funyuns. Each bite is a celebration of flavor!
Customizable: Whether you prefer spicy chili, vegetarian options, or want to add toppings like diced onions or jalapeños, this recipe caters to your taste.
Family-Friendly: Kids and adults alike will love this inventive take on a classic dish, making it a favorite for any gathering. Pair it with a side of pickles or potato salad for a complete meal!
Walking Chili Cheese Dogs Ingredients
For the Base
- Mini Funyun Bags – These crunchy snacks provide a delightful twist to the traditional hot dog experience. Substitute with any similar crunchy snack if you can’t find Funyuns.
For the Chili
- Chili – This hearty component is essential; you can use canned or homemade chili for ease. Just make sure your chili is pre-cooked and warm for the best results!
For the Topping
- Shredded Cheddar Cheese – This creamy cheese adds a sharp flavor that perfectly balances the richness of the chili. Feel free to substitute with other cheese types for unique flavors, like Monterey Jack!
For the Protein
- Hot Dogs – The star of the show; choose any variety you love—beef, turkey, or plant-based options fit right in with these Walking Chili Cheese Dogs!
Step‑by‑Step Instructions for Walking Chili Cheese Dogs
Step 1: Prepare the Funyun Base
Begin by opening the mini Funyun bags. Carefully remove the rings from each bag, ensuring not to tear them, giving you a fun and portable serving vessel. This will be the crunchy base for your Walking Chili Cheese Dogs. Set the opened bags aside and get ready for the delicious filling.
Step 2: Heat the Chili
Warm your pre-cooked chili in a saucepan over medium heat for about 5 minutes, stirring occasionally until hot but not bubbling. You want it steaming and fragrant without burning. This step is crucial for ensuring that the chili, when poured into the Funyun bags, melds beautifully with the other ingredients in your Walking Chili Cheese Dogs.
Step 3: Slice the Hot Dogs
While the chili heats, slice your cooked hot dogs into bite-sized pieces, about ½ inch thick. Aim for uniform slices to ensure even distribution when mixed with the chili. This will enhance the flavor and texture in each mouthful of your Walking Chili Cheese Dogs, creating that delightful burst of flavor with every bite.
Step 4: Assemble the Filling
Once the chili is warm, carefully pour it into the opened Funyun bags, filling them just above the bottom but leaving room for hot dogs. Then, evenly distribute the sliced hot dogs over the chili, ensuring every bite features both the hearty chili and savory hot dog. This layering creates a delicious mix that’s essential for your Walking Chili Cheese Dogs.
Step 5: Add the Cheesy Topping
Finally, sprinkle a generous amount of shredded cheddar cheese over the top of each filled Funyun bag. You can use about a handful or more, depending on your cheese cravings. The warmth of the chili and hot dogs will melt the cheese slightly, creating a gooey, irresistible topping that perfectly crowns your Walking Chili Cheese Dogs.
Step 6: Serve Immediately
Serve these delightful Walking Chili Cheese Dogs right away while they’re warm and the cheese is melty. Encourage your guests or family to dig in directly from the Funyun bags for a fun and interactive meal. Enjoy the harmony of flavors and the satisfying crunch, making sure to have napkins ready for the delicious mess!
Walking Chili Cheese Dogs Variations
Feel free to explore these creative twists for your Walking Chili Cheese Dogs, enhancing flavors and textures that will make your taste buds dance!
-
Crunchy Swap: Substitute Funyuns with potato chips or corn chips for a different crunchy experience. You’ll still enjoy that satisfying crunch alongside the chili and cheese!
-
Protein Options: Experiment with different proteins! Try vegetarian hot dogs or spicy sausage for a deliciously unique take that caters to various dietary preferences.
-
Add Some Heat: Level up the flavor by adding diced jalapeños or using spicy chili. Bring on the heat and tantalize your senses for an extra kick in each bite!
-
Creamy Enhancements: Top your Walking Chili Cheese Dogs with a dollop of sour cream or even guacamole. This will add a creamy element that complements the savory chili beautifully.
-
Unique Cheeses: Swap out cheddar for other cheeses like pepper jack for a bold flavor or feta for a tangy twist. Each cheese brings a distinct character that transforms the dish!
-
Extra Toppings: Get creative with toppings! Add diced onions, fresh cilantro, or even crushed tortilla chips for extra flavor and texture. It’s a great way to personalize your snack.
-
Make it a Meal: Pair your Walking Chili Cheese Dogs with a refreshing coleslaw or a simple green salad for a complete meal experience that balances flavors and textures.
-
Satisfying Sides: Serve alongside tangy pickles or zesty potato salad for a hearty, satisfying combo! These classic sides contrast nicely with the rich chili cheese dogs.
As you customize your dish, think about pairing it with other delicious creations like Cream Cheese Salsa or Spicy Steak Chili for an even more delightful spread!
Helpful Tricks for Walking Chili Cheese Dogs
-
Chili Temperature: Ensure that the chili is warm but not too hot when adding to the Funyuns. This prevents burns and allows for better mixing.
-
Uniform Hot Dog Slices: Slice your hot dogs evenly to ensure each bite of your Walking Chili Cheese Dogs has a balanced flavor and texture. This prevents any pieces from being over or under-represented in the mix.
-
Crunchy Alternatives: If you can’t find Mini Funyun bags, feel free to substitute with potato chips or corn chips for a different but equally crunchy base.
-
Customize Wisely: Experiment with your spice levels! Opting for spicy chili or adding jalapeños can elevate the flavor, so taste as you go to find your perfect heat.
-
Toppings Galore: Don’t stop at cheese! Consider adding diced onions, sour cream, or even guacamole for a personal twist to your Walking Chili Cheese Dogs experience.
What to Serve with Walking Chili Cheese Dogs?
Elevate your outdoor gathering with delicious sides and treats that balance the exciting flavors of your meal.
-
Classic Coleslaw: This crisp and tangy salad adds a refreshing crunch that complements the richness of the chili cheese dogs. It’s a cool counterpoint to the warm, hearty flavors.
-
Sweet Corn on the Cob: Grilled to perfection, the sweetness of corn balanced with a dash of butter offers a delightful contrast to the savory chili dogs, making them a perfect summer side.
-
Potato Salad: A creamy, flavorful potato salad creates a satisfying side that pairs well with the texture of the Walking Chili Cheese Dogs. The subtle flavors harmonize beautifully, adding comfort to your meal.
-
Pineapple Salsa: Add a tropical twist with a fresh pineapple salsa, providing a sweet and zesty pop that contrasts nicely with the chili’s warmth, making each bite an adventure.
-
Spicy Nachos: Serve up some crispy nachos topped with melted cheese and jalapeños. The crunch and spiciness enhance the overall enjoyment, rounding out the essence of comfort food.
-
Lemonade or Iced Tea: Refreshing drinks like homemade lemonade or iced tea quench thirst and bring a sunny vibe to your meal. They cleanse the palate beautifully between bites.
-
Brownies or Chocolate Chip Cookies: End on a sweet note with fudgy brownies or chewy cookies. Their rich sweetness will satisfy any sweet tooth, making your camping gathering complete.
-
Fruit Salad: A light and refreshing fruit salad can balance the heaviness of the chili cheese dogs, offering natural sweetness and a burst of vibrant color to your spread.
-
Pickles or Jalapeños: A side of tangy pickles or spicy jalapeños can add a zesty kick, enhancing the flavors of your meal while serving as a delightful crunchy accompaniment.
How to Store and Freeze Walking Chili Cheese Dogs
Fridge: Store any leftover chili separately in an airtight container for up to 3 days. Reheat it on the stove or in the microwave until warmed through before using it again for your Walking Chili Cheese Dogs.
Freezer: If you have extra chili, it can be frozen for up to 2 months. When you’re ready to enjoy, thaw in the refrigerator overnight and reheat before assembling your Walking Chili Cheese Dogs.
Hot Dog Storage: Unused hot dogs can be stored in the fridge for up to a week. Keep them in their original packaging or sealed in an airtight container.
Reheating Tips: If you’ve prepared these tasty treats in advance, reheat them in the oven or microwave for a quick snack that maintains its flavors. Enjoy crispiness by heating in the oven for a few minutes!
Make Ahead Options
These Walking Chili Cheese Dogs are fantastic for meal prep, allowing you to save time and make your outdoor gatherings even more enjoyable! You can prepare the chili and slice the hot dogs up to 3 days in advance, storing them in separate airtight containers in the refrigerator. To maintain the flavor and quality, make sure the chili is fully cooled before refrigerating. When you’re ready to serve, simply reheat the chili gently in a saucepan over medium heat, then assemble the Walking Chili Cheese Dogs as instructed, pouring the warm chili into the Funyun bags and adding the sliced hot dogs and cheese. This way, you’ll have a delicious, crowd-pleasing snack ready in no time, perfectly suited for those busy days!
Walking Chili Cheese Dogs Recipe FAQs
What type of chili should I use?
Absolutely! You can use either canned or homemade chili for your Walking Chili Cheese Dogs. Just make sure it’s pre-cooked and warmed before adding it to the Funyuns. For a unique twist, try using spicy chili or adding your favorite beans.
How should I store leftovers?
Very! If you have any leftover chili, store it separately in an airtight container in the fridge for up to 3 days. Reheat on the stove or in the microwave until hot, and you can enjoy it again with fresh Funyuns!
Can I freeze the leftover chili?
Yes! Your leftover chili can be frozen for up to 2 months. Place it in a freezer-safe container, allowing some room for expansion as it freezes. When you’re ready to use, thaw it in the fridge overnight and reheat for your Walking Chili Cheese Dogs.
What if my hot dogs are overcooked?
Oh no! If your hot dogs are overcooked, they may become tough and lose flavor. To prevent this, slice them after cooking and check for evenness. In future batches, aim for a cooking time of around 6-8 minutes on medium heat, so they remain juicy and delicious for your Walking Chili Cheese Dogs.
Can I make this recipe vegetarian-friendly?
Absolutely! You can easily customize this recipe to be vegetarian by using plant-based hot dogs or omitting the protein altogether. Pair it with a hearty chili that’s also meatless, and load it up with toppings like diced onions, jalapeños, or avocado for added flavor without sacrificing taste.
How long do the Funyun bags stay crunchy?
Very! The Funyun bags can stay crunchy for several hours if kept sealed and not exposed to moisture. However, for optimal freshness, it’s best to prepare and serve your Walking Chili Cheese Dogs immediately after assembly. If left too long, the moisture from the chili and cheese may cause them to soften.
Ultimate Walking Chili Cheese Dogs for Easy Camping Fun
Ingredients
Equipment
Method
- Open the mini Funyun bags carefully and set them aside.
- Warm the pre-cooked chili in a saucepan over medium heat for about 5 minutes.
- Slice the cooked hot dogs into bite-sized pieces, about ½ inch thick.
- Pour the warm chili into the opened Funyun bags, then evenly distribute the sliced hot dogs over the chili.
- Sprinkle a generous amount of shredded cheddar cheese over the top of each filled Funyun bag.
- Serve the Walking Chili Cheese Dogs immediately while warm.
Leave a Reply