
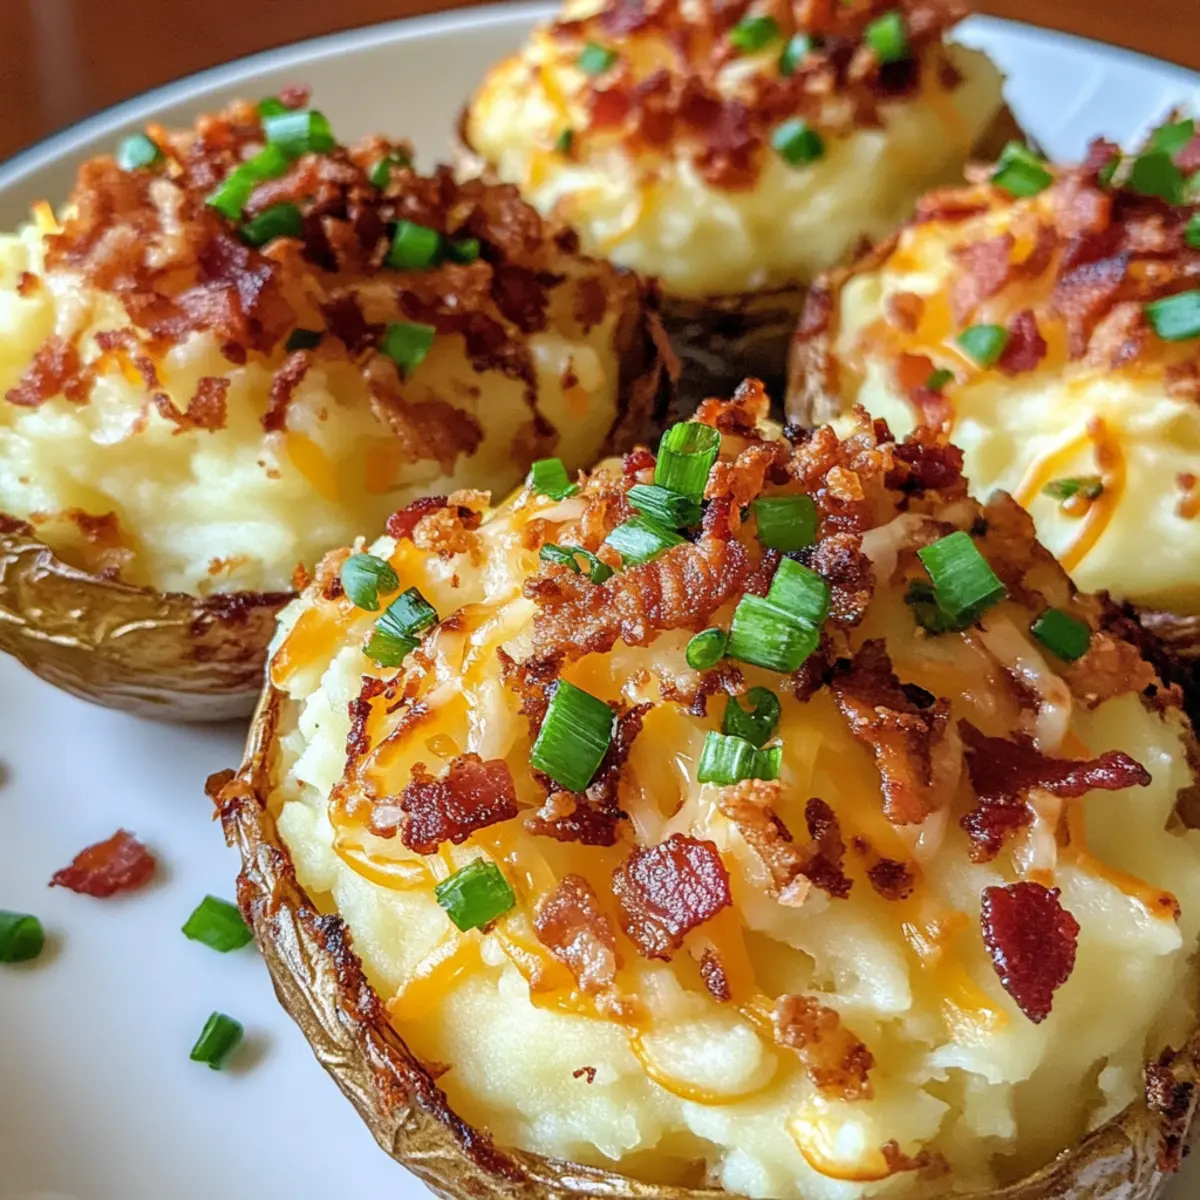
As I stood in the kitchen, the tantalizing aroma of crispy potatoes filled the air, promising something magical was about to happen. Allow me to introduce you to my latest obsession: Stuffed Mashed Potato Nests. These little gems are not only the ultimate comfort food but also an eye-catching addition to any potluck or family gathering. With a golden exterior and a creamy, cheesy filling bursting with bacon and green onions, they bring together all the cozy vibes you crave. Plus, they’re quick to prepare, making them an easy crowd-pleaser that will have everyone coming back for seconds. So, are you ready to dive into this delicious adventure of creating potato nests that will wow your taste buds?
Why Love Stuffed Mashed Potato Nests?
Comfort Food Redefined: These crispy nests offer a nostalgic twist, transforming humble mashed potatoes into a visually stunning dish.
Crowd-Pleasing Appeal: Ideal for potlucks or gatherings, they’re sure to impress your guests without hours of preparation.
Versatile Filler: Mix and match fillings like cheese-stuffed pretzels or add fresh veggies for a unique spin.
Quick to Prepare: Ready in just under an hour, making them a perfect choice for busy weeknights or last-minute plans.
Deliciously Customizable: Whether you prefer bacon or a veggie option like creamy ricotta stuffed zucchini, you can personalize these nests to satisfy every palate.
Stuffed Mashed Potato Nests Ingredients
Get ready to create magic with these delightful nests!
For the Potato Base
• Potatoes – Choose starchy russets for that creamy texture everyone loves.
• Butter – Unsalted works best for perfect flavor control in your mash.
• Milk – Use regular or a non-dairy option to achieve that smooth consistency.
• Egg – Acts as a binder; consider omitting for a vegan version, but the nests might not hold their shape well.
For the Filling
• Cheddar Cheese – Adds rich flavor; feel free to experiment with sharp or mild varieties!
• Bacon – Introduces depth of flavor; swap for turkey bacon or omit for a veggie delight.
• Green Onions – Provide a fresh crunch; chives can step in if needed.
Helpful Tip
Make sure your sliced potatoes are very well drained; this will help you create the perfect crispy nests!
Step‑by‑Step Instructions for Stuffed Mashed Potato Nests
Step 1: Preheat the Oven and Prepare Muffin Tin
Begin by preheating your oven to 400°F (200°C). While it warms up, generously grease a standard muffin tin with cooking spray or softened butter to ensure the stuffed mashed potato nests release easily after baking. This essential step will help you achieve that perfect crispy texture on the outside.
Step 2: Boil and Mash Potatoes
Peel and cut your russet potatoes into even chunks, then place them in a large pot of cold, salted water. Bring the water to a boil over medium-high heat and cook the potatoes until they are fork-tender, about 15-20 minutes. Drain the potatoes well, then mash them in a bowl with the butter, milk, and seasonings until creamy and smooth, creating the nest base.
Step 3: Form Potato Nests in Muffin Tin
Using a spoon or your hands, take a generous portion of the creamy mashed potatoes and press it into each muffin cup, creating a hollow center and forming nests. Make sure the potato walls are thick enough to hold the filling, and aim for a nice, even thickness all around. This will ensure that your stuffed mashed potato nests cook evenly and become beautifully golden.
Step 4: Prepare the Filling Mixture
In a separate mixing bowl, combine shredded cheddar cheese, crumbled bacon, and chopped green onions. Mix these delicious ingredients thoroughly to create a flavorful filling that perfectly complements your stuffed mashed potato nests. Get ready to enjoy the aroma and texture of these delightful ingredients mingling together!
Step 5: Fill the Potato Nests
Spoon the cheese and bacon filling generously into each prepared potato nest. Make sure to pack it slightly but leave a little exposed potato for a beautiful presentation. This step allows the filling to meld beautifully with the potato while baking, resulting in an irresistible stuffed mashed potato nests experience.
Step 6: Bake for Crispy Perfection
Place the muffin tin in your preheated oven and bake for approximately 20 minutes or until the tops are golden and crisp. Keep an eye on them; you want that perfect contrast of textures between the crispy edges and the creamy interior. The stuffed mashed potato nests should be bubbling slightly and creating an inviting aroma in your kitchen.
Step 7: Cool and Serve
Once baked to perfection, remove the muffin tin from the oven and let the stuffed mashed potato nests cool for a few minutes. Gently run a butter knife around the edges of each nest to aid in releasing them. Carefully lift them out and serve warm, perhaps with a dollop of sour cream or fresh herbs, to enhance the delightful flavors.
Storage Tips for Stuffed Mashed Potato Nests
Room Temperature: Enjoy leftover stuffed mashed potato nests at room temperature for up to 2 hours; otherwise, refrigerate them to maintain freshness.
Fridge: Store in an airtight container for up to 3 days. Reheat in the oven for a few minutes to restore that delightful, crispy exterior.
Freezer: Freeze baked nests in a single layer in a freezer-safe container for up to 2 months. Reheat directly from the freezer, placing them in a preheated oven until warmed through.
Reheating: For the best results, reheat stuffed mashed potato nests in the oven to regain their crispy texture, rather than using a microwave.
Expert Tips for Stuffed Mashed Potato Nests
- Potato Choice: Use starchy russet potatoes for the best creaminess in stuffed mashed potato nests; they make the perfect base.
- Avoid Watery Nests: Ensure your potatoes are thoroughly drained after boiling to prevent a soggy mixture and achieve better texture.
- Cheese Variety: Experiment with different cheeses like mozzarella or pepper jack for unique flavors in your nests without sacrificing deliciousness.
- Even Thickness: When forming nests, aim for an even thickness around the sides to ensure they bake uniformly and hold the filling well.
- Cooling Time: Permit the nests to cool slightly before removing them from the tin, as this helps them hold their shape and enhances their crispy exterior.
Stuffed Mashed Potato Nests: Variations & Substitutions
Feel free to get creative with these delectable nests and customize them to please your palate!
- Vegetarian Delight: Replace bacon with sautéed mushrooms and spinach for a hearty veggie-packed option. The earthiness of the mushrooms complements the creamy potatoes beautifully.
- Spicy Kick: Add diced jalapeños or a splash of hot sauce to the filling for a fiery twist. This adds an exciting heat that will awaken your taste buds!
- Cheese Lover’s Dream: Mix in different cheeses, like mozzarella or feta, to switch up the flavor profile and create a melty masterpiece. Who could resist that gooey goodness?
- Herb-Infused: Toss in fresh herbs like thyme or rosemary into the filling for a fragrant lift. These herbs bring a touch of freshness and aroma that elevates your potato nests.
- Crispy Topping: Sprinkle some crushed potato chips or Panko breadcrumbs on top before baking for added crunch and texture. This extra layer creates a delightful contrast with the creamy filling!
- Sweet Potato Twist: Use mashed sweet potatoes instead of regular potatoes for a naturally sweeter flavor and vibrant color. This swap transforms the nests into an even more nourishing option.
- Nutty Flavor: Fold in toasted nuts, such as chopped pecans or walnuts, to the filling for an unexpected crunch and savory depth, making these nests truly unique.
- Smoky Flavor: Incorporate smoked paprika or liquid smoke in the filling for a deliciously smoky essence that pairs wonderfully with the creamy potatoes.
If you’re looking for more fantastic ideas, try serving these nests alongside a refreshing salad or with a dollop of sour cream, just like you might with kielbasa potato soup. Enjoy the delightful journey of flavors with your stuffed mashed potato nests!
Make Ahead Options
These Stuffed Mashed Potato Nests are perfect for meal prep! You can prepare the mashed potato base up to 24 hours in advance. Simply boil and mash the potatoes, then refrigerate them in an airtight container to keep them fresh. You can also mix the filling (cheese, bacon, and green onions) and store it separately in the fridge for up to 3 days. When you’re ready to serve, just reheat the mashed potatoes slightly to make shaping easier, form the nests, fill them with the mixture, and bake until they are golden and crisp. With these make-ahead tips, you’ll enjoy delicious, hassle-free comfort food on busy weeknights!
What to Serve with Stuffed Mashed Potato Nests?
Creating a memorable meal goes beyond just one fantastic dish; it’s about bringing a harmonious blend of flavors and textures to the table.
-
Creamy Coleslaw: Crunchy and refreshing, coleslaw adds a vibrant contrast to the crispy nests, balancing flavors beautifully.
-
Garlic Bread: The buttery, garlicky goodness of this classic side is perfect for soaking up any leftover filling from your nests. It’s a comforting pairing that everyone loves!
-
Roasted Vegetables: A medley of seasonal veggies provides earthiness and color, enhancing the presentation while delivering nutrients.
-
Classic Caesar Salad: Crisp romaine, parmesan, and a tangy dressing create a light sidekick, cutting through the richness of the potato nests.
-
Sweet Corn Fritters: Their sweetness complements the savory profiles in the nests, ensuring a delightful play on flavors. These are often a crowd-pleaser!
-
Homemade Ranch Dip: Serve this alongside for an added layer of flavor, inviting guests to dip their crispy nests into creamy goodness.
-
Sparkling Apple Cider: A fizzy drink adds a refreshing, fruity note that pairs well with savory dishes, making your gathering feel special.
-
Chocolate Chip Cookies: For dessert, nothing beats the nostalgia of warm cookies, offering a sweet finish to a comforting meal.
These delightful pairings will elevate your stuffed mashed potato nests into a memorable feast for every occasion!
Stuffed Mashed Potato Nests Recipe FAQs
How can I select the perfect potatoes for my nests?
Absolutely! Opt for starchy russet potatoes for that creamy texture. They create the best base for your stuffed mashed potato nests. Avoid waxy potatoes as they tend to yield a more gluey mash, not the airy fluff that’s so desirable.
What’s the best way to store leftovers?
Very! Store your leftover stuffed mashed potato nests in an airtight container in the refrigerator for up to 3 days. Simply reheat them in the oven until they’re warm and crispy again—about 10 to 15 minutes at 350°F (175°C) will do the trick!
Can I freeze the stuffed nests?
Of course! To freeze your baked stuffed mashed potato nests, first cool them completely, then place them in a single layer in a freezer-safe container or zip-top bag. They’ll stay fresh for up to 2 months. When you’re ready to enjoy them, bake straight from the freezer in a preheated oven at 375°F (190°C) until heated through, roughly 15-20 minutes.
What if my mashed potatoes turn out too watery?
If that happens, don’t worry! Make sure you thoroughly drain your boiled potatoes before mashing. If they’re still watery, you can return them briefly to the pot over low heat, stirring until the excess moisture evaporates. Keep an eye on them to avoid burning. It’s all about that creamy consistency for your stuffed mashed potato nests!
Are there any dietary concerns with this recipe?
Yes! If you’re making these for guests with dietary restrictions, you can easily adapt the recipe. For a gluten-free option, just ensure all ingredients, particularly the bacon and any cheese, are certified gluten-free. Also, omit the egg for a vegan version—just note that the nests may not hold their shape as well without it. Enjoy customizing until it fits every palate!
Irresistible Stuffed Mashed Potato Nests for Cozy Gatherings
Ingredients
Equipment
Method
- Preheat your oven to 400°F (200°C) and grease a muffin tin with cooking spray or softened butter.
- Boil peeled and cut russet potatoes in salted water until fork-tender (15-20 minutes). Drain and mash with butter, milk, and seasonings.
- Press mashed potatoes into muffin cups to create nests, maintaining a thick enough wall.
- Mix shredded cheddar cheese, crumbled bacon, and chopped green onions in a separate bowl for the filling.
- Spoon filling into each potato nest, slightly packing it but leaving some exposed potato.
- Bake in preheated oven for about 20 minutes until tops are golden and crispy.
- Let cool for a few minutes before gently removing nests from the muffin tin and serving warm.
Leave a Reply