
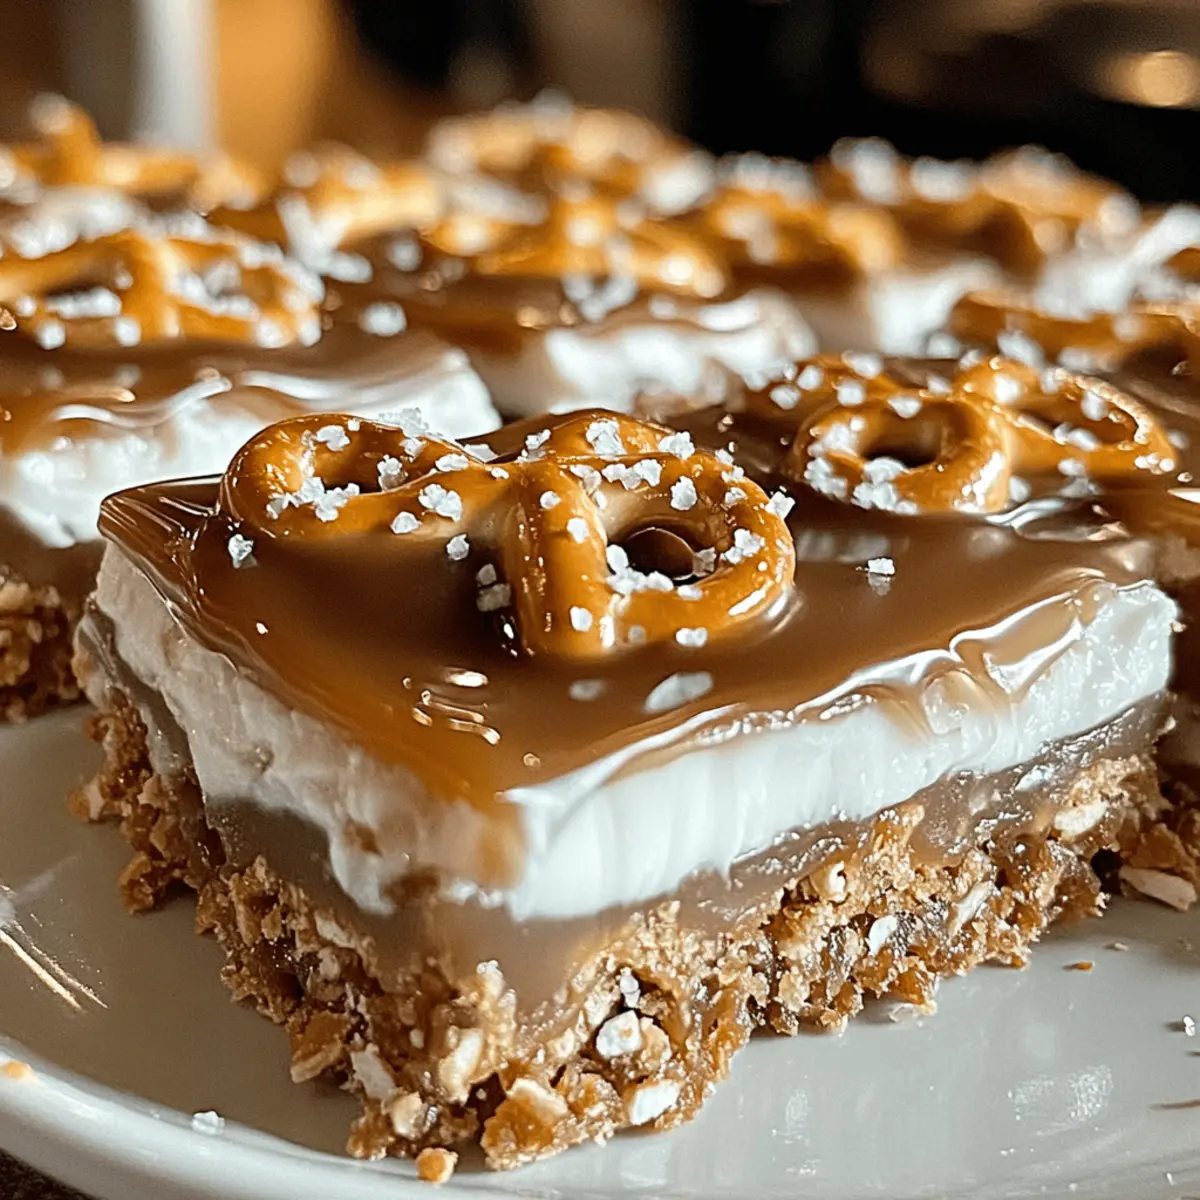
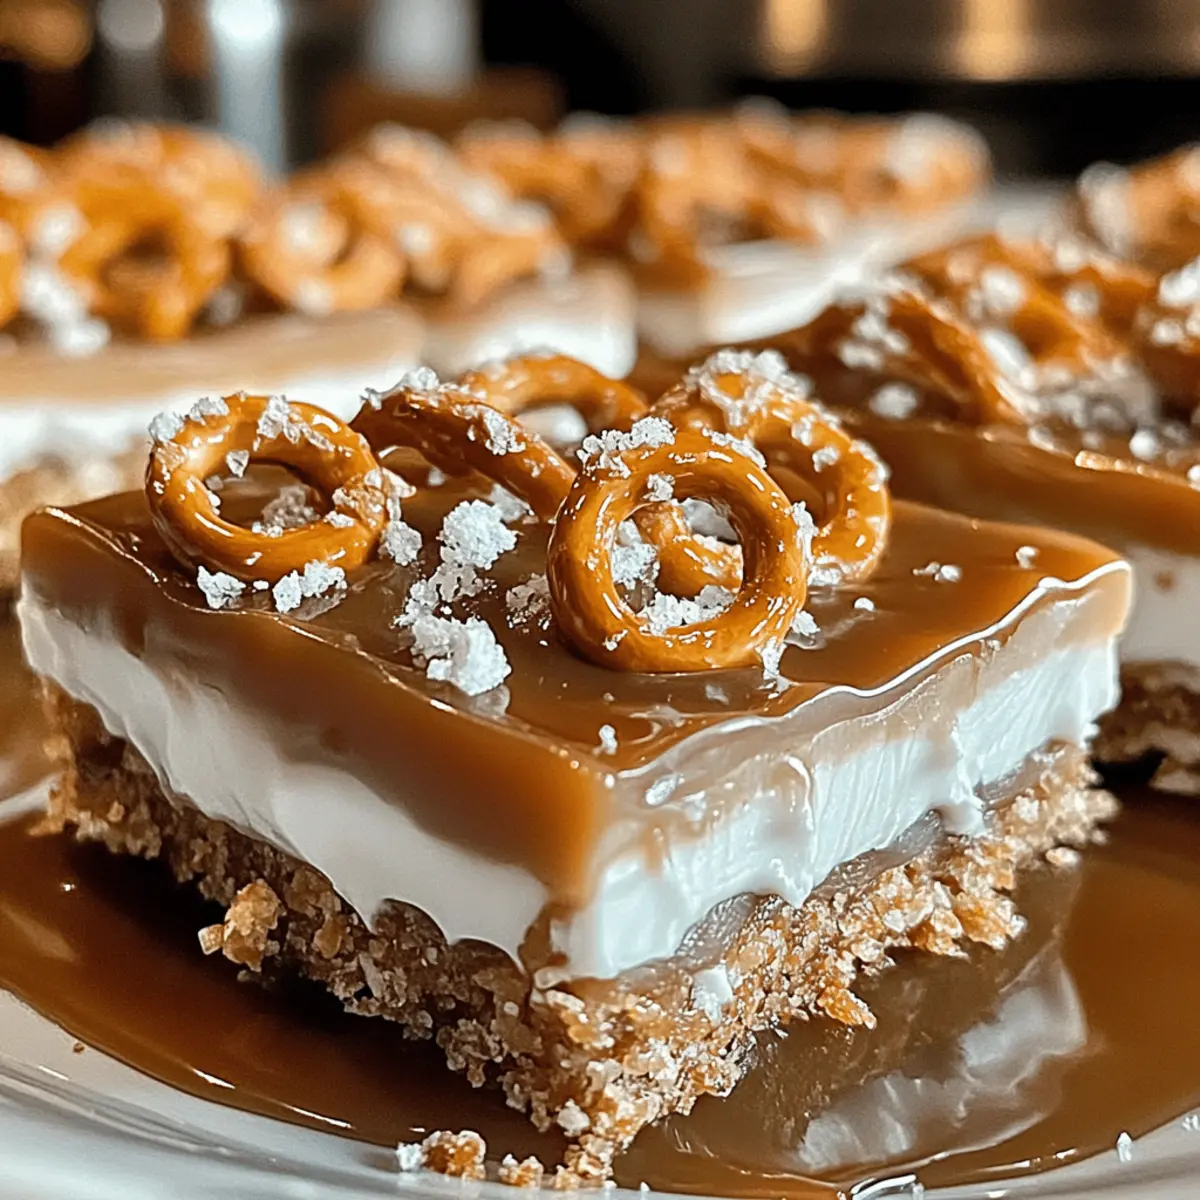
As I sat down to enjoy a lazy afternoon, my thoughts wandered to a blissful treat that captures both indulgence and simplicity: No-Bake Salted Caramel Pretzel Bars. The idea of crafting this dessert without ever turning on the oven is a game-changer for anyone craving something sweet yet effortlessly made. These bars combine a satisfying crunch from pretzels with the rich allure of salted caramel—it’s no wonder they quickly become a go-to favorite at gatherings. Plus, whipping them up is a breeze, making this recipe not just a crowd-pleaser but also a delightful little victory for busy home chefs. Why not take a moment and create this sweet and salty sensation that will have everyone coming back for more? Ready to dive into the joy of no-bake desserts? Let’s get started!

Why are these bars a must-try?
Irresistible Crunch: Each bite combines crunchy pretzels with the buttery allure of salted caramel—truly a flavor explosion!
Quick & Easy: No baking required means less time in the kitchen and more time enjoying your delicious creation.
Perfect for Any Occasion: Whether it’s a game day treat or a family gathering, these bars always impress guests with their unique sweet and salty profile.
Customizable Fun: Want to switch it up? Try adding sprinkles or crushed nuts for extra flair, making it your own!
Satisfying Rewards: Watching friends and family enjoy these bars brings a delightful sense of accomplishment. Pair them with a refreshing dessert like these Cheese Stuffed Pretzels for an unforgettable experience!
Salted Caramel Pretzel Bars Ingredients
• To make your no-bake salted caramel pretzel bars, gather these essential ingredients for a perfect sweet-and-salty treat!
For the Base
- Pretzels – Provides a delightful crunch and salty contrast to the sweet caramel; gluten-free pretzels are a great substitute.
- Salted Caramel Sauce – Adds rich sweetness; feel free to use store-bought or homemade, just ensure it’s thick enough for a satisfying texture.
- Butter – Contributes creaminess and helps bind the bars; opt for unsalted butter for better control over salt levels.
For the Topping
- Chocolate Chips – An optional addition that enhances flavor; choose dark, milk, or semi-sweet chocolate according to your personal taste preference.
With these ingredients in hand, you’re just a few steps away from creating a delicious batch of salted caramel pretzel bars that everyone will love!
Step‑by‑Step Instructions for Salted Caramel Pretzel Bars
Step 1: Prepare the Base
Begin by crushing about 3 cups of pretzels into small pieces, either using a food processor or placing them in a zip-top bag and smashing them with a rolling pin. In a mixing bowl, combine the crushed pretzels with ½ cup of melted butter and 1 cup of salted caramel sauce. Stir until everything is well coated and forms a sticky mixture.
Step 2: Press Mixture
Line an 8×8-inch baking dish with parchment paper for easy removal. Transfer the pretzel mixture into the dish and use your hands or a spatula to firmly press it down into an even layer. Aim for a compact base that holds together well. This will set the foundation for your Salted Caramel Pretzel Bars, ensuring a great texture once chilled.
Step 3: Top It Off
In a microwave-safe bowl, melt 1 cup of chocolate chips in 30-second intervals, stirring in between, until smooth and glossy. Carefully pour the melted chocolate over the pressed pretzel mixture, spreading it evenly with a spatula. This rich topping adds a delightful layer of flavor, enhancing the overall enjoyment of your no-bake salted caramel pretzel bars.
Step 4: Chill
Cover the baking dish with plastic wrap or aluminum foil, and place it in the refrigerator for at least 2 hours, or until completely set. This chilling process is crucial—it allows the layers to firm up and makes for clean cuts when you slice your bars. Check that they feel firm to the touch before proceeding to the next step.
Step 5: Serve
Once chilled, remove the dish from the refrigerator and lift the bars out using the parchment paper. Use a sharp knife to cut them into squares or rectangles. Each bite of your delightful Salted Caramel Pretzel Bars will be a delicious blend of sweetness and saltiness, perfect for sharing at parties or enjoying as a treat at home.

Expert Tips for Salted Caramel Pretzel Bars
• Crush Uniformly: Ensure your pretzels are crushed to similar sizes for a consistent texture—too large, and they won’t bind well.
• Watch the Caramel: If using homemade salted caramel, let it cool slightly before mixing. Hot caramel can melt the pretzels too much, making a sticky mess.
• Chill Properly: Allow the bars to chill for the full two hours or until completely set; cutting too soon can lead to a messy presentation.
• Modify for Taste: Feel free to experiment with different types of chocolate chips, like dark or milk, to enhance the flavor of your salted caramel pretzel bars.
• Storing Tips: Store any leftovers in an airtight container in the fridge; they can last up to a week, but they’ll likely disappear much faster!
What to Serve with No-Bake Salted Caramel Pretzel Bars
Looking to create a memorable meal experience that beautifully complements the sweet and salty magic of your no-bake dessert?
-
Creamy Vanilla Ice Cream: A scoop of rich ice cream brings a cool contrast to the crunchy bars, enhancing the indulgent flavor profile.
-
Fresh Berries: Juicy strawberries or tangy raspberries add a refreshing burst of sweetness, balancing out the richness of caramel. They not only taste amazing but also add a pop of color to your plate.
-
Chocolate Dipped Fruit: Sliced bananas or apple wedges dipped in chocolate echo the bars’ decadence while providing a lighter touch.
-
Caramel Drizzle: Enhance the sweet experience by drizzling your bars with additional caramel sauce, bringing an extra layer of lusciousness that caramel lovers will appreciate.
-
Nutty Trail Mix: A crunchy side of trail mix brings texture and healthy fats, making for a delightful nibble alongside each rich bite.
-
Chilled Lemonade or Iced Tea: Quench your thirst with a bright, citrusy drink that cuts through the sweetness, refreshing your palate with every sip.
-
Espresso or Coffee: Serving a small cup of strong coffee balances the sugary dessert, creating a perfect after-dinner pairing that coffee lovers will adore.
With these thoughtful pairings, you’re sure to elevate your no-bake salted caramel pretzel bars into a delightful dessert spread that invites everyone to dig in!
Make Ahead Options
These No-Bake Salted Caramel Pretzel Bars are perfect for meal prep, saving you time on busy weeknights! You can prepare the base (crushed pretzel mixture combined with melted butter and salted caramel) up to 24 hours in advance. Simply press it into your lined baking dish and refrigerate. To maintain their delicious quality, keep the un-topped bars covered tightly to prevent drying out. Just before serving, melt the chocolate chips and pour over the chilled base—this last step only takes a few minutes! With this make-ahead strategy, you’ll have delectable bars ready to impress, all with minimal effort!
How to Store and Freeze Salted Caramel Pretzel Bars
Fridge: Store your salted caramel pretzel bars in an airtight container in the refrigerator for up to one week. This keeps them fresh and ready for a quick sweet treat!
Freezer: For longer shelf life, wrap the bars tightly in plastic wrap and then place them in a freezer-safe bag or container. They can be frozen for up to three months.
Reheating: When you’re ready to enjoy your frozen bars, let them thaw in the fridge overnight for the best texture, or enjoy them slightly chilled right from the freezer for a delightful crunch!
Salted Caramel Pretzel Bars Variations
Feel free to get creative with your No-Bake Salted Caramel Pretzel Bars—your unique touch will make them even more delightful!
-
Gluten-Free: Substitute regular pretzels with gluten-free pretzels for a tasty treat that everyone can enjoy. Your friends will be amazed that they’re gluten-free, too!
-
Nutty Crunch: Add ½ cup of chopped nuts, such as pecans or almonds, into the base for a hearty crunch. This enhances the texture and introduces additional flavors that perfectly complement the caramel.
-
Choco-Drizzle: Instead of melting chocolate chips for the top, drizzle a mixture of milk chocolate and white chocolate for a visually appealing and delicious twist. The visual contrast is just as delightful as the flavor!
-
Sweet & Salty Twist: Mix in a sprinkle of sea salt on top of the chocolate layer before it sets. This will elevate the salted caramel flavor, creating a contrast that makes every bite irresistible.
-
Fruit Add-In: Want to brighten your bars? Toss in a handful of dried cranberries or chopped dates for a fruity note that pairs beautifully with the caramel and pretzels.
-
Flavor Burst: Infuse the caramel with a splash of vanilla extract or a dash of espresso powder for a rich depth of flavor. This small addition can turn your bars into a true gourmet experience.
-
S’mores Style: Layer mini marshmallows and crushed graham crackers on top of the melted chocolate for a nostalgic s’mores twist. Each bite brings a new layer of joy, perfect for summer gatherings!
Make sure to pair these variations with other delightful recipes like Butter Jelly Bars or Butter Oatmeal Bars for a dessert spread that will have your guests raving!
Salted Caramel Pretzel Bars Recipe FAQs
How do I choose the right pretzels for my recipe?
Absolutely! When selecting pretzels, look for ones that are crunchy but not overly stale. Thin and salty pretzels work best, giving the perfect balance to the sweetness of the salted caramel. If gluten-free is your goal, many brands offer excellent alternatives that won’t compromise flavor or texture.
How should I store my salted caramel pretzel bars?
Store your salted caramel pretzel bars in an airtight container in the refrigerator. They will stay fresh for up to one week, which makes them perfect for sweet cravings anytime! Just make sure they’re fully chilled before placing them in the container to avoid stickiness.
Can I freeze salted caramel pretzel bars?
Very! To freeze, first, wrap each bar tightly in plastic wrap. Next, place them in a freezer-safe bag or container, ensuring they are sealed well to prevent freezer burn. They can last for up to three months in the freezer. When you’re ready to enjoy them, simply thaw them in the fridge overnight, or you can savor them slightly chilled right from the freezer for that extra crunch!
What should I do if my bars fall apart when I cut them?
If your bars crumble while cutting, it may be due to insufficient chilling or loosely packed pretzel mixture. Make sure to press the mixture firmly into the baking dish to create a solid base. If you find it too crumbly, the next time, chill it for a bit longer before slicing—aim for at least two hours or until set. A warm knife can also help ensure cleaner cuts!
Are there any dietary concerns I should be aware of?
Great question! These salted caramel pretzel bars contain gluten from the pretzels and high sugar content, so they aren’t suitable for those with gluten intolerance or diabetes. You can consider substituting with gluten-free pretzels and use sugar alternatives like monk fruit or erythritol for a sweeter balance without the extra sugar. Always check labels if serving to guests with allergies!
Salted Caramel Pretzel Bars: Sweet, Salty Bliss Awaits
Ingredients
Equipment
Method
- Begin by crushing about 3 cups of pretzels into small pieces, either using a food processor or placing them in a zip-top bag and smashing them with a rolling pin.
- In a mixing bowl, combine the crushed pretzels with ½ cup of melted butter and 1 cup of salted caramel sauce. Stir until everything is well coated and forms a sticky mixture.
- Line an 8x8-inch baking dish with parchment paper for easy removal. Transfer the pretzel mixture into the dish and use your hands or a spatula to firmly press it down into an even layer.
- In a microwave-safe bowl, melt 1 cup of chocolate chips in 30-second intervals, stirring in between, until smooth and glossy.
- Carefully pour the melted chocolate over the pressed pretzel mixture, spreading it evenly with a spatula.
- Cover the baking dish with plastic wrap or aluminum foil, and place it in the refrigerator for at least 2 hours, or until completely set.
- Once chilled, remove the dish from the refrigerator and lift the bars out using the parchment paper. Cut them into squares or rectangles.
Leave a Reply