
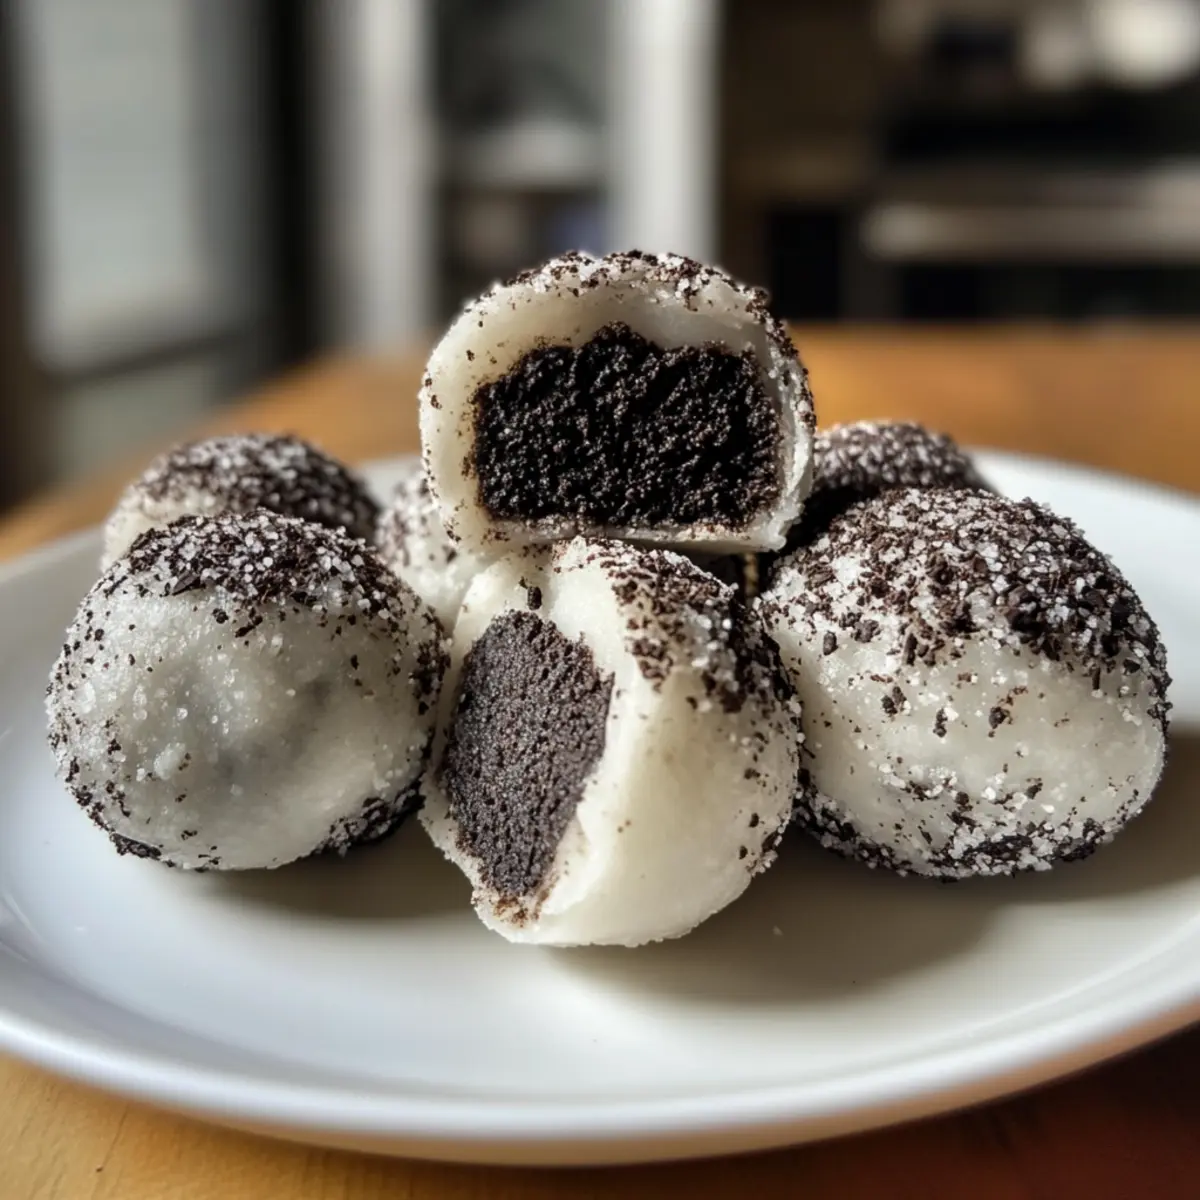
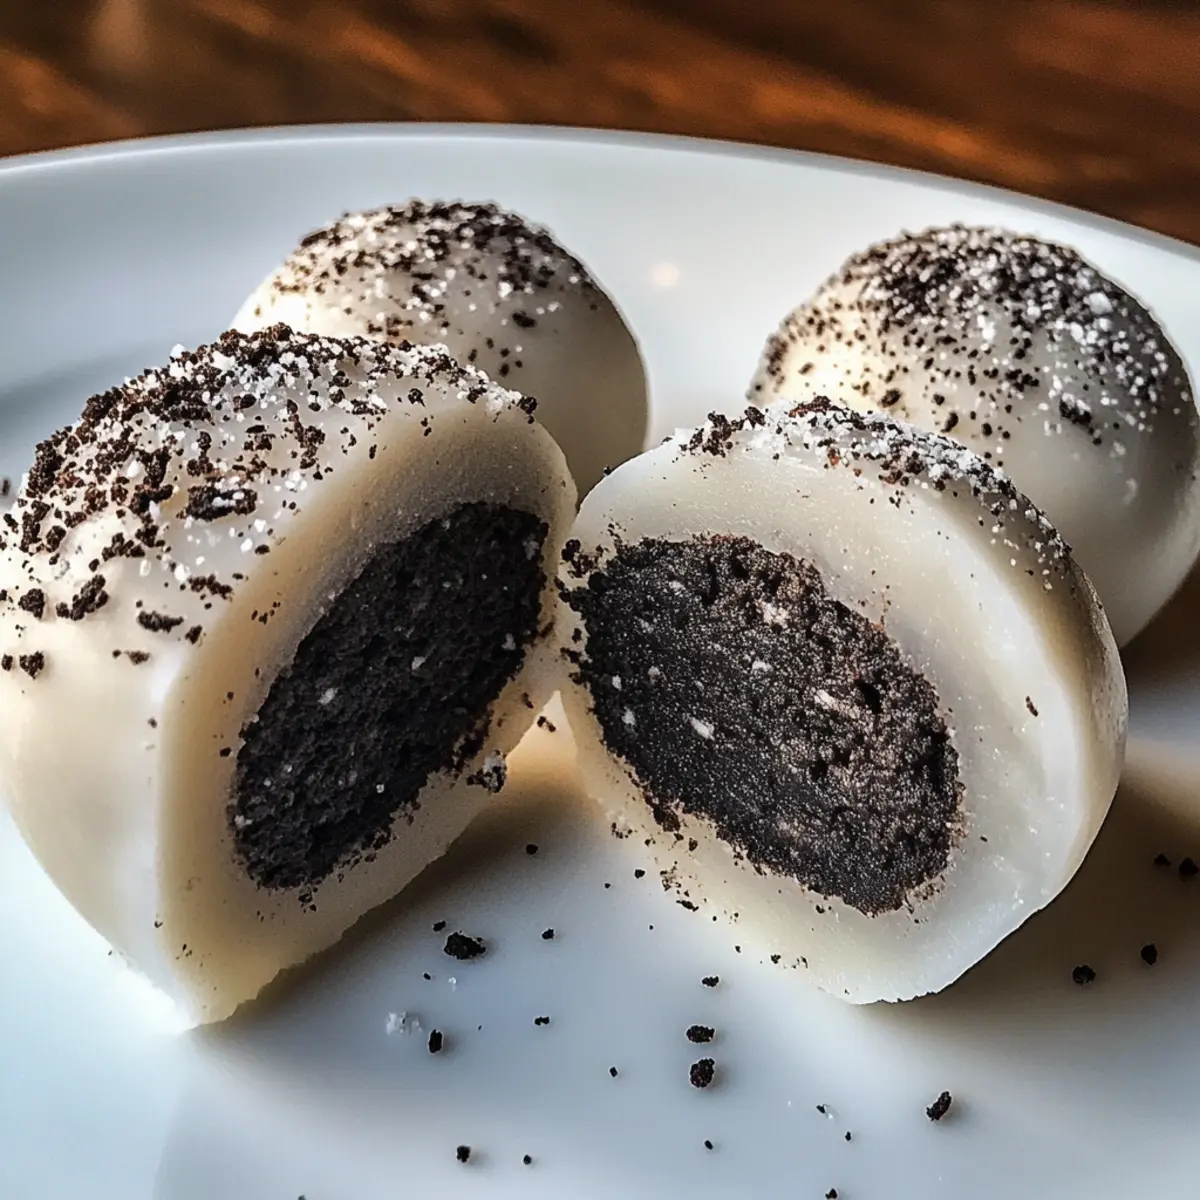
Have you ever craved a dessert that brings together the best of both worlds? Enter the world of Oreo Mochi! This delightful fusion combines the classic chocolatey goodness of Oreos with the chewy, pillowy texture of traditional Japanese mochi. With just a handful of simple ingredients and a minimal prep time, this Oreo Mochi recipe is not only a breeze to make but also a sure-fire crowd-pleaser. Whether you’re hosting a gathering or just indulging your sweet tooth, you’ll appreciate how easily these chewy treats come together. So, are you ready to embark on a fun culinary adventure that will leave everyone wanting more? Let’s dive into the sweet world of Oreo Mochi!

Why Will You Adore This Oreo Mochi?
Irresistible Fusion: This recipe combines two beloved treats – the iconic Oreo and the delightful texture of mochi – creating a unique dessert experience.
Quick and Easy: With minimal prep time, you’ll have these tasty morsels ready in no time, perfect for busy days or unexpected guests.
Fun to Make: Get the whole family involved in the kitchen! Making mochi can be a joyful activity, and the simple process will engage both kids and adults alike.
Versatile Flavor Options: While Oreos steal the show, feel free to experiment with other crushed cookies or flavored extracts for a personalized twist.
Crowd-Pleasing Treat: These chewy delights are a hit at parties or gatherings and are sure to impress friends and family. Don’t forget to check out my Pumpkin Scones Recipe for another crowd-pleasing dessert!
Oreo Mochi Recipe Ingredients
• • All you need for this sweet treat!
For the Mochi Dough
- Glutinous Rice Flour – Essential for creating the chewy structure that makes mochi so delightful; don’t substitute with regular flour!
- Cornstarch – Helps achieve a smooth batter and improves elasticity; no substitutes needed for best results.
- Cocoa Powder – Adds a rich chocolate flavor to the mochi; use unsweetened cocoa for that deep taste.
- White Sugar – Balances out the sweetness in this dessert; you can use powdered sugar for a finer texture but reduce the amount slightly.
- Corn Oil – Provides moisture and adds richness; vegetable oil or melted coconut oil can work as substitutes.
- Milk – Creaminess booster for the dough; feel free to use dairy-free alternatives like almond or oat milk if needed.
For the Coating
- Oreo Cookies – Crushed to infuse flavor and provide a crunchy exterior; you can swap with other chocolate cookies for a fun twist!
Indulge in this Oreo Mochi recipe that transforms your favorite cookies into a dreamy, chewy dessert everyone will love!
Step‑by‑Step Instructions for Oreo Mochi Recipe
Step 1: Mix Ingredients
In a large mixing bowl, combine 1 cup of glutinous rice flour, 2 tablespoons of cornstarch, 2 tablespoons of unsweetened cocoa powder, 1/4 cup of white sugar, 1 tablespoon of corn oil, and 1/2 cup of milk. Whisk everything together until the batter is smooth and free of lumps, ensuring a creamy consistency that sets the foundation for your delicious Oreo Mochi.
Step 2: Sift Batter
To achieve a velvety texture in your mochi, sift the combined mixture through a fine sieve into a medium-sized pot. This crucial step will eliminate any clumps, providing an even batter. Make sure the pot is prepared on the stovetop and ready to heat, as you will soon cook this delightful blend into a dough-like consistency.
Step 3: Heat & Stir
Over low heat, stirring continuously with a silicone spatula, cook the batter for about 10 to 15 minutes. Keep an eye on the mixture as it thickens; it should gradually transform into a cohesive dough that pulls away from the sides of the pot. The visual cue here is a shiny surface with a slight stretch when lifted, indicating it’s ready for the next step in creating your Oreo Mochi.
Step 4: Pull Dough
Once the dough has thickened, carefully transfer it to a lightly greased surface to allow it to cool for about 5 minutes. After it’s cool enough to handle, use your hands to stretch and knead the dough vigorously for 10 minutes. This step is essential for achieving the perfect elasticity and smoothness in your Oreo Mochi, making the treat chewy and delightful.
Step 5: Form Mochi Balls
After the dough has reached the desired consistency, divide it into equal pieces and roll them into small balls, about 1 inch in diameter. Aim for uniform sizes for even cooking and coating. This step lets you create bite-sized portions that are not only pleasing to the eye but also perfect for sharing or indulging in with your loved ones.
Step 6: Coat with Oreo Crumbs
Finally, take your crushed Oreo cookies and place them in a separate bowl. Roll each mochi ball in the Oreo crumbs until fully coated, pressing gently to ensure the crumbs stick. This step adds a delightful crunchy texture to your Oreo Mochi, finishing off this sweet treat with the classic flavor of Oreos that everyone loves.

Make Ahead Options
These Oreo Mochi are perfect for busy home cooks looking to save time without compromising on deliciousness! You can prepare the mochi dough up to 24 hours in advance by following steps 1-4, allowing it to cool completely before wrapping it tightly in plastic wrap and refrigerating. This method helps to maintain the chewy texture you crave while keeping it fresh. When you’re ready to serve, simply divide and roll the chilled dough into balls, coat them in crushed Oreos, and enjoy. Not only will this make your dessert prep easier, but you’ll still end up with irresistibly chewy and chocolatey Oreo Mochi that everyone will adore!
Expert Tips for Making Oreo Mochi
-
Use Glutinous Rice Flour: Ensure you use glutinous rice flour only; regular flour will change the texture and won’t yield that delightful chewiness essential for your Oreo Mochi.
-
Sift Thoroughly: Sifting the batter not only eliminates lumps but also ensures a smooth, uniform dough. Take your time to avoid any graininess in your mochi.
-
Patience is Key: When cooking the batter, stir constantly and be patient. Waiting until the mixture leaves the sides of the pot is crucial for achieving the perfect consistency.
-
Cool Before Handling: Allow the dough to cool for a few minutes before stretching it. This prevents burns and helps you handle it more easily, leading to a better end result.
-
Coating Tips: For a crunchy texture, be generous with the crushed Oreos when coating each mochi ball. Press them gently to ensure they adhere well.
-
Experiment with Flavors: Feel free to explore different cookies or flavoring extracts in your Oreo Mochi recipe, adding your personal touch to this chewy treat!
How to Store and Freeze Oreo Mochi
Airtight Container: Store your Oreo Mochi in an airtight container at room temperature for up to 3 days to keep them fresh and chewy.
Refrigeration: For longer freshness, refrigerate the mochi for up to a week. Ensure they’re in an airtight container to prevent them from drying out.
Freezer Friendly: Mochi can be frozen for up to 1 month. Wrap each piece individually in plastic wrap and place them in a freezer-safe bag for best results.
Thawing: When ready to enjoy, thaw the Oreo Mochi in the fridge overnight or at room temperature for a few hours before serving. Enjoy the delightful chewiness!
Oreo Mochi Recipe Variations
Feel free to get creative with the Oreo Mochi recipe and customize it to your taste!
-
Gluten-Free: Use a gluten-free all-purpose flour blend instead of glutinous rice flour to accommodate dietary needs. However, keep in mind that this may alter the chewy texture.
-
Vegan: Simply replace the milk with your favorite plant-based milk and ensure any alternative cookies used are vegan-friendly. Almond milk or oat milk works wonderfully for an equally creamy outcome!
-
Nutty Bliss: Mix in finely chopped nuts, such as almonds or hazelnuts, into the dough for added crunch and flavor. The nuts’ natural oils will enrich the taste and introduce delightful texture variations.
-
Chocolate Chip Addition: Stir in chocolate chips into the dough before cooking to elevate the chocolate experience. As they melt, they create gooey pockets of chocolate bliss in each soft mochi ball.
-
Coconut Coating: Instead of crushed Oreos, roll the mochi in unsweetened shredded coconut for a tropical twist that enhances the sweetness beautifully. The coconut adds a whimsical touch to your treats!
-
Matcha Mochi: Substitute some cocoa powder with matcha powder for a stunning green tea twist. This will impart earthy flavors and stunning visuals to your mochi—perfect for impressing guests!
-
Spicy Kick: Add a dash of cayenne pepper or chili powder into the cocoa for those who love a spicy contrast to their sweet treats. The slight heat beautifully balances the chocolate, creating a memorable flavor experience.
-
Refreshing Mint: Incorporate mint extract into the dough for a refreshing twist. This works exceptionally well if you’re thinking of a mint chocolate chip variation, reminiscent of favorite ice cream flavors!
When you’re done experimenting, why not try serving your delicious Oreo Mochi with other crowd-pleasing desserts like Pumpkin Scones or a decadent Banana Matcha Smoothie? Enjoy your culinary adventure!
What to Serve with Oreo Mochi
Elevate your dessert spread with delightful pairings that perfectly complement the chewy sweetness of your Oreo Mochi.
-
Rich Chocolate Sauce: Drizzle some warm chocolate sauce on top for an indulgent touch that enhances the chocolate flavor.
-
Fresh Berries: Juicy strawberries or raspberries balance the richness of the mochi and add a refreshing burst of flavor.
-
Matcha Green Tea: A cup of this earthy beverage contrasts beautifully with the sweetness, making it a lovely pairing for a unique experience.
-
Vanilla Ice Cream: Serve alongside a scoop of creamy vanilla ice cream for a delightful temperature contrast and a comforting twist.
-
Coconut Milk Pudding: This creamy dessert adds a tropical flair and smooth texture that beautifully complements the chewy mochi.
-
Espresso or Coffee: Enjoy your Oreo Mochi with a rich cup of espresso or coffee to push the chocolate flavors to a new level.
-
Chilled Milk: A classic choice, ice-cold milk perfectly matches the Oreo flavor, making for a nostalgic and comforting pairing.
-
Caramel Sauce: A light drizzle of caramel adds an extra layer of sweetness, creating a luscious harmony with the chewy dessert.
-
Chocolate Dipped Fruits: Try pairing with chocolate-dipped bananas or strawberries for a multi-texture treat that delights the senses.
Oreo Mochi Recipe FAQs
How do I choose the right glutinous rice flour?
Absolutely! When selecting glutinous rice flour, look for brands that specifically state “glutinous” or “sweet rice flour” on the packaging. Avoid any that just say “rice flour,” as it will not produce the chewy texture essential for your Oreo Mochi. You can often find this flour in Asian grocery stores or health food stores.
What is the best way to store Oreo Mochi?
I recommend storing your Oreo Mochi in an airtight container at room temperature for 2 to 3 days. If you’re not ready to indulge yet, feel free to refrigerate them for up to a week; just be sure they’re sealed tightly to prevent drying out. For longer storage, you can freeze the mochi for up to one month as long as you wrap each piece well to preserve their lovely chewiness.
Can I freeze Oreo Mochi? If so, how?
Very! To freeze your Oreo Mochi, wrap each individual mochi ball tightly in plastic wrap, ensuring no air gets in. Then, place them in a freezer-safe resealable bag. When it’s time to enjoy them, simply thaw them overnight in the refrigerator or at room temperature for a couple of hours. This method keeps their delightful texture intact!
What should I do if my mochi dough is too sticky?
If you find your mochi dough sticky, don’t worry! Simply dust your hands and the working surface with a bit of cornstarch to help with handling. Make sure to knead the dough until it becomes smooth and elastic, which will help reduce stickiness. If the dough remains unmanageable, it might need more cooking on low heat, as it needs to achieve that perfect dough-like consistency.
Are there any dietary considerations I should keep in mind?
Absolutely! If you’re preparing this Oreo Mochi for someone with dietary restrictions, you have options! Use almond or oat milk for a dairy-free version, and make sure to select gluten-free Oreos or any other cookies that meet dietary needs. Always check ingredients for allergies, especially for those who may be sensitive to nuts, gluten, or dairy.
Can I make variations of this Oreo Mochi recipe?
Oh, the more the merrier! Feel free to play around with different cookie flavors or additional extracts. I often switch up the cookies to include chocolate chip or graham crackers for a unique twist. You can also personalize the taste by adding flavoring extracts, like vanilla or almond, to your mochi dough. Experimenting is part of the fun!
Oreo Mochi Recipe: A Chewy Chocolate Dream Come True
Ingredients
Equipment
Method
- In a large mixing bowl, combine glutinous rice flour, cornstarch, cocoa powder, white sugar, corn oil, and milk. Whisk until smooth.
- Sift the mixture into a medium-sized pot to eliminate lumps.
- Cook the batter over low heat, stirring continuously for 10 to 15 minutes, until it thickens and pulls away from the sides.
- Transfer the dough to a lightly greased surface and cool for 5 minutes, then knead for 10 minutes.
- Divide the dough into equal pieces and roll them into 1-inch balls.
- Roll each mochi ball in crushed Oreo crumbs until fully coated.
Leave a Reply