
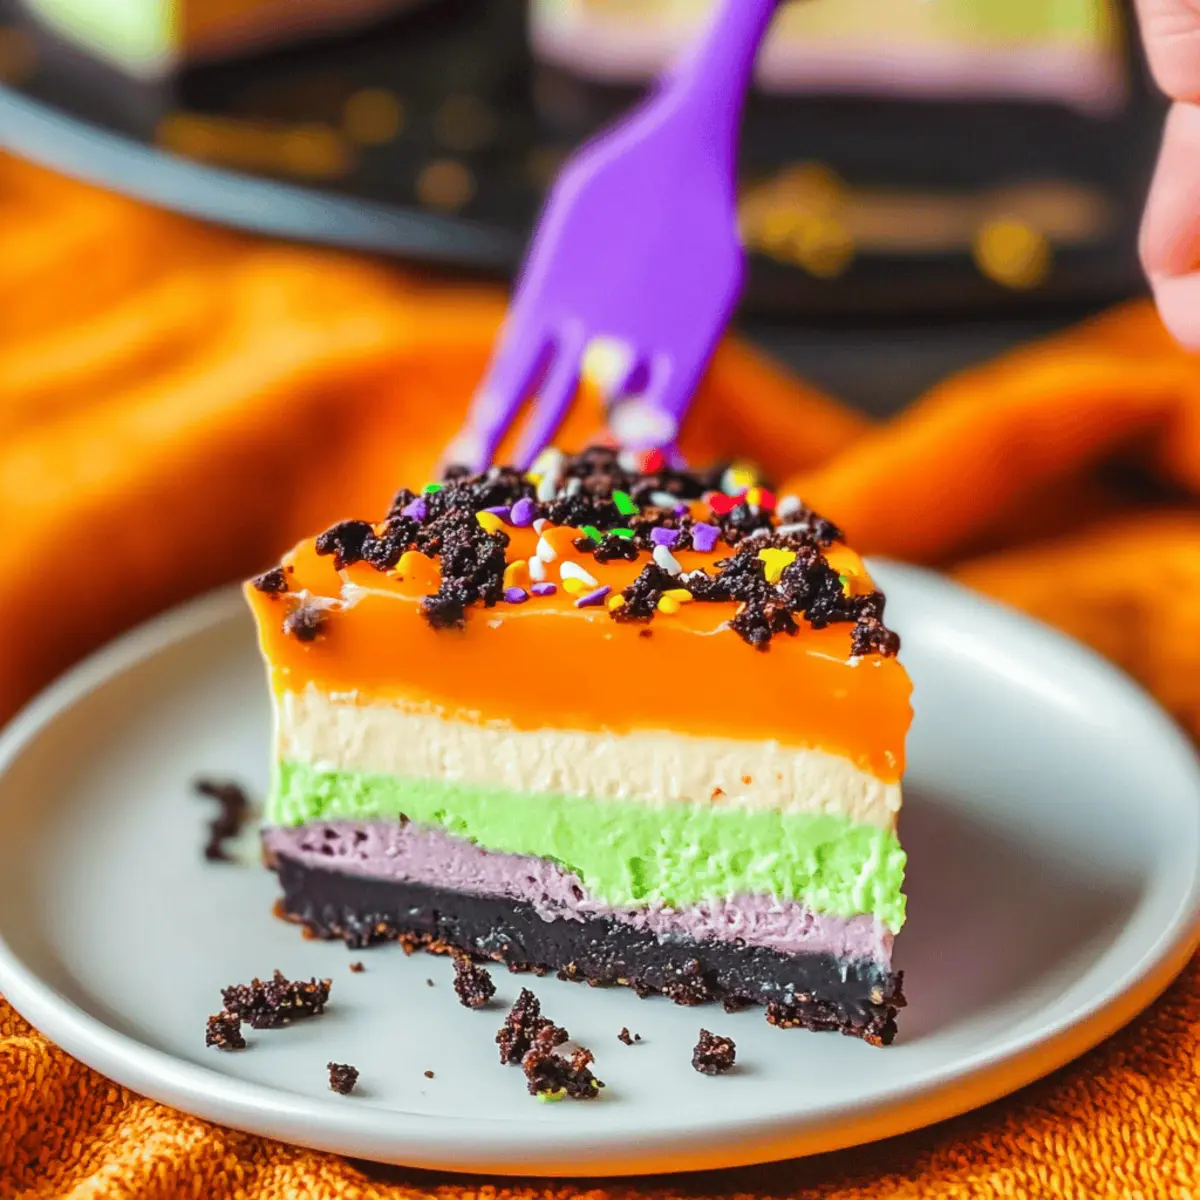
As the leaves start to turn and a crisp chill fills the air, I can’t help but indulge in Halloween spirit—starting with something sweet. This No Bake Halloween Lush isn’t just a dessert; it’s a colorful layered masterpiece that showcases festive flavors without ever needing the oven. With its easy prep and make-ahead convenience, this delight steals the show at any gathering, ensuring you can focus on what truly matters—sharing joyful moments with family and friends. Imagine layers of crushed chocolate cookies, creamy cheesecake, and vibrant orange goodness, topped with a playful sprinkle of Halloween magic. Who wouldn’t want a slice of this eye-catching treat? Ready to conjure up some delicious fun in your kitchen? Let’s dive in!

Why Make No Bake Halloween Lush?
Easy Preparation: No baking required—just mix and layer, making this dessert stress-free!
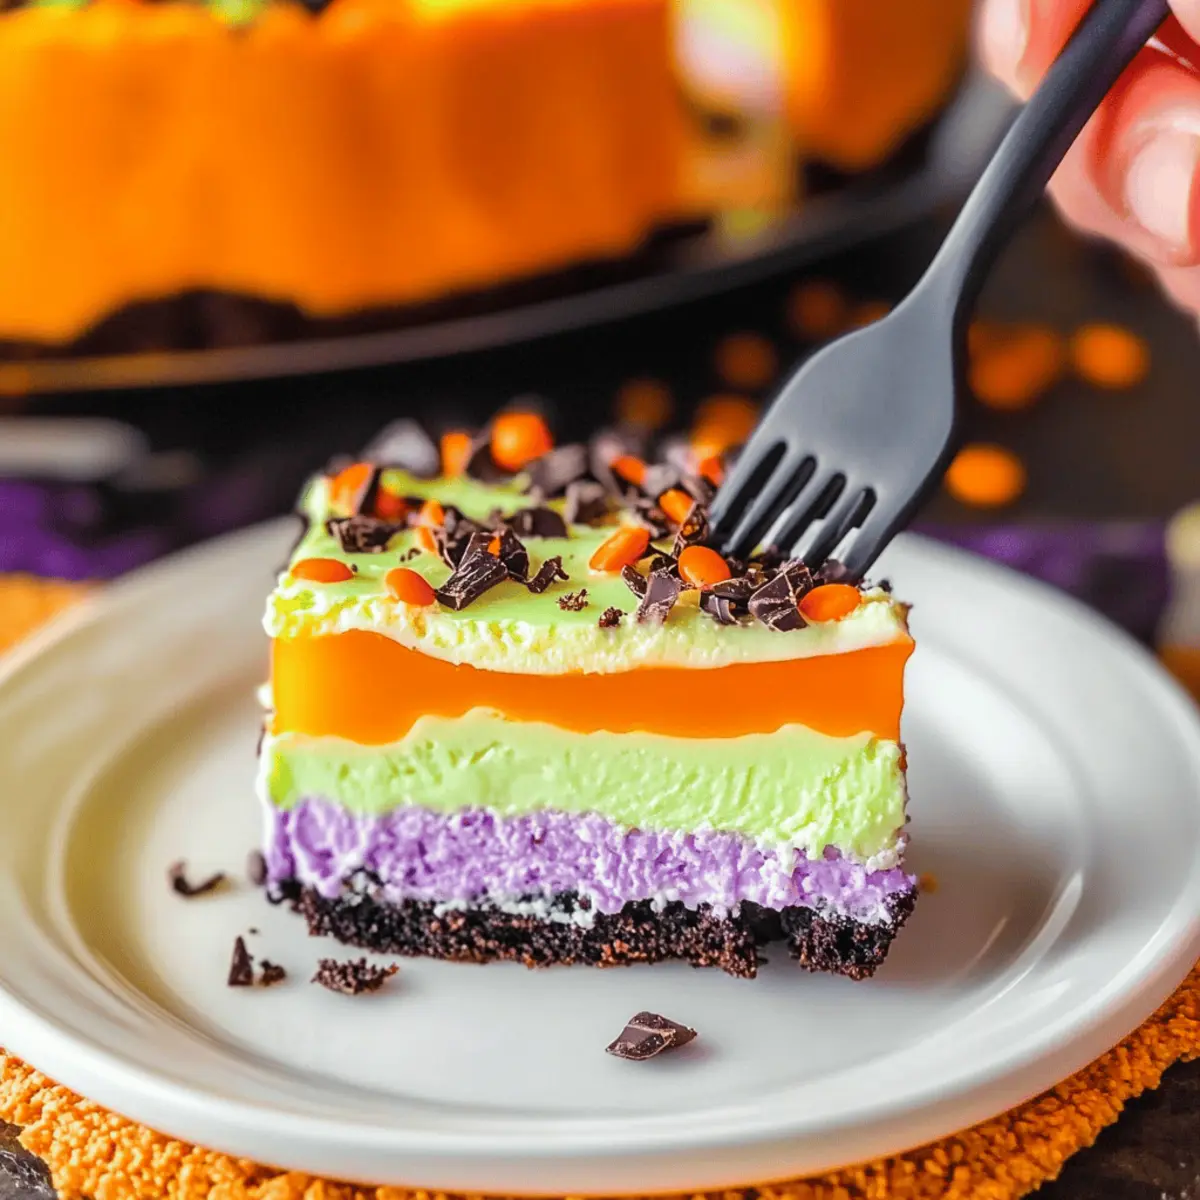
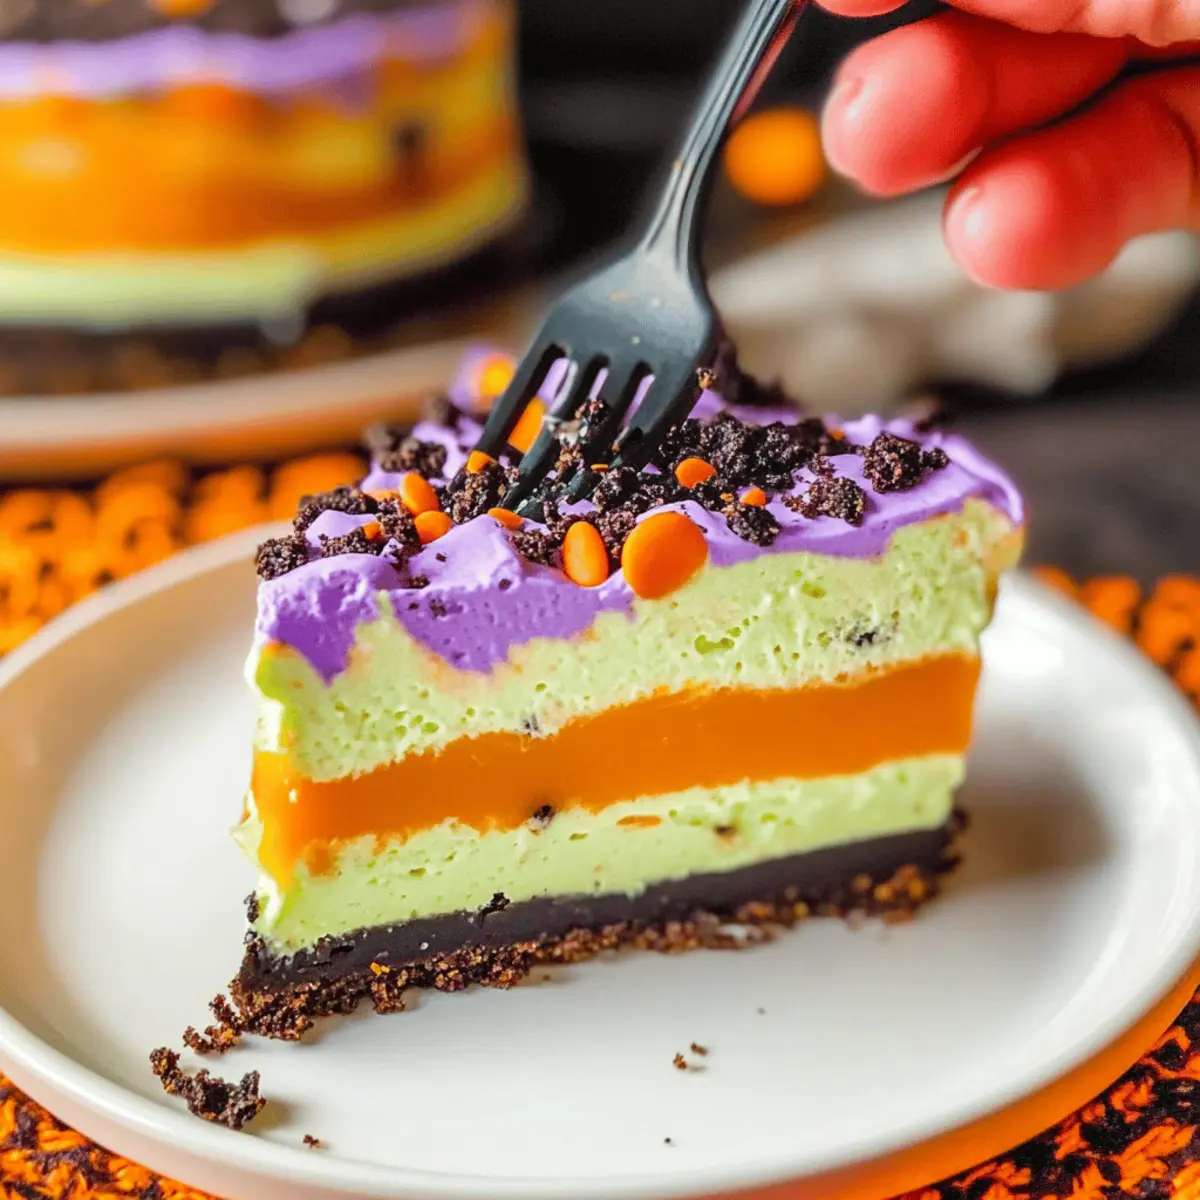
Vibrant Colors: The bright layers are visually stunning and perfect for Halloween celebrations.
Crowd Favorite: Both kids and adults will adore the combination of flavors and textures.
Flexible Ingredients: Make it your own by substituting ingredients, like using ginger snaps for a unique twist.
Make-Ahead Magic: Prepare it the day before your event and store it in the fridge—so convenient!
Fun Presentation: Serve it in themed cups or bowls for an extra festive touch that makes every slice a treat.
No Bake Halloween Lush Ingredients
For the Crust
• Chocolate Sandwich Cookies – The perfect base for a crunchy crust; feel free to substitute with chocolate wafers for a different flavor.
• Butter – Melted to bind the crust together; both unsalted and salted work, depending on your taste preference.
For the Orange Layer
• Orange Gelatin – Provides that spooky orange color and flavor; other flavored gelatins can work but might change the hue.
• Vanilla Instant Pudding & Pie Filling Mix – Adds creaminess and thickens the orange layer; swap for chocolate pudding for a fun twist.
• Milk – Mixes with pudding to create a smooth consistency; any type, including plant-based, is acceptable.
For the Cheesecake Layer
• Cream Cheese – This creates that velvety, creamy cheesecake layer; consider Neufchâtel for a lighter touch.
• Powdered Sugar – Sweetens the cheesecake mix beautifully; adjust to taste for your preferred sweetness level.
• Whipped Topping – Essential for both the cheesecake layer and topping; homemade whipped cream is a delightful alternative.
For the Decoration
• Food Coloring – Use to achieve vibrant Halloween colors; gel food colorings can create even brighter shades.
• Sprinkles – Sprinkle fun over the top for that festive look; any Halloween-themed sprinkles will enhance the appeal.
Embrace the spirit of Halloween and whip up this No Bake Halloween Lush for a deliciously fun treat!
Step‑by‑Step Instructions for No Bake Halloween Lush
Step 1: Prepare the Crust
Start by crushing the chocolate sandwich cookies in a food processor until they resemble fine crumbs. Melt the butter in a microwave-safe bowl, then combine it with the crushed cookies until well mixed. Press this mixture firmly into the bottom of a 9×13 glass baking dish to create a solid crust layer, leveling it out for even texture.
Step 2: Make the Orange Layer
In a medium bowl, dissolve the orange gelatin in 1 cup of boiling water, stirring until fully dissolved. In another bowl, whisk together the vanilla instant pudding mix and 2 cups of milk until thickened, taking about 2 minutes. Carefully combine the pudding mixture with the gelatin until blended and set aside to thicken slightly, ensuring a vibrant orange layer for your No Bake Halloween Lush.
Step 3: Prepare Cream Cheese Layer
Using an electric mixer, beat the cream cheese and powdered sugar together in a large bowl until smooth and creamy, about 2-3 minutes. Fold in 2 cups of whipped topping gently, making sure not to deflate it. Add a few drops of food coloring to achieve your desired shade; this colorful cheesecake layer will add deliciousness and charm to your dessert.
Step 4: Layer the Dessert
Spread the cream cheese mixture evenly over the prepared crust in the baking dish, smoothing it out gently with a spatula. Next, pour the slightly thickened orange gelatin mixture over the cream cheese layer, ensuring it covers the entire surface. This beautiful layering is key to creating your stunning No Bake Halloween Lush.
Step 5: Top with Whipped Cream
Take the remaining whipped topping and mix in food coloring as desired to create a festive hue. Once colored, gently spread this whipped topping over the orange gelatin layer, covering it completely for a fluffy finish. The vibrant colors will make your dessert even more appealing as it comes together beautifully.
Step 6: Chill
Cover the layered dessert with plastic wrap and place it in the refrigerator to chill for at least 4 hours, or until set firm. Chilling is crucial for the layers to meld together properly, resulting in a delightful No Bake Halloween Lush that slices beautifully for serving.
Step 7: Serve & Enjoy
After chilling, remove the dessert from the refrigerator and use a sharp knife to slice it into squares for serving. For a fun touch, garnish each piece with Halloween-themed sprinkles. Present your colorful layered masterpiece and get ready to delight family and friends with this festive treat!
What to Serve with No Bake Halloween Lush?
Elevate your festive gatherings and create a complete Halloween experience with delightful pairings that complement your delicious creation.
- Crispy Caramel Apples: The crunch of fresh apples dipped in gooey caramel offers a sweet contrast to the creamy lush.
- Spiced Pumpkin Bread: A slice of moist pumpkin bread adds a warm, autumnal flavor that perfectly matches the Halloween theme.
- Ghostly Meringue Cookies: Light and airy meringue cookies shaped like ghosts provide a fun, whimsical touch to your dessert table.
- Nutty Trail Mix: A crunchy mix of nuts, dried fruits, and chocolate is a great savory-sweet snack that balances the richness of the lush.
- Witch’s Brew Punch: Serve a vibrant, fruity punch in a cauldron-style bowl for a fun, spooky drink that guests can enjoy alongside dessert.
- Chocolate-Dipped Pretzels: The salty crunch of pretzels coated in chocolate offers a delightful balance to the layers of sweetness in your lush.
- Frosted Sugar Cookies: Brightly decorated sugar cookies can double as festive treats and edible decor around your No Bake Halloween Lush.
- Warm Apple Cider: A steaming mug of spiced apple cider brings comforting warmth and invokes the essence of fall, enhancing the seasonal experience.
How to Store and Freeze No Bake Halloween Lush
Fridge: Store your No Bake Halloween Lush in the refrigerator for up to 4 days. Cover it with plastic wrap to maintain freshness and prevent absorption of odors.
Freezer: For longer storage, wrap the dessert tightly in plastic wrap and aluminum foil, then freeze for up to 3 months. Defrost in the refrigerator overnight before serving.
Serving: If you find the dessert has softened after freezing, let it chill in the fridge for a couple of hours before slicing to enhance the texture.
Reheating: This dessert is served chilled; no reheating is necessary! Enjoy it as a refreshing treat right out of the fridge.
No Bake Halloween Lush Variations
Feel free to personalize your No Bake Halloween Lush with these delightful swaps and twists that will elevate your dessert experience!
-
Ginger Snap Crust: Instead of chocolate cookies, use ginger snaps for a warm, autumnal flavor that complements Halloween perfectly.
-
Festive Gelatin Colors: Swap the orange gelatin for other vibrant flavors like green or purple. This creates a colorful twist that embraces different seasonal themes.
-
Mini Cup Servings: For easy serving at parties, assemble the layers in individual cups. This makes for a fun presentation and portion control for your guests.
-
Chocolate Pudding Variation: Replace the vanilla pudding mix with chocolate pudding to create a rich, decadent flavor that surprises with each bite.
-
Nut Crust Option: Combine crushed nuts like almonds or pecans with the crust for added crunch and heartiness. It’s a simple way to elevate the texture!
-
Homemade Whipped Cream: Instead of store-bought whipped topping, whip up your own cream for a fresher taste and a beautiful finish on your layered dessert.
-
Syrupy Sweet Drizzle: Drizzle some caramel or chocolate sauce over the top before serving for an extra layer of indulgence that little ones will love.
-
Spicy Kick: For those who enjoy a bit of heat, add a pinch of cayenne pepper to the cream cheese layer. It pairs surprisingly well with the sweet flavors and adds an exciting twist.
Remember, your kitchen is your playground, so don’t be shy about experimenting! Speaking of fun desserts, you might love trying out our Cheesy Pumpkin Bake for a delightful seasonal treat or the delightful Bake Toffee Cheesecake to keep those sweet celebrations going!
Expert Tips for No Bake Halloween Lush
- Chill Thoroughly: Be sure to refrigerate for at least 4 hours. This is essential for achieving the perfect consistency in your No Bake Halloween Lush.
- Room Temperature Cream Cheese: Let your cream cheese sit out for 30 minutes before mixing; this will ensure a smoother texture in the cheesecake layer.
- Gentle Folding: When mixing in whipped topping, fold gently to preserve its lightness. Overmixing can lead to a denser texture.
- Layering Tips: Pour the orange layer slowly over the cream cheese layer to maintain distinct layers. This enhances the visual appeal of your dessert.
- Fun Variations: Don’t hesitate to experiment! Substitute chocolate cookies with ginger snaps for a seasonal twist on your No Bake Halloween Lush.
- Freezing Option: For cleaner slices, briefly freeze the dessert before cutting; this helps maintain neat layers and makes serving easier.
Make Ahead Options
This No Bake Halloween Lush is a fantastic choice for meal prep, allowing you to prepare it up to 24 hours in advance! You can mix the crust and the cream cheese layer a day ahead, then assemble the dessert the evening before your gathering. To maintain its delightful texture and flavors, simply store it covered in the refrigerator. When you’re ready to serve, unwrap the dessert and pour the orange gelatin layer over the cream cheese, allowing each layer to meld beautifully. Finish by topping with colored whipped cream and festive sprinkles just before presentation, ensuring a fresh and stunning dessert that will impress your guests while saving you time on the big day!
No Bake Halloween Lush Recipe FAQs
What kind of cookies should I use for the crust?
I recommend using chocolate sandwich cookies, like Oreos, for the base crust of your No Bake Halloween Lush. If you prefer a different flavor, chocolate wafers or chocolate graham crackers work beautifully too. The key is to ensure they are crushed finely to create a sturdy crust.
How should I store my No Bake Halloween Lush?
You can store your No Bake Halloween Lush in the refrigerator for up to 4 days. Make sure to cover it tightly with plastic wrap to keep it fresh and prevent it from absorbing any odors. It’s perfect for make-ahead dessert planning!
Can I freeze No Bake Halloween Lush?
Absolutely! If you want to store it for longer, wrap your No Bake Halloween Lush tightly in plastic wrap followed by aluminum foil, and freeze for up to 3 months. When you’re ready to enjoy, simply defrost it in the refrigerator overnight. If it’s a little soft after freezing, allow it to chill in the fridge for a couple of hours before slicing.
What can I do if my layers don’t set properly?
If you find your layers aren’t setting as expected, it might be due to insufficient chilling time. Make sure to refrigerate for at least 4 hours to allow everything to meld together nicely. If it still seems too soft, you can briefly freeze it for 30 minutes before slicing for cleaner pieces.
Are there any allergy considerations?
Yes! This recipe contains dairy and gluten. If you’re accommodating dietary needs, consider using gluten-free chocolate cookies and dairy-free cream cheese or whipped topping. There are plenty of alternatives available that can be just as delicious and festive. Always check ingredient labels to cater to allergies.
No Bake Halloween Lush: Your Showstopper Dessert Treat
Ingredients
Equipment
Method
- Crush the chocolate sandwich cookies in a food processor until they resemble fine crumbs. Melt the butter and combine it with the crushed cookies until well mixed. Press firmly into the bottom of a 9x13 glass baking dish to create a solid crust layer.
- In a medium bowl, dissolve the orange gelatin in 1 cup of boiling water. In another bowl, whisk together the vanilla instant pudding mix and 2 cups of milk until thickened. Carefully combine both mixtures until blended and set aside.
- Beat the cream cheese and powdered sugar together until smooth. Fold in 2 cups of whipped topping and a few drops of food coloring for the cheesecake layer.
- Spread the cream cheese mixture evenly over the crust, smoothing it out. Pour the orange gelatin mixture over the cream cheese layer.
- Mix the remaining whipped topping with food coloring and spread it over the orange layer for a fluffy finish.
- Cover with plastic wrap and refrigerate for at least 4 hours until set firm.
- Slice into squares and garnish with Halloween-themed sprinkles before serving.
Leave a Reply