
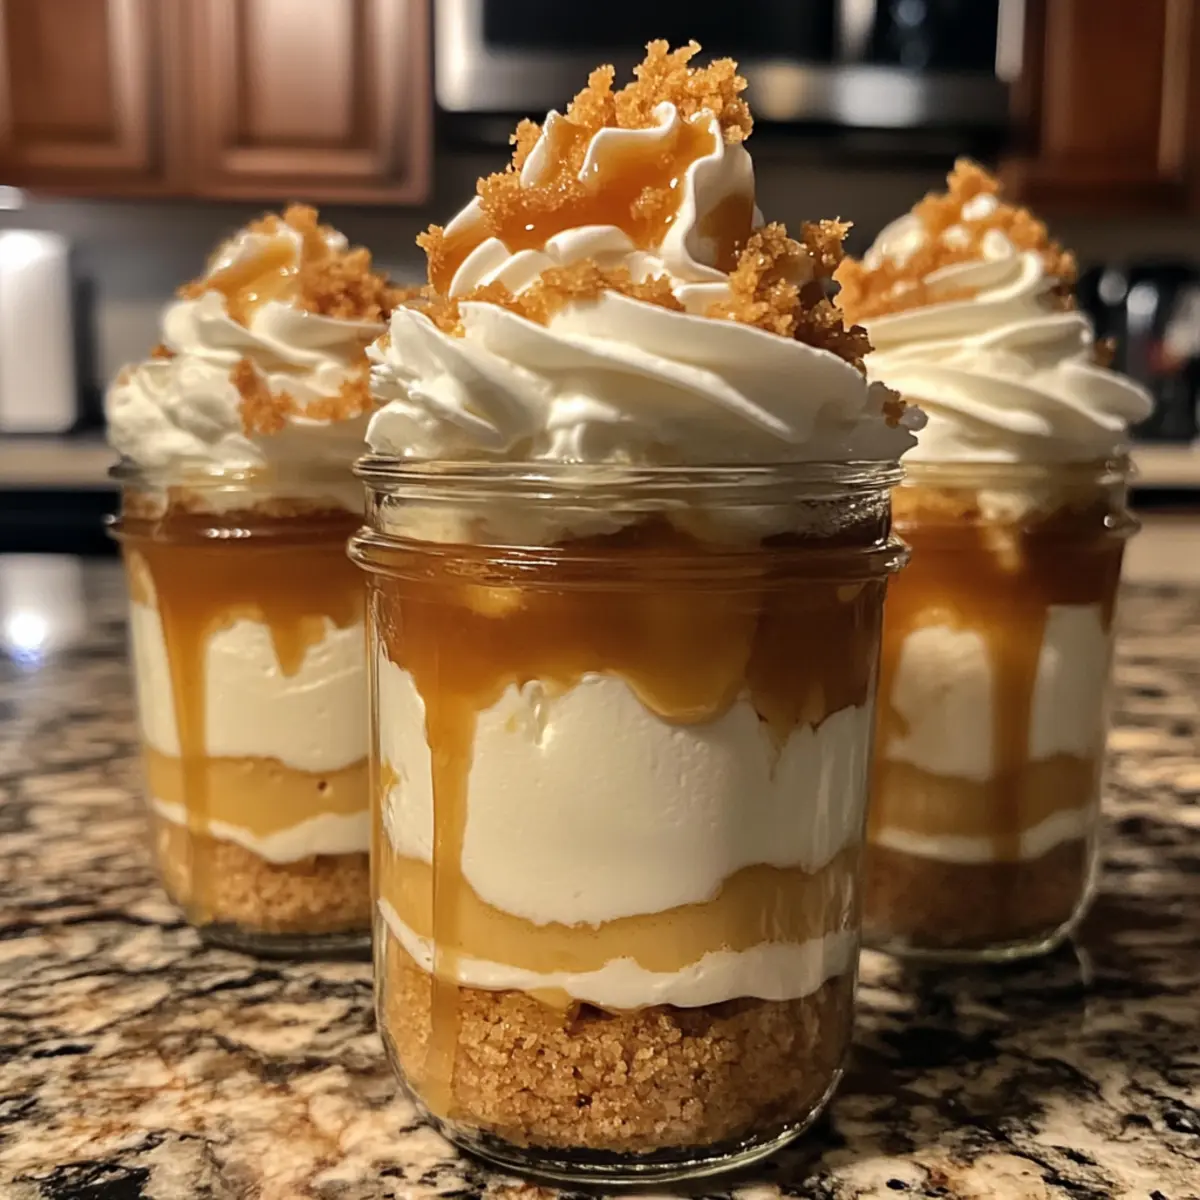
As I stirred the ingredients for my latest creation, the delightful scent of butterscotch wafted through my kitchen, instantly transporting me to the magical world of Harry Potter. That’s right—today, I’m excited to share a recipe for Harry Potter Butterbeer Cheesecake Jars, a delightful no-bake dessert that captures the whimsical essence of Butterbeer. These jars are not just visually enchanting; they also deliver a luxuriously creamy cheesecake layered atop a satisfying graham cracker crust. Perfect for anyone looking to impress their friends or simply craving a sweet treat, this recipe allows for easy substitutions, making it accessible to all. Plus, since it’s quick and requires no baking, you’ll be able to whip up these magical delights in no time. Who’s ready to dive into the world of desserts that promise a little sparkle?
Why is this dessert a must-try?
Irresistibly Creamy: The rich cheesecake filling blends butterscotch and vanilla for a taste that’s simply magical.
No-Bake Wonder: You can whip up these jars in minutes—perfect for last-minute gatherings or cravings!
Versatile Substitutions: Easily adapt the recipe with different crusts or flavors to match your preferences.
Crowd-Pleasing Delight: Loved by fans of all ages, these jars are bound to impress at any party or family dinner.
Make Ahead Convenience: Prepare them up to three days in advance, so you can enjoy spontaneous celebrations!
Pair these enchanting jars with a warm drink, or explore more delicious options like Harry Potter Butterbeer to elevate your magical dessert experience!
Harry Potter Butterbeer Cheesecake Jars Ingredients
For the Crust
• Graham Cracker Crumbs – Provides structure and a crunchy base for the jars; substitute with crushed digestive biscuits or chocolate cookie crumbs for a twist.
• Butter – Binds the crumbs together, creating a cohesive crust; use melted plant-based butter for a dairy-free alternative.
For the Filling
• Cream Cheese – Forms the creamy filling; ensure it’s softened for easy mixing; use dairy-free cream cheese for a vegan option.
• Powdered Sugar – Sweetens the cheesecake and ensures a smooth texture; granulated sugar can be substituted if needed.
• Butterscotch Sauce – Adds the signature Butterbeer flavor; in a pinch, high-quality caramel sauce can substitute.
• Vanilla Extract – Enhances flavors and adds depth to the filling.
• Heavy Cream – Whipped to stiff peaks for a light, airy cheesecake texture; coconut cream is a great dairy-free alternative.
For the Topping
• Whipped Cream – Adds a creamy, fluffy finish, perfect for topping your jars; garnish with cinnamon or toffee bits for extra flavor.
These delightful Harry Potter Butterbeer Cheesecake Jars promise to bring a dash of magic to your homemade desserts!
Step‑by‑Step Instructions for Harry Potter Butterbeer Cheesecake Jars
Step 1: Prepare the Graham Cracker Crust
In a mixing bowl, combine the graham cracker crumbs and melted butter until thoroughly mixed. You should achieve a sandy texture that holds together when pressed. Firmly pack this mixture into the bottom of individual serving jars, creating a solid base. Use the back of a spoon or your fingers to press evenly and compactly.
Step 2: Make the Cream Cheese Filling
In another bowl, using a hand mixer, beat the softened cream cheese until it is light and fluffy, usually taking about 2 minutes. Gradually add the powdered sugar, butterscotch sauce, and vanilla extract, mixing continuously until smooth and well-blended. This mixture should be creamy, with no lumps remaining, capturing the essence of the Harry Potter Butterbeer flavor.
Step 3: Whip the Heavy Cream
In a chilled mixing bowl, pour in the heavy cream and whip it using an electric mixer until stiff peaks form, about 3-5 minutes. Be careful not to overwhip, as it can become grainy. The whipped cream should be light and airy, ready to fold into the cream cheese mixture for that perfect cheesecake texture.
Step 4: Combine the Mixtures
Gently fold the whipped cream into the cream cheese mixture using a spatula. Start by adding a third of the whipped cream to lighten the mixture, then carefully fold in the remainder until just combined. This step is crucial for achieving a lovely, fluffy filling in your Harry Potter Butterbeer Cheesecake Jars.
Step 5: Layer the Cheesecake Filling
Using a spoon or piping bag, carefully layer the cheesecake filling over the crust in each jar, filling them generously. Aim for a tall layer of filling for that delightful dessert experience. Leave a little space at the top of each jar for whipped cream and toppings, ensuring they are beautifully presented.
Step 6: Add the Whipped Cream Topping
Once all jars are filled, top each with a generous dollop of whipped cream. This fluffy layer adds a beautiful contrast to the creamy cheesecake beneath. Ensure the whipped cream is soft and luscious; you can even use a piping bag to create decorative swirls for an extra magical touch.
Step 7: Drizzle with Butterscotch Sauce
To finish the Harry Potter Butterbeer Cheesecake Jars, drizzle butterscotch sauce artistically over the whipped cream. This not only enhances the flavor but also adds a beautiful, glistening touch that invites you to indulge. Use as much or as little as you like for that sweet finishing touch.
Step 8: Chill Before Serving
Place the jars in the refrigerator for at least 2 hours to chill and allow the flavors to meld beautifully. This chilling time is essential, as it helps the cheesecake filling set to the right consistency, making each jar a delightful treat that’s incredibly refreshing and indulgent when served cold.
How to Store and Freeze Harry Potter Butterbeer Cheesecake Jars
Fridge: Store your jars tightly covered in the refrigerator for up to 3 days to ensure freshness and maintain that delightful creamy texture.
Freezer: For longer storage, freeze the jars right after filling—just make sure they’re airtight. They can be kept frozen for up to 2 months.
Thawing: When ready to enjoy, simply transfer the jars to the fridge and let them thaw overnight. This way, you’ll retain their magical flavor and consistency.
Serving Tips: Once thawed, consider adding a fresh dollop of whipped cream or a drizzle of butterscotch sauce to elevate the presentation before serving.
Harry Potter Butterbeer Cheesecake Jars Variations
Feel free to sprinkle your own magic over these delightful cheesecake jars with these simple twists!
-
Dairy-Free: Use dairy-free cream cheese and coconut cream for the filling to keep this delicious treat vegan and light.
Whether you’re lactose intolerant or just exploring, this variation keeps the creamy texture while celebrating plant-based goodness. -
Crunchy Surprise: Add a layer of crushed toffee bits between the crust and the filling for an added crunchy texture that will surprise your taste buds.
The mix of creamy and crunchy is a delightful experience with every bite! -
Top with Flavor: Consider an alternative garnish of chocolate shavings or crushed nuts for a nutty twist to the whipped cream topping.
Elevate your jars with decorative and flavorful toppings to please both the eyes and the palate. -
Spiced Flavor: Replace graham cracker crumbs with crushed ginger snaps for a warm, spicy flavor that complements the butterscotch perfectly.
This twist will have you feeling cozy, as the warmth of spices elevates the dessert experience. -
Fruity Addition: Incorporate a layer of macerated strawberries or raspberries for a fresh, fruity contrast to the rich filling.
The brightness of the fruit gives an exciting twist to the enchanting flavors of Butterbeer. -
Extra Butterscotch Sizzle: Drizzle extra butterscotch sauce into the filling for a more pronounced sweetness; it’ll make every rich bite even more delectable.
A little extra indulgence never hurt anyone, right? -
Maple Twist: Use maple syrup instead of powdered sugar for added depth in sweetness, creating a uniquely enchanting taste.
The maple brings an earthy sweetness that complements the other flavors beautifully.
Ready to explore even more magical treats? Be sure to check out these delightful recipes, like Lemon Meringue Cheesecake or a satisfying Lemon Cheesecake Mousse, both of which are sure to enchant your table!
Expert Tips for Harry Potter Butterbeer Cheesecake Jars
-
Room Temperature Cheese: Ensure your cream cheese is at room temperature for easy blending; this avoids lumps and ensures a smooth filling.
-
Whip Gently: When whipping heavy cream, stop at firm peaks; overwhipping can lead to a grainy texture instead of a light, airy cheesecake.
-
Chill Time: For the best flavor, let your jars chill in the refrigerator for at least 2 hours before serving; this enhances the texture and taste.
-
Seal for Freshness: Store jars tightly covered in the refrigerator for up to 3 days to maintain maximum freshness and flavor in your Harry Potter Butterbeer Cheesecake Jars.
-
Decadent Toppings: Experiment with toppings beyond just whipped cream; a sprinkle of cinnamon or even a few butterscotch chips can elevate your dessert’s presentation and taste.
Make Ahead Options
These Harry Potter Butterbeer Cheesecake Jars are perfect for meal prep, allowing you to create a magical dessert in advance! You can prepare the crust and the cheesecake filling up to 3 days ahead. Simply assemble the jars by pressing the crust into the bottoms and layering the cheesecake mixture, then store them tightly covered in the refrigerator to maintain freshness. For the best results, add the whipped cream topping and butterscotch drizzle just before serving, ensuring it retains its delightful texture and flavor. This way, you’re set for busy weeknights or impromptu gatherings, delighting your guests with this enchanting treat!
What to Serve with Harry Potter Butterbeer Cheesecake Jars
To create a whimsical feast that pairs perfectly with these enchanting jars, consider these delightful accompaniments.
- Warm Spiced Tea: The soothing aroma of spiced tea complements the rich flavors of the cheesecake, creating a cozy, magical moment.
- Buttery Shortbread Cookies: These melt-in-your-mouth cookies balance the creamy texture of the cheesecake, adding a delightful crunch with each bite.
- Caramel Sauce Drizzle: For an extra touch of indulgence, drizzle warm caramel sauce over the jars to enhance the butterscotch notes and add a sweet sheen.
- Fresh Berries: A handful of tart raspberries or strawberries adds a pop of color and a refreshing burst of flavor, making each spoonful a celebration.
- Chocolate-Dipped Pretzels: The saltiness of the pretzels contrasts beautifully with the sweetness of the cheesecake, creating an exciting combination of textures and flavors.
- Chilled Vanilla Milk: Serve these jars with a glass of cold vanilla milk for a nostalgic pairing that enhances the magical feel of the dessert.
- Toffee Bits Sprinkle: Add a sprinkle of toffee bits on top for an extra crunch, enhancing the dessert’s texture while elevating its presentation.
- Miniature Pumpkin Pies: Perfect for fans of all things fall; the spiced pumpkin flavor provides a lovely contrast and seasonal theme for dessert lovers.
Harry Potter Butterbeer Cheesecake Jars Recipe FAQs
How do I choose the right ripeness for the ingredients?
When selecting your cream cheese, ensure it’s fully softened at room temperature to achieve a smooth consistency in your filling. For the best flavor, take care to choose a butterscotch sauce that has a rich, deep color, avoiding any that appear overly watery or light. This will enhance the magical taste of your Harry Potter Butterbeer Cheesecake Jars!
What’s the best way to store Harry Potter Butterbeer Cheesecake Jars?
Store your jars tightly covered in the refrigerator for up to 3 days. Keeping them sealed will help maintain that creamy texture and delightful flavor. I often place them in a glass container with a lid for added protection against any fridge odors.
Can I freeze Harry Potter Butterbeer Cheesecake Jars?
Absolutely! You can freeze the jars right after filling them—just ensure they’re airtight. They will stay fresh for up to 2 months. To thaw, simply transfer the jars to the fridge a day before serving, allowing them to defrost gently without losing texture or flavor.
What should I do if my whipped cream is too grainy?
If you find your whipped cream has become grainy, it’s likely you’ve overwhipped it. To rescue it, gently fold in a small amount of unwhipped heavy cream—it’ll help bring back that light and airy texture. Remember, stop whipping when you reach firm peaks for the best results in your cheesecake filling!
Are there any dietary considerations I should keep in mind?
Absolutely! For a vegan version, substitute cream cheese with dairy-free options and use coconut cream for the whipped topping. You’ll still get that delicious cheesecake flavor! Also, check the butterscotch sauce ingredients, as some brands may include dairy or allergens that could affect your guests.
How can I make sure my cheesecake filling is lump-free?
To ensure a perfectly smooth cheesecake filling, make certain the cream cheese is at room temperature before mixing. Beat it until fluffy before gradually adding the powdered sugar and butterscotch sauce. Mixing these slowly will help prevent lumps from forming, ensuring a creamy finish for your Harry Potter Butterbeer Cheesecake Jars!
Enchanting Harry Potter Butterbeer Cheesecake Jars to Indulge
Ingredients
Equipment
Method
- Prepare the Graham Cracker Crust by combining the graham cracker crumbs and melted butter until achieving a sandy texture. Firmly pack this mixture into the bottom of individual serving jars.
- Make the Cream Cheese Filling by beating softened cream cheese until light and fluffy. Gradually add powdered sugar, butterscotch sauce, and vanilla extract until smooth.
- Whip the Heavy Cream in a chilled mixing bowl until stiff peaks form. Be careful not to overwhip.
- Combine the Mixtures gently by folding whipped cream into the cream cheese mixture until just combined.
- Layer the Cheesecake Filling over the crust in each jar, aiming for a tall layer, leaving some space for toppings.
- Add the Whipped Cream Topping by placing a generous dollop of whipped cream on top of each jar.
- Drizzle with Butterscotch Sauce artistically over the whipped cream.
- Chill the jars in the refrigerator for at least 2 hours to set before serving.
Leave a Reply