
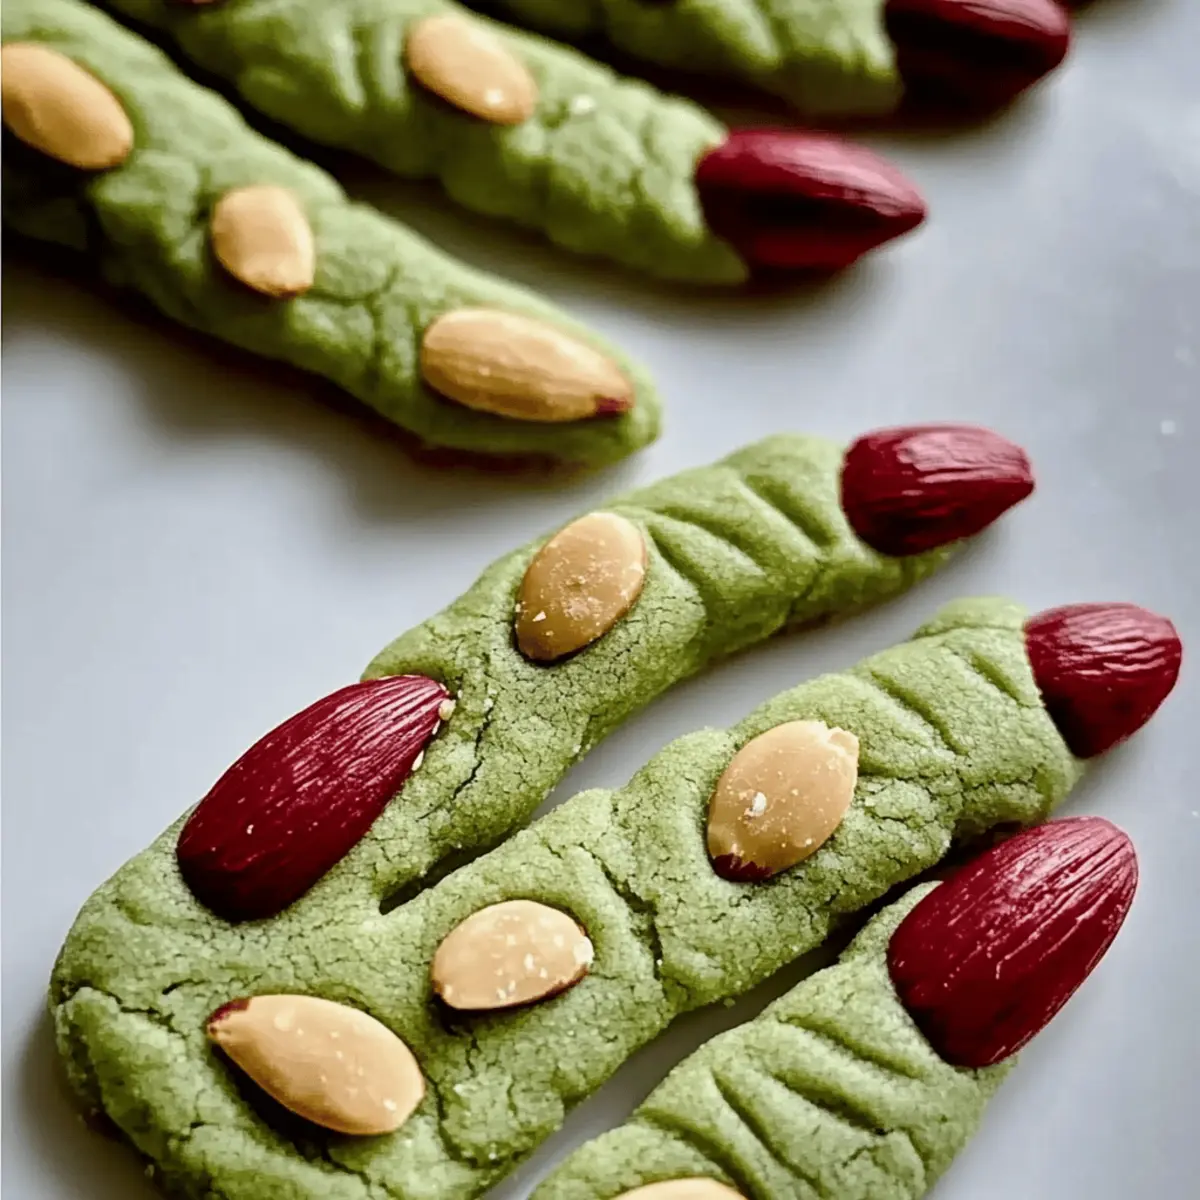
In a world filled with sweet confections, few treats evoke as much delight and fright as Halloween Finger Cookies. These unique creations, with their eerie resemblance to green, wrinkled fingers flaunting almond “nails,” are sure to be the talk of any Halloween gathering. As a passionate home chef, I adore making these buttery shortbread cookies that not only deliver a satisfying crunch but also offer a fun twist for the spooky season. With easy customization options, they cater to everyone’s tastes—swap out the almond nails for colorful candy melts or add a dollop of jam for a bloody effect. Not only are they a playful addition to your Halloween spread, but they also provide a delightful way to involve the kids in the kitchen. Ready to whip up a batch of these creepy treats that are both vegetarian-friendly and perfectly spooky? Let’s dive in!
Why Are These Finger Cookies So Fun?
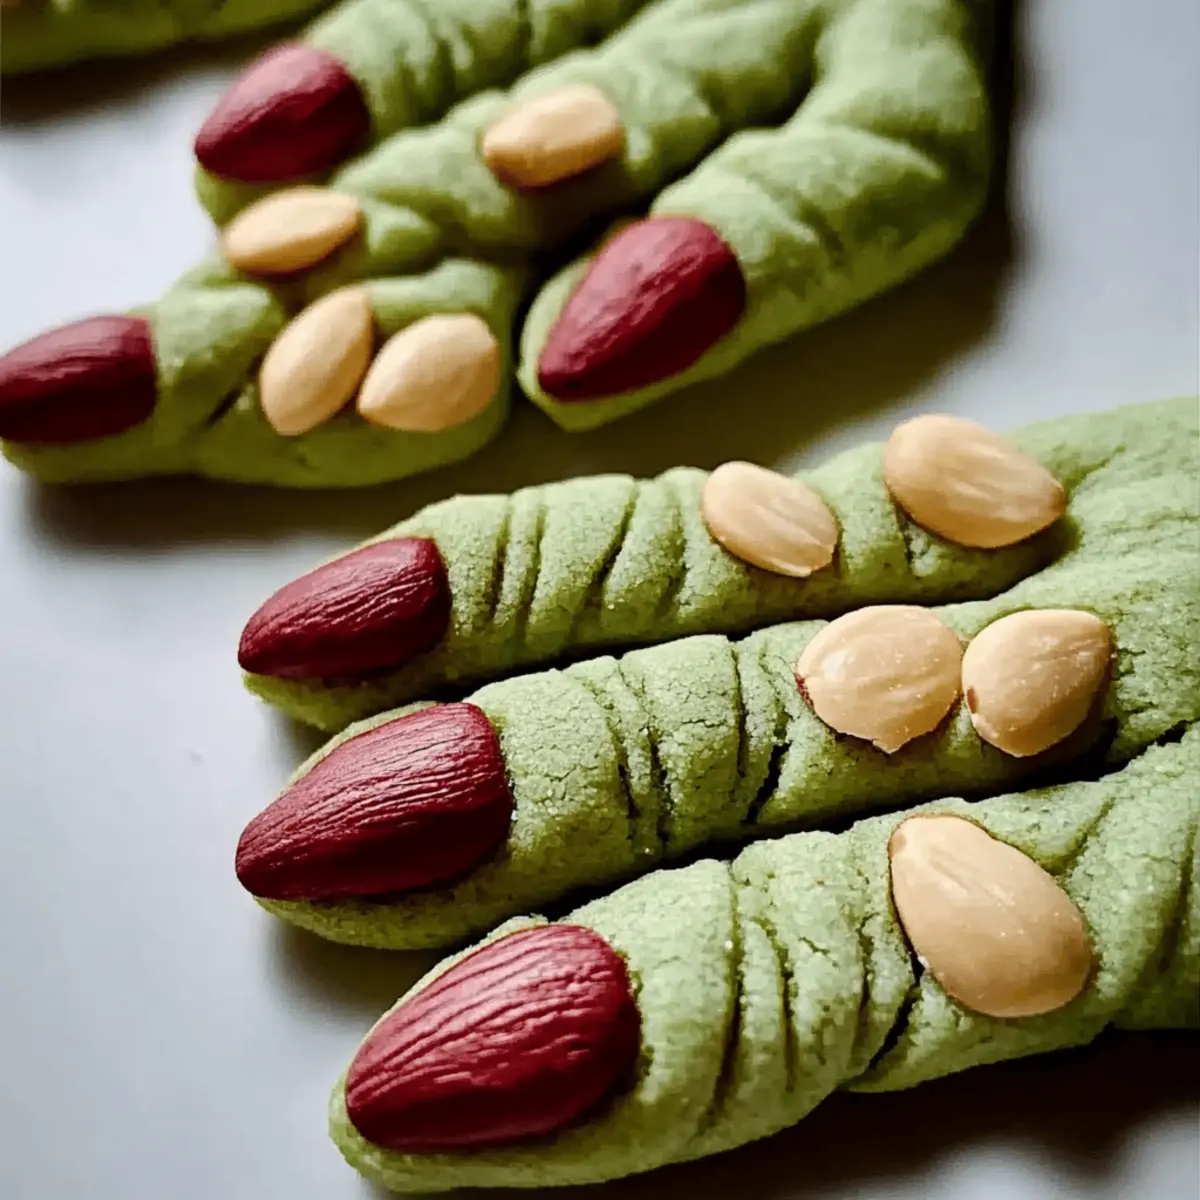
Spooky, Fun Appearance: Their unsettling look mimics wrinkled fingers, which will fascinate both kids and adults alike.
Crispy Yet Buttery: The perfect balance of a soft, buttery texture with a satisfyingly crispy bite ensures everyone will love them.
Flexible Customization: Easily swap almond nails for colorful candy melts or add jam, making these cookies versatile and fun for any taste.
Kid-Friendly Fun: Involve your little ones in the kitchen by letting them shape and decorate—it’s a spooky activity everyone will enjoy!
Perfect for Any Occasion: These Halloween Finger Cookies are ideal for parties, movie nights, or potlucks, ensuring they are a hit at any gathering.
Easy Recipe: Simple steps mean you won’t spend all day baking. For other quick treats, check out my Nutella Marshmallow Cookies.
Halloween Finger Cookies Ingredients
For the Cookie Dough
- Butter – Provides richness and structure; essential for a buttery shortbread. Use unsalted for a balanced flavor.
- Granulated Sugar – Adds sweetness and aids with texture and spreading; substitute with light brown sugar for a caramel note.
- Almond Extract – Enhances flavor with a nutty note; use vanilla extract if almond isn’t available.
- Egg Yolk – Binds dough and adds moisture; using a whole egg will yield a different texture.
- All-Purpose Flour – Main structure creating the cookie base; can replace part with almond flour for a nuttier flavor (may alter texture).
- Baking Powder – Acts as a leavening agent for slight lift; can omit for denser cookies.
- Green Food Coloring – Offers spooky finger color; omit for pale “corpse” fingers.
For the Topping
- Almonds (for nails) – Decoration for a creepy touch; can use chocolate pieces or jam for different effects.
- Jam/Candy Melts – Optional for “bloody” nails, adding a decorative detail; use edible glitter for a glam effect.
Get ready to bake some spooky Halloween Finger Cookies that are sure to thrill your guests!
Step‑by‑Step Instructions for Halloween Finger Cookies
Step 1: Prepare the Dough
In a large mixing bowl, combine 1 cup of softened unsalted butter with ½ cup of granulated sugar until light and fluffy, about 3-5 minutes. Mix in 1 teaspoon of almond extract and 1 egg yolk until fully incorporated. Gradually add 2 cups of all-purpose flour, 1 teaspoon baking powder, and a few drops of green food coloring, blending until a soft dough forms. This colorful dough will be the spooky base for your Halloween Finger Cookies.
Step 2: Chill Dough
Once your dough is well combined, wrap it in plastic wrap and refrigerate for at least 30 minutes. This step is crucial as it helps the dough firm up, ensuring sharp and defined details when shaped. While the dough chills, preheat your oven to 350°F (175°C) so it’s ready for baking once your cookies are formed.
Step 3: Shape Cookies
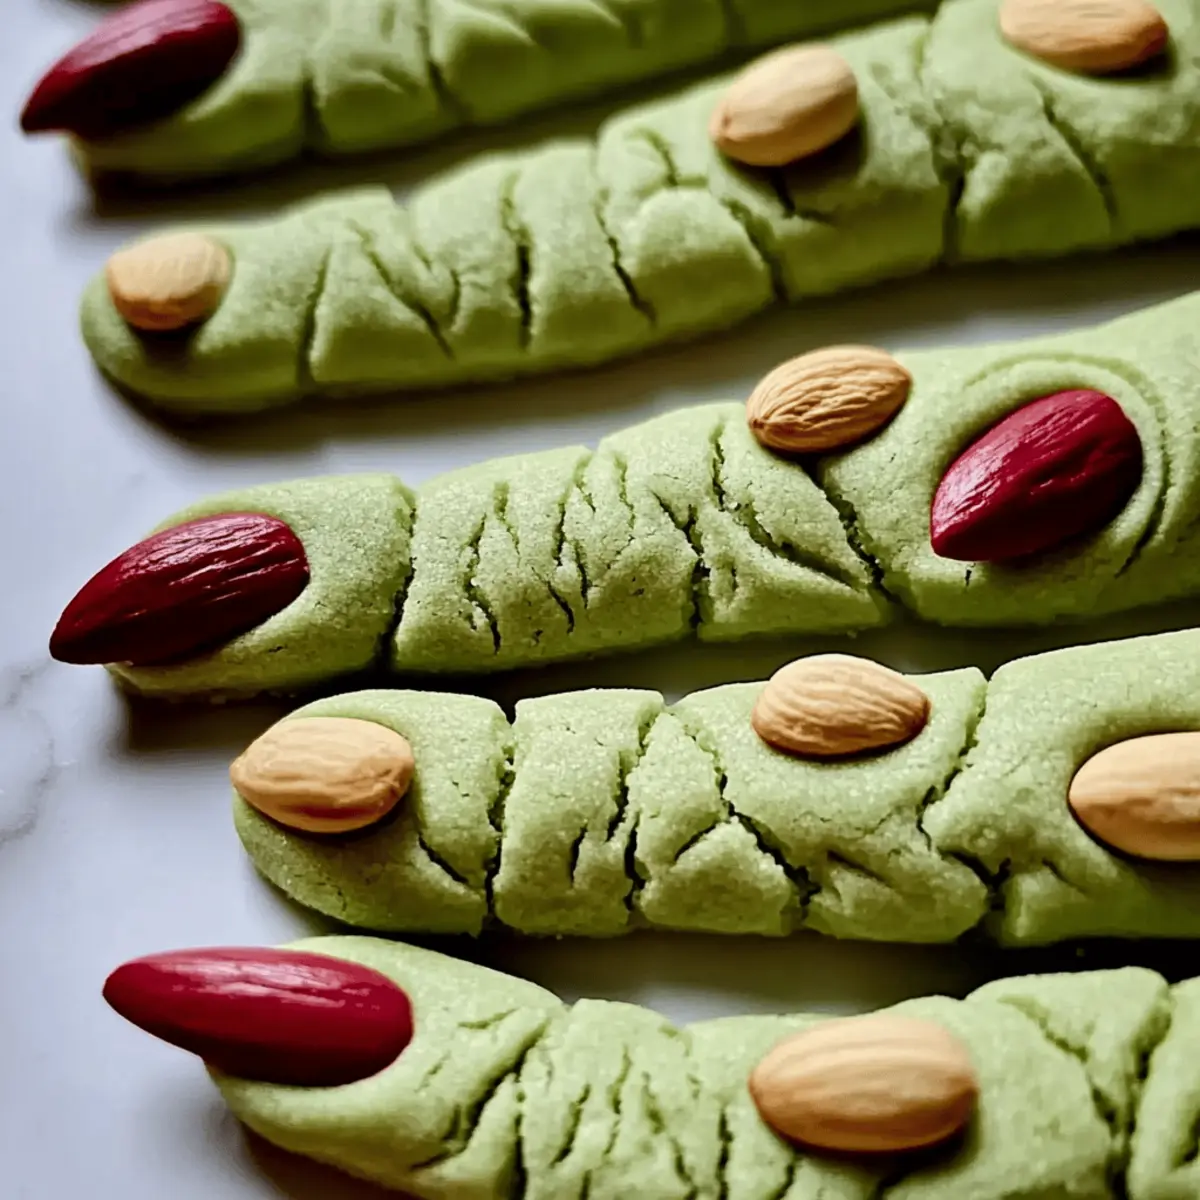
After chilling, remove the dough from the fridge and divide it into small portions. Roll each piece into finger shapes, complete with knuckles for an extra creepy effect. Gently press a blanched almond at the tip of each cookie to represent nails. Be sure to create a tapered edge where the almond attaches; this enhances the illusion of Halloween Finger Cookies.
Step 4: Bake
Arrange the shaped cookies on a baking sheet lined with parchment paper, ensuring they have some room to spread. Place them in the preheated oven and bake for 15 to 20 minutes, or until they are pale without browning. Keep an eye on them towards the end; pale but firm is the goal for a perfect texture.
Step 5: Decorate
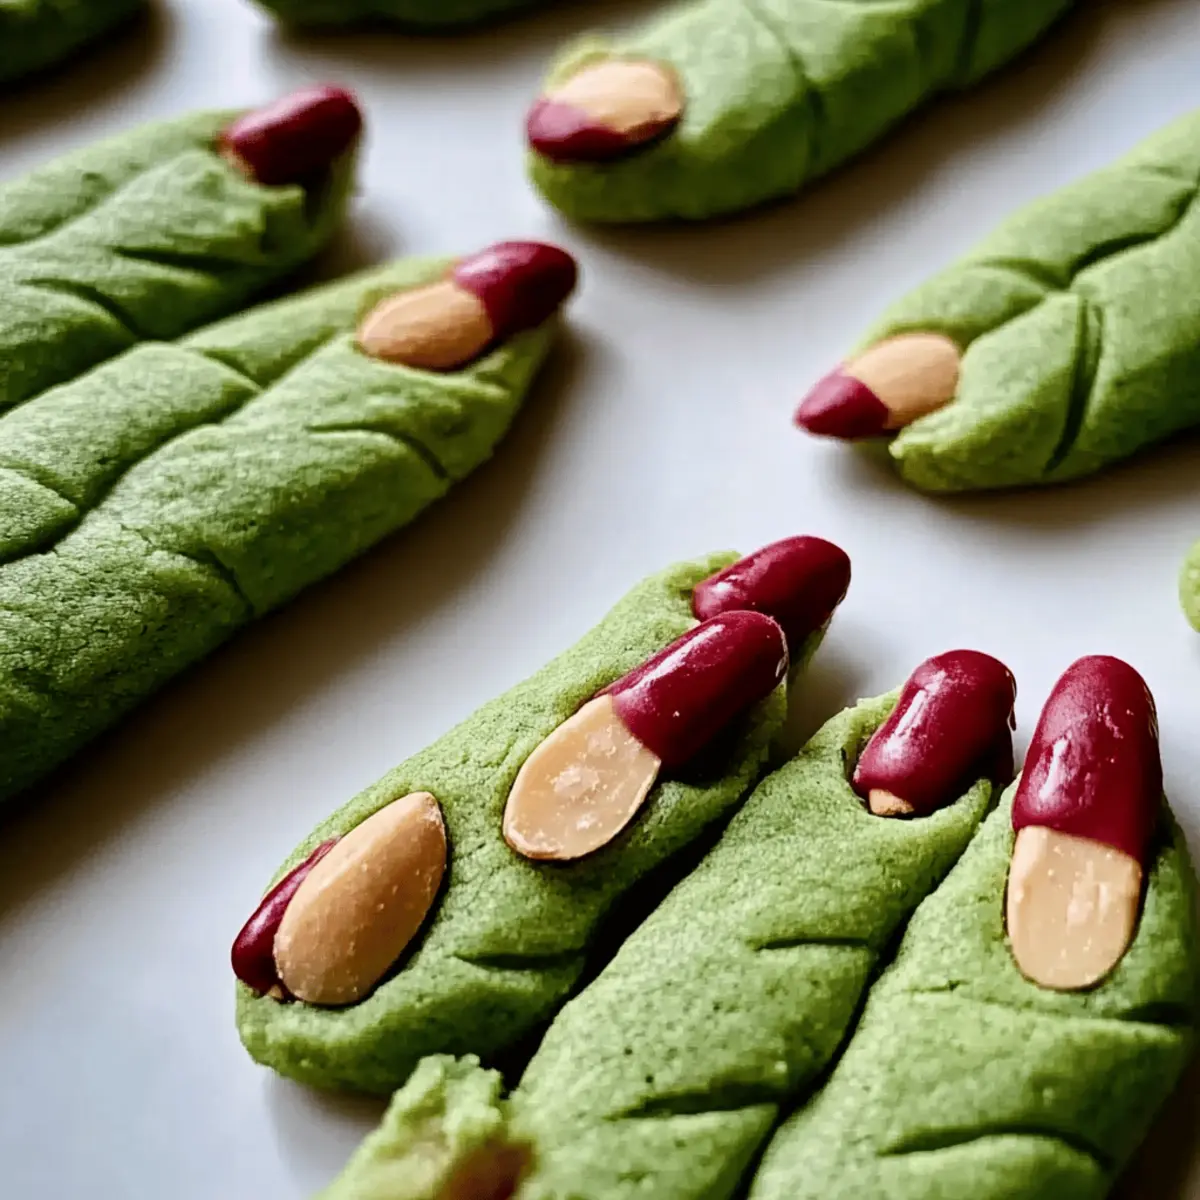
Once baked, let your Halloween Finger Cookies cool completely on a wire rack. To add a gory touch, you can use a dollop of jam or melted candy melts around the base of the almond nail, giving them a “bloody” appearance. For an extra spooky flair, consider sprinkling edible glitter or letting the kids draw creepy designs on the cookies for a customized look.
Expert Tips for Halloween Finger Cookies
- Cold Dough Matters: Ensure your dough is thoroughly chilled before shaping; this helps maintain their finger-like details and prevents spreading.
- Avoid Tough Cookies: Mix your dough just until combined. Overworking it can lead to tough cookies, sacrificing that tender, buttery texture.
- Pale is Perfect: Aim for a pale finish. Perfectly baked Halloween Finger Cookies should not brown; they should look witchy green, not burnt!
- Creative Toppings: Experiment with different toppings for the nails. Try colored candy melts or jam for “bloody” effects, adding a fun twist.
- Involve the Kids: Make this a family affair! Let your little ones help shape and decorate these spooky cookies—they’ll love getting crafty in the kitchen.
Halloween Finger Cookies: Fun Variations
Feel free to put your own spin on these creepy treats and let your creativity shine in the kitchen!
- Dairy-Free: Substitute butter with coconut oil for a plant-based version that’s equally rich and satisfying. The subtle coconut flavor adds an intriguing twist!
- Gluten-Free: Use a gluten-free flour blend instead of all-purpose flour. They may turn out slightly different, but just as delightful in taste and texture!
- Nut-Free: Replace almond extract with vanilla and use sunflower seeds instead of almonds for a safe alternative. A great option for allergy considerations!
- Spicy Touch: Mix in a pinch of cayenne pepper or cinnamon to the dough for a surprising warm flavor that contrasts beautifully with the sweet frosting.
- Bloody Decoration: Drizzle with red icing or raspberry jam around the almond nails for a gruesome effect reminiscent of classic horror films. Get the kids involved in this fun decorating step!
- Colorful Halloween: Use different shades of food coloring to create a rainbow of spooky fingers. Kids will love the chance to experiment with colors!
- Chocolate Chip Version: Add mini chocolate chips to the cookie dough for an extra touch of sweetness and a delightful surprise with every bite!
- Gory Glitter: After allowing the cookies to cool, sprinkle edible glitter on top for a spooky, shimmering effect that catches the eye at any Halloween gathering.
Get ready to create your ultimate spooky spread with these ideas! Pair your Halloween Finger Cookies with other treats like Dirt Cake Cookies for an even creepier dessert table.
Make Ahead Options
These Halloween Finger Cookies are perfect for meal prep enthusiasts looking to save time during the busy Halloween season! You can prepare the dough up to 3 days in advance; simply wrap it tightly in plastic wrap and refrigerate. When you’re ready to bake, take the dough out, let it sit at room temperature for about 10 minutes, then shape it into finger forms and add the almond “nails.” If you prefer, you can also bake the cookies a day ahead and store them in an airtight container. Just be sure to maintain their freshness by keeping them in a cool, dry place. They will be just as delicious and spooky when it’s time to serve them at your Halloween festivities!
What to Serve with Creepy Halloween Finger Cookies
Celebrate the eerie vibes of Halloween with a menu that will enchant and thrill your guests.
-
Witch’s Brew Hot Chocolate: A rich, creamy drink topped with whipped cream and spooky sprinkles; it perfectly complements the cookies’ playful nature. Create a warm and inviting atmosphere while adding a touch of indulgence to your treat table.
-
Ghostly Cupcakes: Light and fluffy cupcakes with ghostly whipped icing and candy eyes; they add whimsy and enhance the Halloween theme, inviting laughter from all ages.
-
Ghoulish Green Salad: A fresh mix of spinach, avocado, and cucumbers dressed in a tangy lime vinaigrette. It offers a refreshing counterpart to the sweetness of the cookies, balancing out your dessert spread.
-
Mummy Dogs: Crescent roll-wrapped hot dogs that look like mummies, baked until golden, and served with mustard for dipping. This fun finger food enhances the playful spooky theme of your gathering.
-
Creepy Crawly Punch: A fruity punch adorned with gummy worms and ice cubes for a chilling effect. This adds excitement and enhances the enjoyment of your spooky menu while keeping guests refreshingly happy.
-
Blood Orange Sorbet: A chilling, slightly tart sorbet that offers a bright contrast to the sweetness of the cookies. Its unique color and flavor make it a spirited end to your holiday feast.
Storage Tips for Halloween Finger Cookies
- Room Temperature: Store the Halloween Finger Cookies in an airtight container at room temperature for up to 5 days to maintain their buttery texture and flavor.
- Fridge: If you prefer, you can also keep the cookies in the fridge for enhanced freshness, where they will last up to a week, but expect them to lose a bit of crispness.
- Freezer: For longer storage, freeze the cookies in a single layer on a baking sheet, then transfer them to an airtight container or freezer bag. They can last for up to 3 months in the freezer.
- Reheating: To enjoy them warm, microwave the cookies for about 10-15 seconds or briefly oven heat them. This brings back their delightful buttery goodness!
Halloween Finger Cookies Recipe FAQs
How do I select ripe ingredients for Halloween Finger Cookies?
Absolutely! Use unsalted butter at room temperature to ensure it incorporates smoothly with sugar. For the egg yolk, make sure it’s fresh. If you’re using almonds for nails, opt for blanched ones without dark spots, as they will give a cleaner look and texture.
How should I store my Halloween Finger Cookies?
These eerie delights should be kept in an airtight container at room temperature for up to 5 days. If you prefer a longer shelf life, you can refrigerate them for up to a week, though they may lose some crispness. Just ensure they cool completely before storing!
Can I freeze Halloween Finger Cookies?
Very! To freeze, first place the cookies in a single layer on a baking sheet to prevent sticking. Once frozen, transfer them to an airtight container or freezer bag. They can be stored for up to 3 months. When you’re ready to enjoy, simply let them thaw at room temperature or warm them up in the microwave for about 10-15 seconds to restore their delightful texture.
What should I do if my dough is too sticky?
If your dough turns out sticky, don’t worry! This can happen if the butter is too soft or if it’s a bit too warm. Simply sprinkle a little more flour over the dough while mixing, or refrigerate it for an additional 15-20 minutes. This should help you achieve a manageable texture for shaping the cookies.
Are Halloween Finger Cookies suitable for dietary restrictions?
Absolutely! These cookies are vegetarian and can be made nut-free by substituting the almonds with sunflower seeds or candy melts. Always check your ingredients for any allergies—such as gluten in flour—and feel free to substitute with gluten-free flour blends to cater to all dietary needs!
Spooky Halloween Finger Cookies That Will Thrill Your Guests
Ingredients
Equipment
Method
- In a large mixing bowl, combine the butter and granulated sugar until light and fluffy. Mix in the almond extract and egg yolk until fully incorporated. Gradually add the all-purpose flour, baking powder, and green food coloring until a soft dough forms.
- Wrap the dough in plastic wrap and refrigerate for at least 30 minutes.
- Remove the dough from the fridge and divide it into small portions. Roll each piece into finger shapes and press a blanched almond at the tip of each cookie.
- Arrange the cookies on a baking sheet lined with parchment paper and bake at 350°F for 15 to 20 minutes, until pale but firm.
- Let the cookies cool completely, then decorate with jam or melted candy melts for a bloody appearance.
Leave a Reply