
Stepping into the bustling streets of Osaka, the enticing aroma of sizzling savory pancakes envelops you, inviting you to indulge in the local delicacy: Okonomiyaki. This Easy Okonomiyaki Recipe transforms the traditional flavors into a fun, customizable experience right in your own kitchen. With its budget-friendly ingredients and quick preparation, it’s the perfect solution for anyone looking to swap out takeout for a nourishing and celebratory meal. Whether you opt for the classic Osaka-style or the layered Hiroshima-version, these pancakes promise to be both satisfying and versatile enough to cater to any palate. Ready to unleash your inner chef and create a sensational dish that keeps everyone asking for seconds? Let’s dive into the magic of Okonomiyaki!
Why is this Okonomiyaki recipe a must-try?
Versatile and Fun: This recipe encourages creativity, allowing you to customize your Okonomiyaki with favorite ingredients like shrimp or extra veggies.
Budget-Friendly: Utilizing pantry staples makes this a wallet-friendly meal that’s easy on the budget.
Quick Preparation: Enjoy flavorful pancakes in just 30 minutes, ideal for busy weeknights.
Crowd-Pleasing: Perfect for family dinners or social gatherings, where everyone can pitch in and customize their own pancake.
Nutrient-Packed: With cabbage, protein, and optional seafood or veggies, this dish is as nutritious as it is delicious!
Elevate your meal game and explore variations like the Banana Matcha Smoothie for a refreshing drink alongside your savory creation!
Easy Okonomiyaki Recipe Ingredients
For the Batter
- All-purpose flour – Provides structure; swap with whole wheat flour for a healthier option.
- Water or dashi stock – Adds moisture and flavor, with dashi offering a rich umami boost.
- Eggs – Bind ingredients together, adding richness essential for a delightful pancake.
For the Filling
- Finely shredded cabbage – The primary vegetable that adds fiber and volume; replace with spinach or kale if desired.
- Chopped green onions – Contributes a fresh, mild onion flavor that brightens up the dish.
- Tempura scraps (tenkasu, optional) – Adds a delightful crunch; feel free to omit if not available.
- Thinly sliced pork belly or bacon – Main protein source; substitute shrimp or squid to switch up the flavors.
For Toppings
- Okonomiyaki sauce – A critical condiment that brings it all together; you can use a store-bought version or make your own.
- Japanese mayonnaise (preferably Kewpie) – Adds creaminess and delightful richness; regular mayo is fine too.
- Aonori (seaweed flakes) – Imparts umami flavor; skip if you don’t have it on hand.
- Katsuobushi (bonito flakes) – Provides an extra layer of savory depth; optional for a vegetarian version.
- Chopped green onions – Use for garnish and an added flavor kick.
- Pickled ginger (beni shoga) – Offers a spicy, tangy contrast to the savory elements of the pancake.
Now you’re all set to create this Easy Okonomiyaki Recipe and embark on your flavorful pancake adventure!
Step‑by‑Step Instructions for Easy Okonomiyaki Recipe
Step 1: Prepare the Batter
In a large mixing bowl, whisk together the all-purpose flour, water or dashi stock, and eggs until the mixture is smooth and free of lumps. This batter should have a creamy consistency; it may take about 2-3 minutes of whisking. Set it aside for a moment, as we’ll soon bring it to life with fantastic flavors.
Step 2: Incorporate Vegetables
Gently fold in the finely shredded cabbage and chopped green onions into your batter, ensuring they are evenly distributed. If you’re using tempura scraps for added crunch, throw those in as well. This step adds vibrancy and texture to your Easy Okonomiyaki, making each bite a delightful surprise.
Step 3: Preheat the Pan
Place a non-stick skillet or griddle over medium heat and allow it to heat up for about 3-4 minutes. Lightly drizzle some oil onto the surface, using a paper towel to spread it evenly. You want to create a slick cooking surface to ensure your pancake gets a nice golden crust without sticking.
Step 4: Assemble the Pancake
Pour a portion of the batter onto the hot skillet, forming a round pancake about 1/2-inch thick. Gently place thinly sliced pork belly or bacon on top of the batter, allowing it to nestle in. If you’re feeling adventurous, add any seafood at this stage for an added flavor dimension to your Easy Okonomiyaki.
Step 5: Cook the Pancake
Allow the pancake to cook for about 4-5 minutes until the bottom is golden brown and you can see bubbles forming on the top. Carefully flip it using a wide spatula, letting it cook for another 4-5 minutes until firmly set and the meat is cooked through. Achieving this step is vital for that perfect balance of crispy and fluffy.
Step 6: Add Toppings
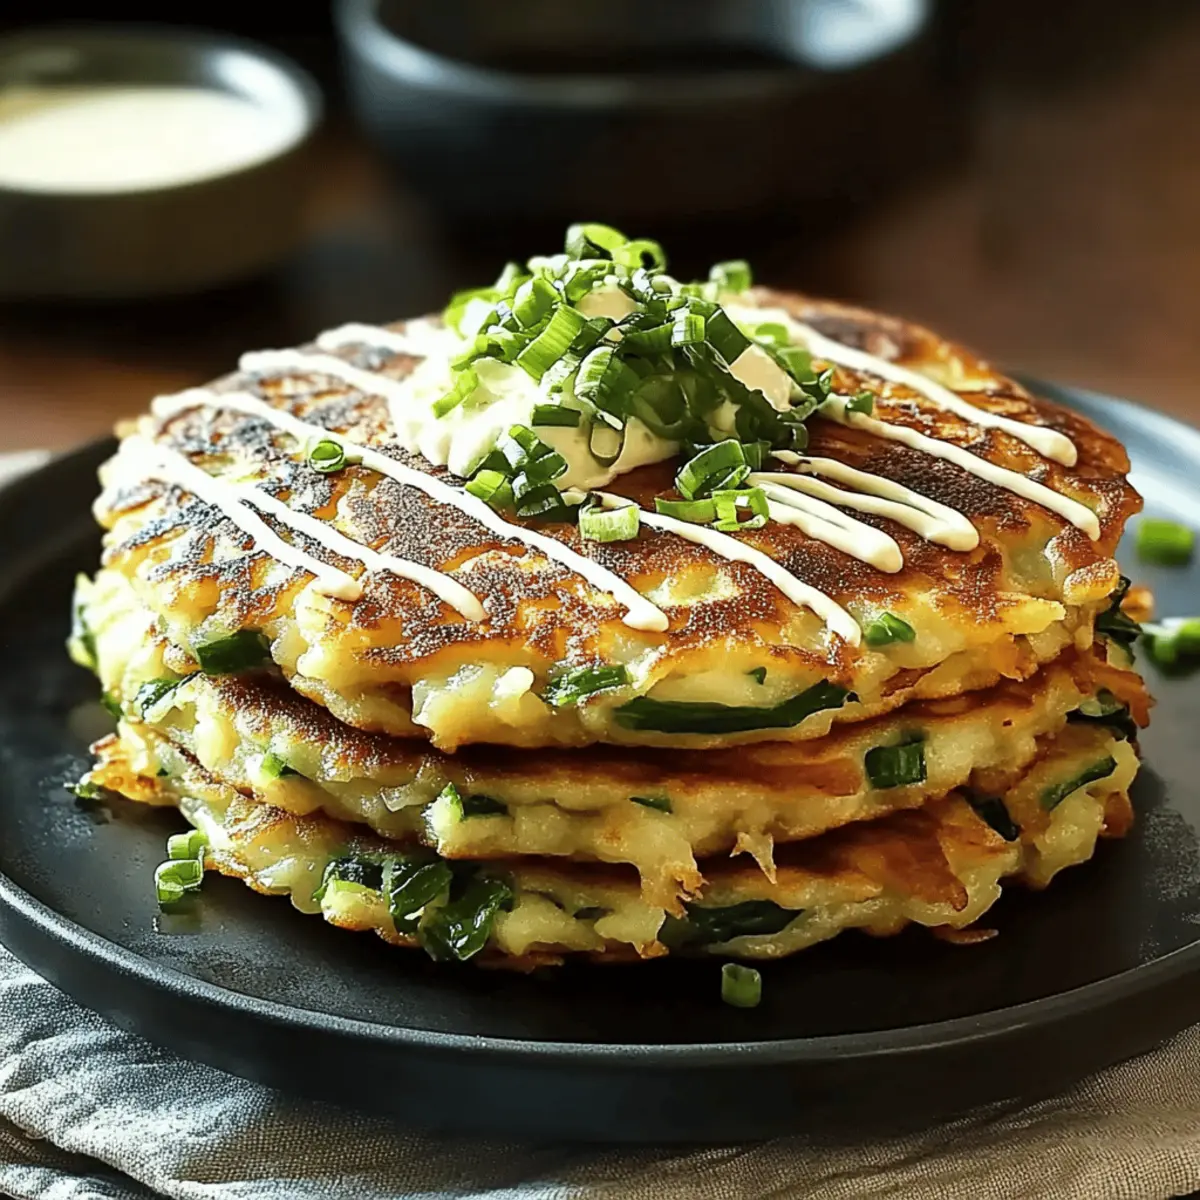
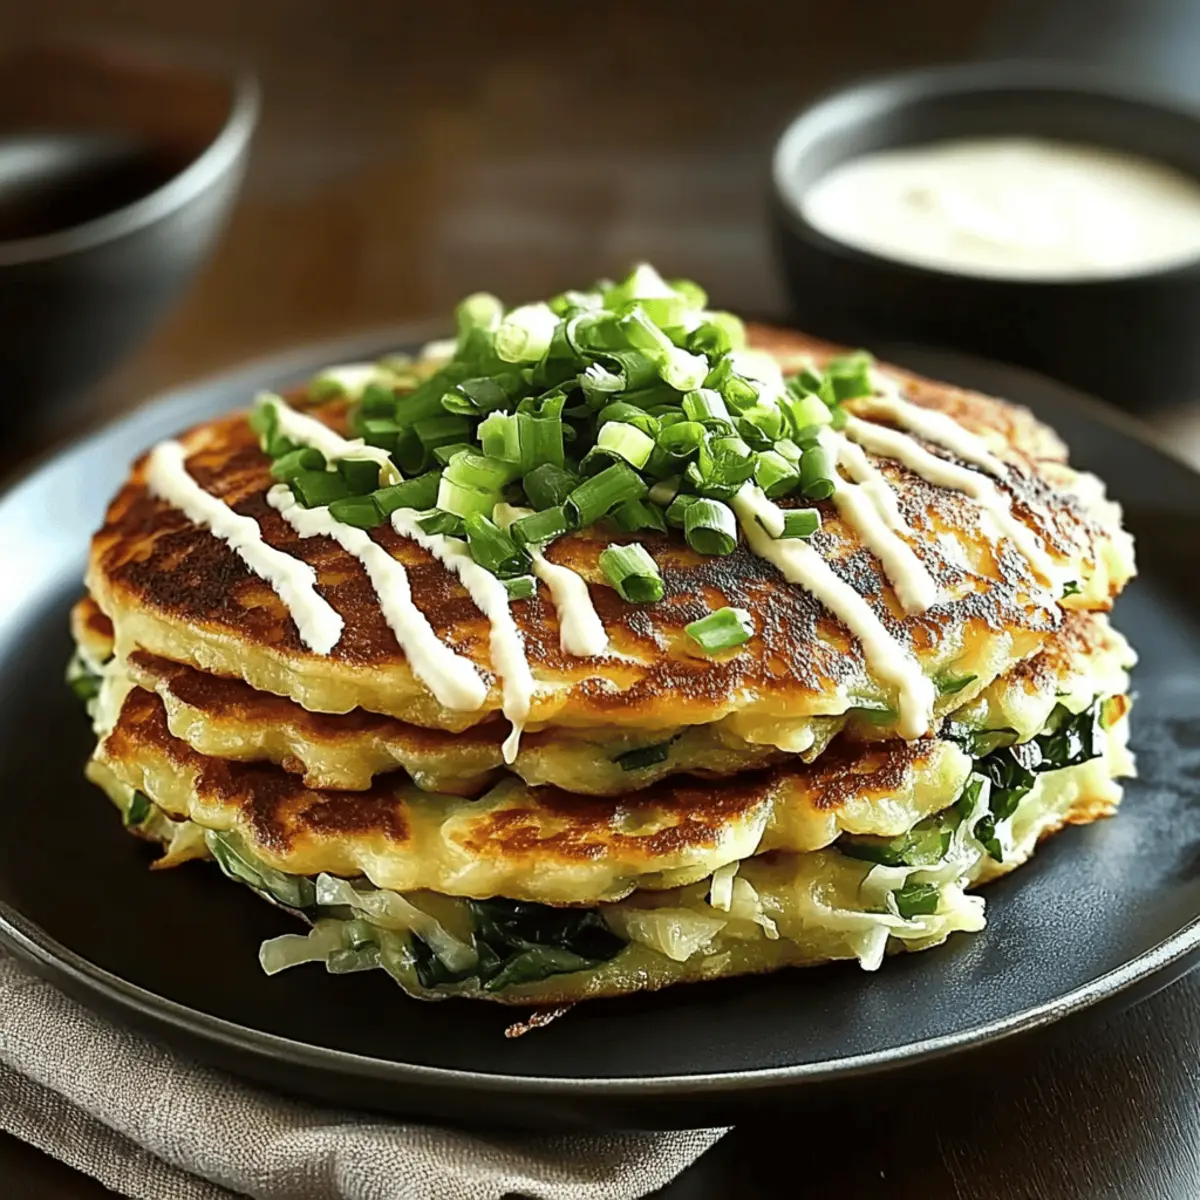
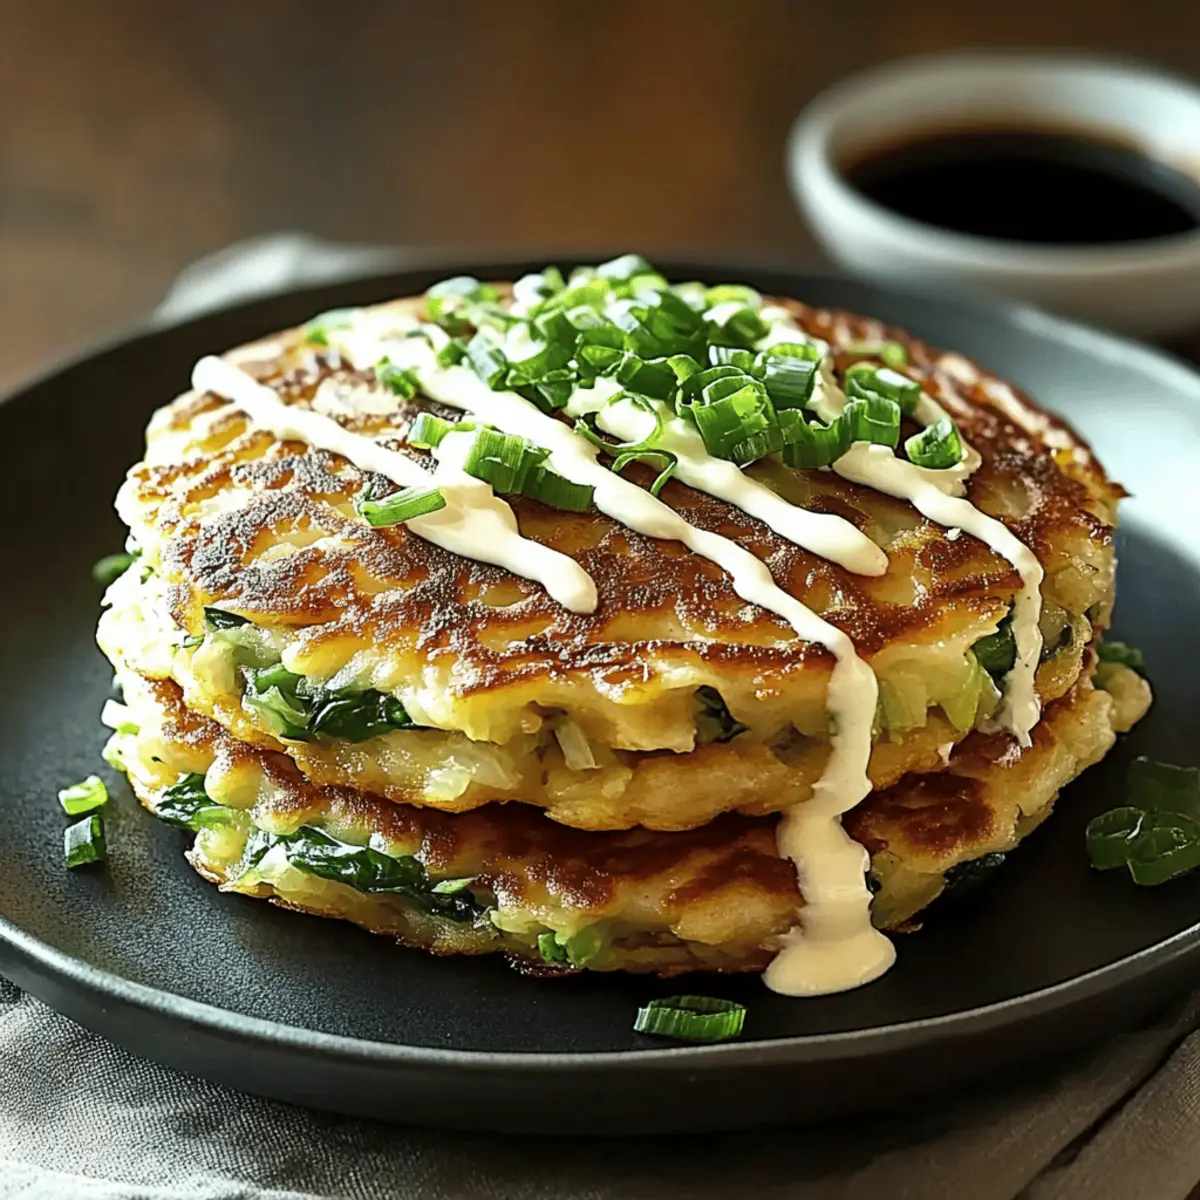
Once cooked, transfer your pancake to a plate, and generously drizzle it with okonomiyaki sauce and creamy Japanese mayo. Sprinkle aonori, katsuobushi, and chopped green onions as desired, adding layers of flavor and visual appeal to your Easy Okonomiyaki.
Step 7: Serve Immediately
Slice your delicious Okonomiyaki into wedges and serve hot, perfect for sharing or enjoying on your own. With each bite, you’ll experience the delightful mix of textures and flavors, making this tasty pancake a gratifying alternative to fast food.
Make Ahead Options
These Easy Okonomiyaki are perfect for meal prep enthusiasts! You can prepare the batter up to 24 hours in advance by combining the all-purpose flour, water or dashi stock, and eggs in a bowl. Just cover it tightly in the refrigerator to maintain freshness and prevent browning. Additionally, you can chop and store the vegetables, like cabbage and green onions, in an airtight container for up to 3 days. When you’re ready to serve, simply whisk the batter briefly, incorporate the vegetables, and cook as directed. This way, you’ll enjoy delicious homemade pancakes with minimal effort on busy weeknights, bringing restaurant-quality results right to your family table!
What to Serve With Easy Okonomiyaki Recipe
Transform your enjoyable pancake experience into a delightful meal by adding complementary sides that elevate every bite.
-
Crispy Salad: A refreshing green salad with a tangy vinaigrette provides a crunchy contrast to the savory pancakes. The crispness will brighten the flavors of the Okonomiyaki.
-
Miso Soup: Warm miso soup introduces soothing umami tones that harmonize perfectly with the savory profiles of the pancakes. Its warmth and depth balance the meal beautifully.
-
Pickled Vegetables: Adding a side of colorful pickled vegetables for a zesty crunch enhances the dish, bringing out the pancake’s savoriness with each bite. It’s a delightful way to keep the palate refreshed.
-
Japanese Rice: A simple bowl of steamed rice pairs well for a more filling meal, soaking up any extra sauce. It provides a comforting base to enjoy alongside your Okonomiyaki adventure.
-
Teriyaki Chicken Skewers: Grilled teriyaki chicken skewers add a sweet and savory note that complements the flavors of the Okonomiyaki. The tenderness of the chicken makes every bite a delightful experience.
-
Chilled Soba Noodles: Tossed in a light soy or sesame dressing, these noodles add an element of coolness and texture. They elevate your meal while remaining light and refreshing.
-
Green Tea: A warm cup of green tea is perfect for cleansing the palate between bites and enhancing the meal with its earthy notes. It’s the ideal drink to wrap up your Japanese culinary adventure.
-
Fruit Sorbet: End your meal with a fruity sorbet for a refreshing palate cleanser. The bright flavors provide a sweet contrast to the savory pancakes and make for a delightful finish.
Storage Tips for Easy Okonomiyaki
Fridge: Store leftover cooked Okonomiyaki in an airtight container for up to 3 days. Reheat on a skillet over medium heat for about 3-4 minutes per side until warmed through.
Freezer: To freeze, wrap individual pancakes tightly in plastic wrap and place them in a freezer-safe bag. They can be stored for up to 1 month. Reheat directly from frozen in a skillet or oven until hot.
Batter Storage: Uncooked batter can be refrigerated for up to 1 day; however, it’s best to use it fresh for optimal texture. Stir gently before cooking if stored.
Reheating: For the best results, always reheat on the stovetop for a crispy exterior. Avoid microwaving to prevent sogginess. Enjoy your flavorful Easy Okonomiyaki meal anytime!
Expert Tips for the Best Easy Okonomiyaki
- Preheat Perfectly: Make sure your skillet is hot enough before pouring the batter to achieve that crispy exterior everyone loves.
- Gentle Mixing: Avoid overmixing the batter; a gentle fold of ingredients prevents tough pancakes and keeps them light.
- Versatile Add-ins: Feel free to get creative! Incorporate your favorite vegetables or proteins to customize your Easy Okonomiyaki and elevate flavors.
- Quality Sauce: Don’t skimp on the okonomiyaki sauce and mayonnaise; these toppings are essential for a rich, savory experience.
- Ideal Cooking Time: Keep an eye on the cooking time for a perfect balance of crispy outside and fluffy inside—about 4-5 minutes per side is key.
Easy Okonomiyaki Recipe Variations
Feel free to personalize your Okonomiyaki adventure with these delicious twists that will inspire your culinary creativity!
-
Vegetarian: Omit meat and add a medley of mushrooms or colorful bell peppers for a delightful veggie-packed pancake.
-
Seafood Delight: Swap pork for a mix of shrimp and squid, bringing a fresh ocean flavor that seafood lovers will adore.
-
Spicy Version: Toss in a pinch of chili powder or top with spicy mayo for an exciting heat level that awakens the senses.
-
Hiroshima-Style: Layer cooked noodles between the pancake and toppings for a unique twist that’s heartier and extra satisfying.
-
Cheesy Addition: Incorporate shredded cheese into the batter before cooking for a gooey, indulgent twist that the cheese lovers will cherish.
-
Whole Wheat: Substitute all-purpose flour with whole wheat flour for a more nutritious option without compromising flavor, offering a wholesome experience.
-
Asian Fusion: Experiment by adding kimchi or curry powder to the batter for a fusion flavor explosion—bringing a spicy zing that’s sure to delight!
-
Perfect Pairings: Consider pairing your Okonomiyaki with a refreshing side like a vibrant miso soup or a crunchy salad. Enjoy that nostalgic taste of homemade goodness while elevating your meal!
For even more inspiration, after savoring your savory pancakes, try making a delightful Hot Orange Chicken for a fabulous next meal!
Easy Okonomiyaki Recipe FAQs
What type of cabbage is best for Okonomiyaki?
Absolutely! Finely shredded green cabbage is the traditional choice, providing the right texture and flavor. However, if you prefer a different taste, feel free to use spinach or kale instead. Just keep in mind that these options may alter the taste slightly but can add nutritional benefits.
How should I store leftover Okonomiyaki?
To keep your leftover Okonomiyaki fresh, store it in an airtight container in the refrigerator for up to 3 days. When you’re ready to enjoy it again, reheat it on a medium skillet for 3-4 minutes per side to regain that crispy texture.
Can I freeze Okonomiyaki?
Very! To freeze, wrap individual cooked pancakes tightly in plastic wrap, then place them in a freezer-safe bag. They’ll stay good for up to 1 month. When the craving strikes, simply reheat directly from frozen in a skillet or oven until hot throughout—this way, you’ll have a tasty meal ready in no time!
Why is my Okonomiyaki not cooking through?
A common issue is not allowing the pancake to cook long enough. Ensure your skillet is hot enough before pouring the batter, and cook for about 4-5 minutes on each side until golden brown and firm. If using thicker ingredients, reduce the heat slightly to allow a longer cooking time without burning the outside.
Are there any dietary considerations with this recipe?
Of course! Okonomiyaki can be easily tailored to accommodate dietary needs. For a vegetarian option, simply omit the meat and add more vegetables like mushrooms or bell peppers. If you have seafood allergies, substitute with chicken or tofu. Just be mindful of the toppings, particularly the mayonnaise and seafood ingredients.
How long can I store the uncooked batter?
You can store your uncooked batter in the refrigerator for up to 1 day. However, for optimal texture and flavor, it’s best to use it fresh. If you do refrigerate, make sure to stir it gently before cooking to recombine the ingredients.

Easy Okonomiyaki Recipe – Your Flavorful Pancake Adventure
Ingredients
Equipment
Method
- In a large mixing bowl, whisk together the all-purpose flour, water or dashi stock, and eggs until smooth.
- Gently fold in the finely shredded cabbage and chopped green onions into the batter. Add tempura scraps if using.
- Preheat a non-stick skillet over medium heat for 3-4 minutes and drizzle with oil.
- Pour a portion of the batter onto the skillet, forming a round pancake about 1/2-inch thick. Place slices of pork belly or bacon on top.
- Cook for about 4-5 minutes on each side until golden brown.
- Transfer to a plate and drizzle with okonomiyaki sauce and mayonnaise. Sprinkle with aonori, katsuobushi, and green onions.
- Slice and serve hot.
Leave a Reply