
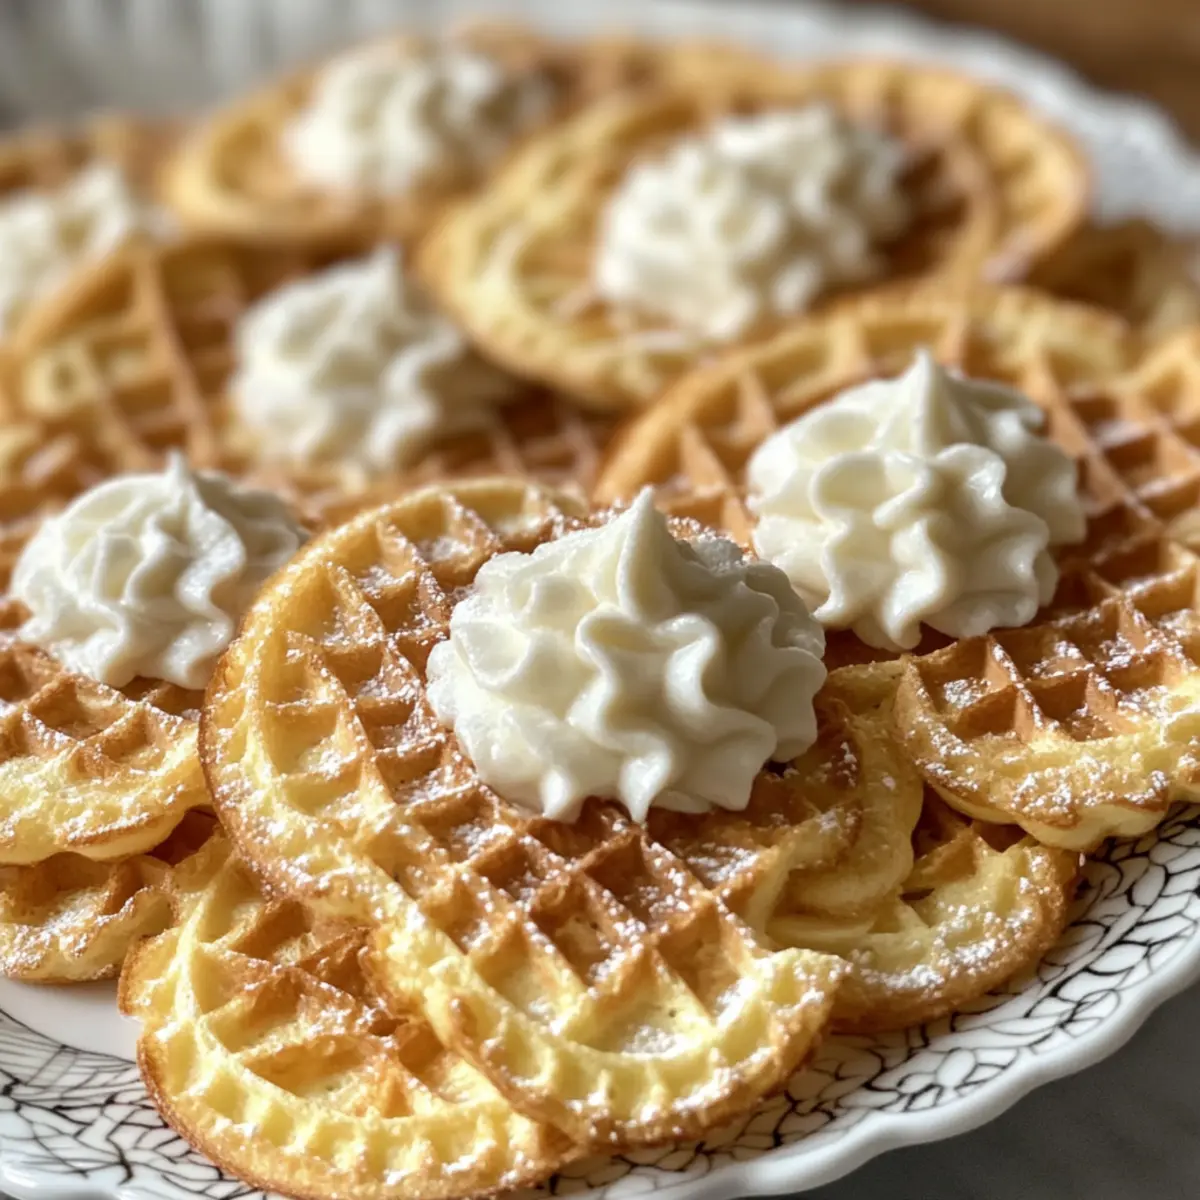
As the sweet aroma of crispy batter fills the air, memories of family gatherings come rushing back. Cream Filled Pizzelles, or Trubochki, are more than just a dessert; they’re a delightful tradition that marries the tactile joy of baking with laughter around the table. These charming waffle tubes, filled with a luscious condensed milk cream, are perfect for any occasion. Whether you’re hosting a festive celebration or simply want to elevate your dessert game, this recipe will not disappoint. Plus, the quick prep time means you can whip them up in no time, accommodating even the busiest of schedules. Why not indulge in a treat that embraces both nostalgia and joy? Dive in, and let me guide you through crafting these unforgettable Cream Filled Pizzelles that are sure to impress!
Why are Cream Filled Pizzelles a Must-Try?
Irresistible flavor combination: The crispy outer shell paired with a luscious cream filling creates a heavenly treat that delights every palate.
Quick Preparation: With a simple process, you can have a batch ready in no time, making them perfect for last-minute gatherings or celebrations.
Perfectly Versatile: Customize your pizzelles with various fillings, from flavored whipped cream to fresh fruit purees, ensuring there’s a version for everyone.
Crowd-Pleasing: Ideal for both casual and elegant occasions, these Cream Filled Pizzelles are sure to impress your family and friends, making them a go-to for any event.
Traditional Charm: Embrace the rich Italian heritage of pizzelles, making these treats not just delicious but also a beautiful addition to any festive table. Enjoy them alongside a light dip like Cream Cheese Salsa for an elevated experience!
Cream Filled Pizzelles Ingredients
• Let’s gather everything we need for these delightful treats!
For the Batter
- 4 large eggs – They provide structure and moisture for the batter; ensure they’re at room temperature for the best results.
- 1/4 cup granulated sugar – This adds sweetness and helps with browning during baking.
- 1/4 teaspoon fine salt – Enhances the overall flavors beautifully.
- 2 tablespoons grapeseed oil – Adds moisture to the batter; for crispier pizzelles, you can use melted unsalted butter instead.
- 1/2 teaspoon vanilla extract – This brings a wonderful depth of flavor to the batter.
- 1 cup all-purpose flour (sifted) – It gives structure to the pizzelles; make sure to sift to avoid any lumps.
For the Cream Filling
- 8 oz cream cheese (refrigerated) – This forms the base of the filling and provides a rich creaminess.
- 1/3 cup sweetened condensed milk (refrigerated) – Sweetens and enriches the filling, making it irresistibly creamy.
- 8 oz cool whip (frozen) – Adds lightness and volume; extra creamy versions work best.
- 1/4 teaspoon vanilla extract – It flavors the filling, adding a lovely aroma.
For Dusting
- 1 tablespoon powdered sugar (for dusting) – This is optional but adds a beautiful finish to your Cream Filled Pizzelles.
Prepare these ingredients, and you’re well on your way to creating delightful Cream Filled Pizzelles that will leave everyone wanting more!
Step‑by‑Step Instructions for Cream Filled Pizzelles
Step 1: Preheat Your Pizzelle Maker
Begin by preheating your pizzelle maker according to the manufacturer’s instructions. This is essential for achieving that perfect crispy texture. Aim for a setting that produces a light golden color; usually, this takes about 5 minutes. While the maker heats up, gather all your ingredients and prepare to whip up the batter.
Step 2: Beat Eggs and Sugar
In a large mixing bowl, combine four large eggs with 1/4 cup of granulated sugar and 1/4 teaspoon of fine salt. Using an electric mixer, beat on high speed for about 2 minutes, until the mixture becomes pale and creamy. This aeration is important for lightening your batter, ultimately contributing to the delightful texture of the Cream Filled Pizzelles.
Step 3: Incorporate Wet Ingredients
Next, drizzle in 2 tablespoons of grapeseed oil and add 1/2 teaspoon of vanilla extract into the egg mixture. Gently mix these wet ingredients until they are thoroughly combined, which will only take about 30 seconds. It’s crucial to keep the mixing on low speed to maintain the airiness of your batter while ensuring everything is well incorporated.
Step 4: Add Dry Ingredients
Now, sift in 1 cup of all-purpose flour to the wet mixture. With the mixer on low speed, gently combine until the flour is just incorporated, about 1 minute. Be cautious not to over-mix, as this can make your pizzelles tough. The batter should be thick and smooth, ready for that pizzelle maker!
Step 5: Bake the Pizzelles
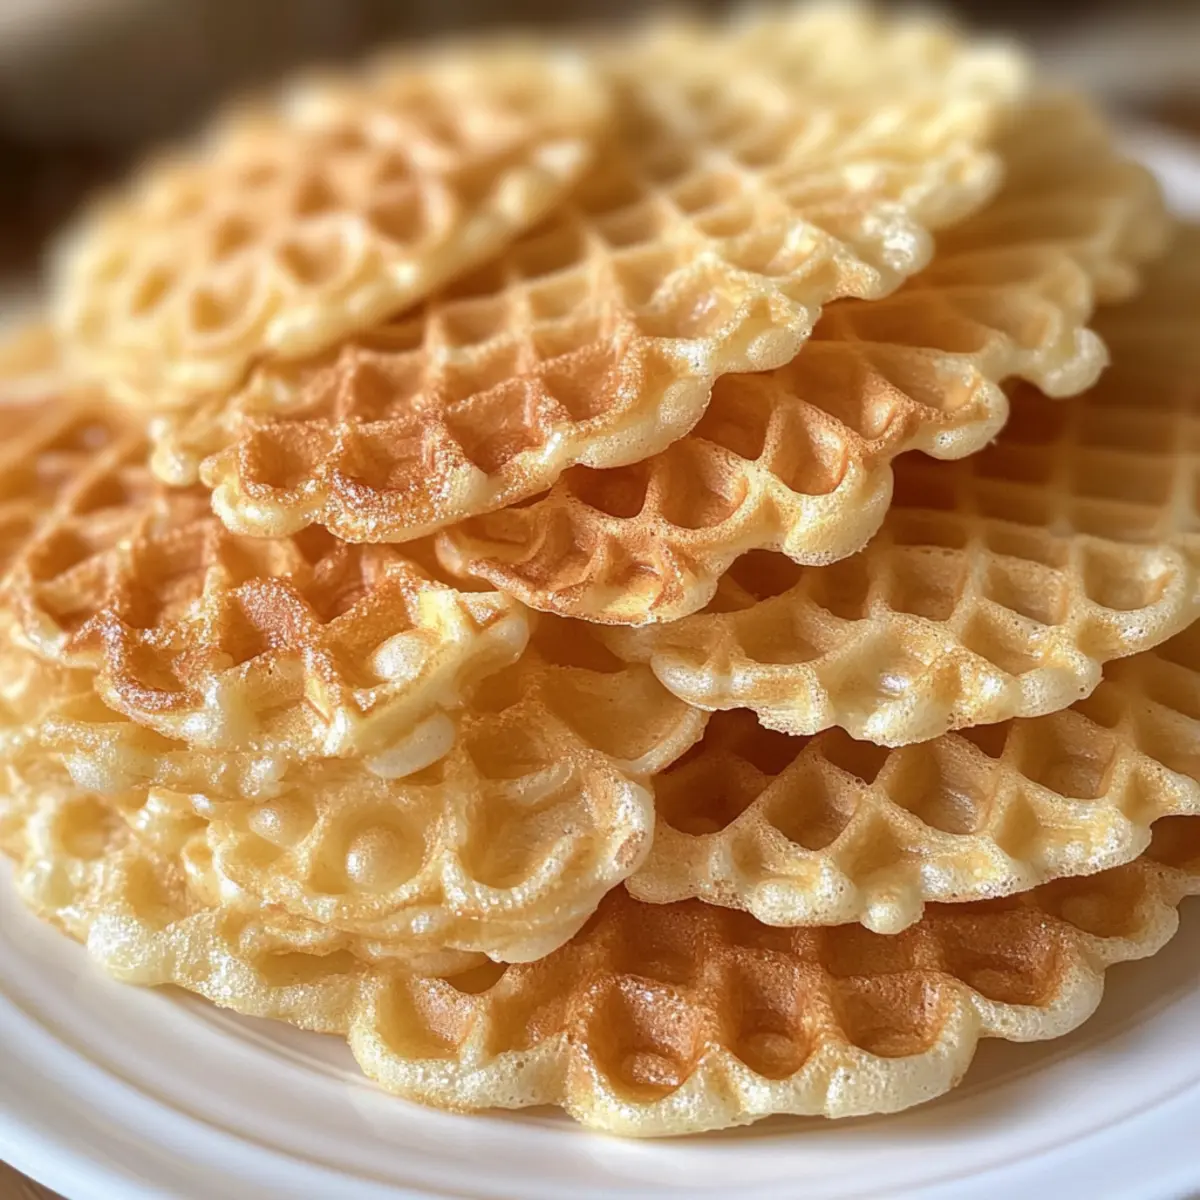
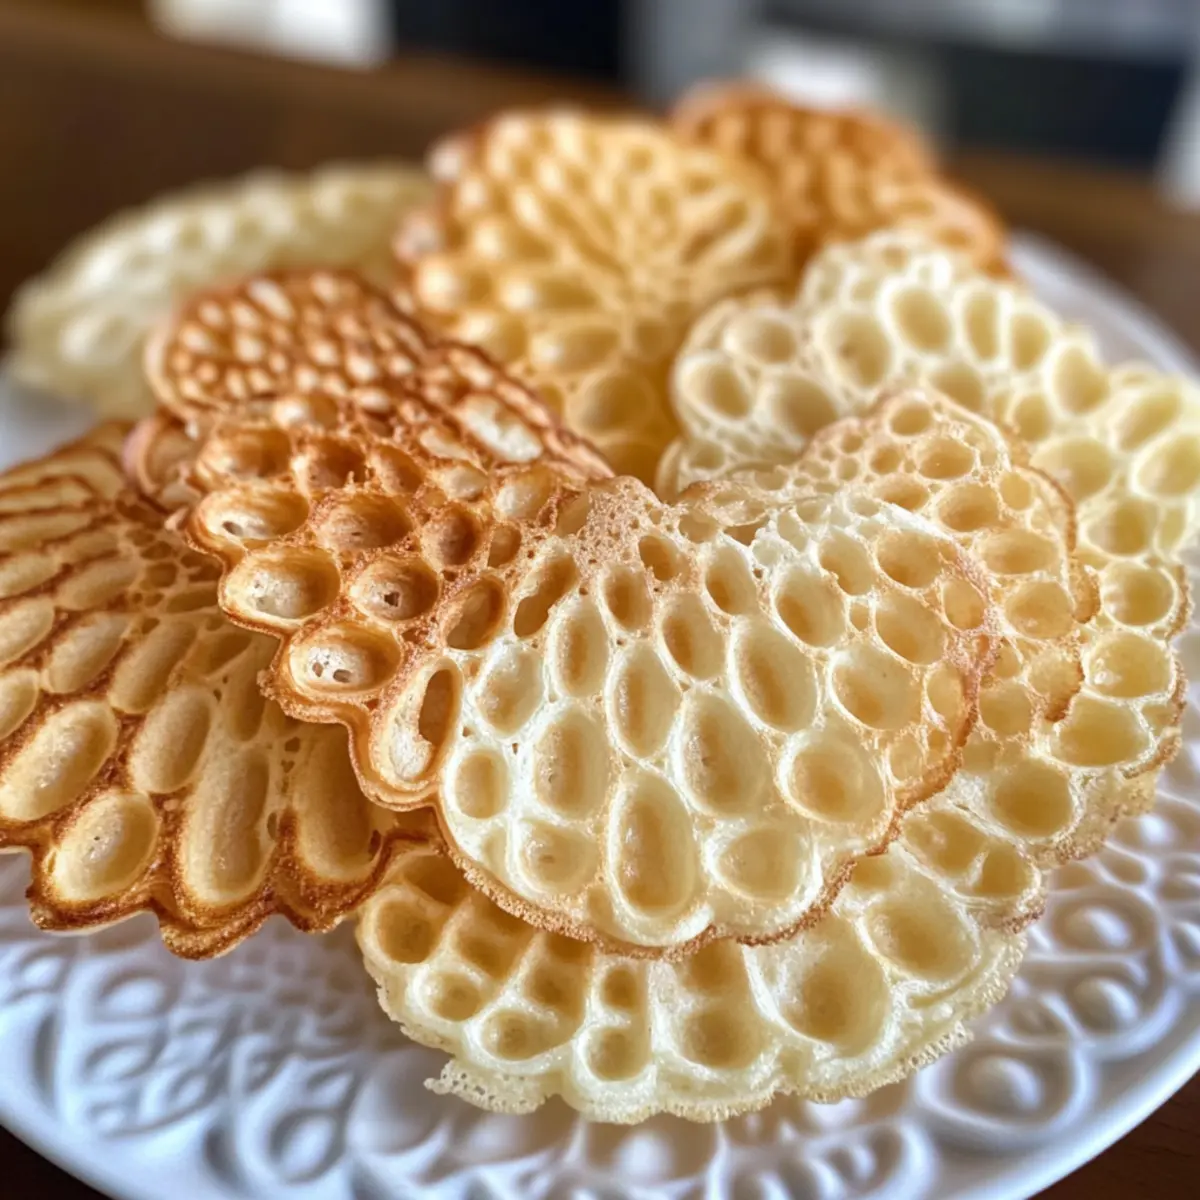
Once your pizzelle maker is hot and ready, spoon about 1 tablespoon of batter onto the center of each mold. Close the lid and bake for approximately 18-20 seconds, or until the pizzelles are a dark golden brown. Keep an eye on them through the vapor vent; visual cues will guide you to achieve the perfect color without burning.
Step 6: Shape the Pizzelles
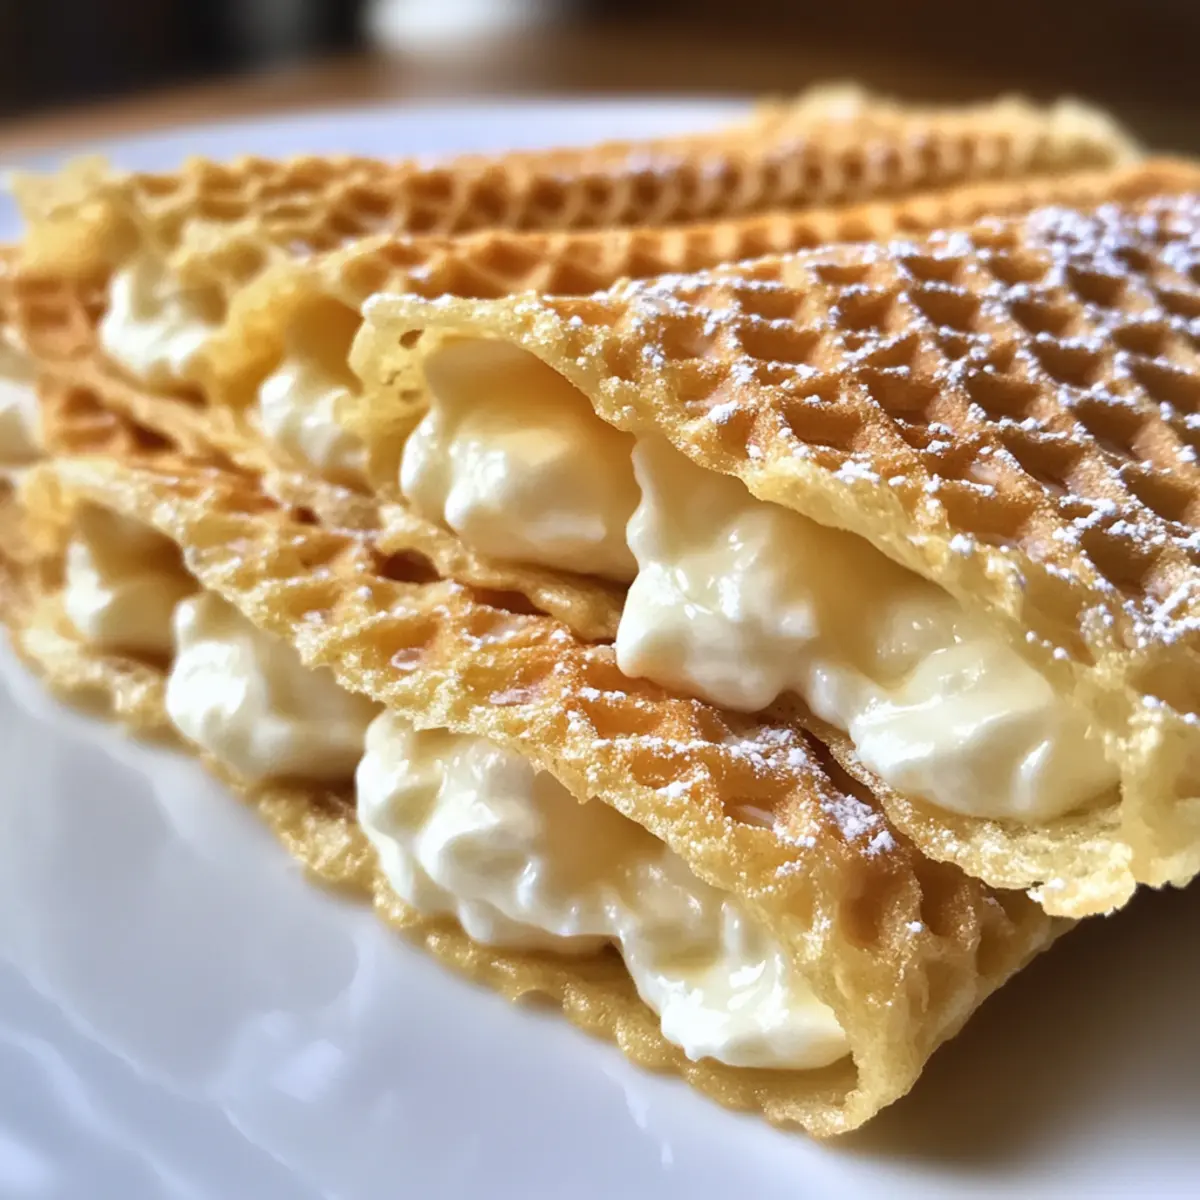
Immediately after baking, carefully remove the hot pizzelles and wrap each one around a wooden stick or a dowel to form a tube shape. Do this quickly, as they will harden as they cool. Just a few seconds of shaping each one will create that delightful tube, perfect for holding the creamy filling later on.
Step 7: Cool the Pizzelles
Once shaped, place your pizzelles in a single layer on a baking sheet. Avoid stacking them to ensure they cool evenly without becoming soggy. Allow them to cool completely for about 10-15 minutes, during which time they will become crispier, setting the stage for the Cream Filled Pizzelles.
Step 8: Prepare the Cream Filling
While the pizzelles cool, in a separate bowl, blend 8 oz of cream cheese with 1/3 cup of sweetened condensed milk and 1/4 teaspoon of vanilla extract until the mixture is smooth. This should take about 2 minutes of mixing. Next, gently fold in 8 oz of thawed Cool Whip until the filling is fluffy and well combined, creating that irresistible creamy treat.
Step 9: Fill the Pizzelles
Using a piping bag, fill each cooled pizzelle with the rich cream filling, taking care to fill them generously but not overstuff. This technique will ensure you have a satisfying balance of crispy shell and creamy interior. Once filled, sprinkle with a light dusting of powdered sugar for an elegant touch.
Step 10: Chill and Serve
Refrigerate the filled Cream Filled Pizzelles for at least 30 minutes before serving. This will allow the filling to firm up a bit, enhancing each delightful bite. Serve chilled or at room temperature, and enjoy the delightful combination of crispy shell and creamy filling that will surely impress your friends and family!
How to Store and Freeze Cream Filled Pizzelles
Room Temperature: Store unfilled pizzelles at room temperature in an airtight container for up to 3 days to maintain their crispiness. Make sure they are completely cool before sealing.
Fridge: If you have leftover filled Cream Filled Pizzelles, keep them in the refrigerator for up to 2 days in a covered container to preserve freshness and avoid sogginess.
Freezer: You can freeze unfilled pizzelles for up to 1 month. Just ensure they are layered between parchment paper in an airtight container or freezer bag to prevent sticking.
Reheating: To restore crispness, reheat thawed pizzelles in a preheated oven at 350°F (175°C) for about 5 minutes before serving, but fill them just before enjoying to keep the luscious cream intact.
Cream Filled Pizzelles Variations & Substitutions
Feel free to get creative and personalize your Cream Filled Pizzelles adventure with these delightful tweaks!
-
Dairy-Free: Use coconut cream and a dairy-free whipped topping for a luscious filling that everyone can enjoy.
-
Nutty Twist: Try adding almond or hazelnut extract to the batter for a dreamy, nutty flavor that elevates these treats beautifully.
-
Fruit-Filled: Swap out the cream filling with a fresh fruit puree, like strawberry or raspberry, for a burst of natural sweetness that’ll brighten every bite.
-
Chocolate Lovers: Mix cocoa powder into the cream filling for a chocolatey twist. This makes every pizzelle a rich and decadent indulgence.
-
Spicy Kick: Incorporate a dash of cinnamon or nutmeg into the batter for a warm, cozy flavor reminiscent of holiday treats.
-
Flavorful Cream Cheese: Substitute classic cream cheese with flavored varieties, like strawberry or chive, for an unexpected filling that surprises and delights.
-
Gluten-Free: Use a gluten-free flour blend instead of all-purpose flour to ensure that everyone can enjoy these delightful delights without missing out.
If you’re nurturing more sweet cravings, you might also enjoy Spice Gooey Cake or celebrate with our Creamy Turkey Stroganoff for a comforting side!
Your Cream Filled Pizzelles can reflect your tastes and those of your loved ones, so don’t hesitate to explore these delicious variations. Happy baking!
What to Serve with Cream Filled Pizzelles?
Imagine the joy of gathering around the table, indulging in the sweet, crispy goodness of these delightful treats.
- Rich Chocolate Sauce: Drizzle warm chocolate sauce over your pizzelles for an indulgent touch that elevates their creamy filling.
- Fresh Berries: A medley of strawberries, raspberries, and blueberries adds a refreshing contrast that brightens each bite with natural sweetness.
- Gelato or Sorbet: The creamy texture of gelato complements the pizzelles perfectly, while a fruity sorbet provides a refreshing cleanse between bites.
- Espresso or Coffee: Serve alongside a rich cup of espresso or your favorite brewed coffee for a delightful pairing that enhances the flavors.
- Whipped Cream: A dollop of freshly whipped cream on the side mirrors the pizzelles’ filling, adding lightness to your dessert experience.
- Chocolate-Dipped Fruit: Chocolate-covered strawberries or bananas provide delicious textures and flavors, making for a perfectly decadent pairing.
- Homemade Fruit Compote: A sweet fruit compote offers a deliciously tart contrast, cutting through the richness of the cream filling beautifully.
- Sparkling Wine: A glass of bubbly adds an elegant touch, making any occasion feel special and perfectly complementing the sweetness of the dessert.
- Nutty Coffee Cake: Serve with a slice of coffee cake, as its crumbly texture contrasts beautifully with the crispy pizzelles, creating delightful harmony on your plate.
Make Ahead Options
These Cream Filled Pizzelles are a fantastic time-saver for busy cooks! You can prepare the pizzelle shells up to 3 days in advance. Simply bake them, allow to cool completely, and store them in an airtight container at room temperature to maintain their crispiness. For the filling, whip it up and refrigerate for up to 24 hours prior to assembly to allow the flavors to meld beautifully. When you’re ready to serve, fill the shells just before your guests arrive to ensure they remain delightfully crispy. With these make-ahead tips, you’ll have impressive Cream Filled Pizzelles ready with minimal last-minute effort!
Expert Tips for Cream Filled Pizzelles
Room Temperature Eggs: Ensure your eggs are at room temperature to create a fluffier batter, helping your Cream Filled Pizzelles achieve the perfect texture.
Don’t Overmix: When combining your wet and dry ingredients, mix just until combined. Overmixing can lead to tough pizzelles instead of the light, airy treats you want.
Quick Shaping: Shape your pizzelles immediately after baking while they’re still hot and pliable. This allows you to form the tubes easily without cracking.
Avoid Sogginess: To prevent soggy shells, cool the pizzelles in a single layer and avoid stacking them. Covering them with a paper towel can help absorb any moisture.
Fill Before Serving: For the crispiest experience, fill your Cream Filled Pizzelles just before serving. This keeps the shells crunchy and prevents them from becoming soft.
Cream Filled Pizzelles Recipe FAQs
What kind of eggs should I use for the batter?
Absolutely! Using large eggs at room temperature is key. They provide the necessary structure and moisture for your batter, resulting in a fluffier texture for your Cream Filled Pizzelles.
How should I store unfilled pizzelles?
Store your unfilled pizzelles at room temperature in an airtight container for up to 3 days. Ensure they are completely cool before sealing to maintain their crispiness. Avoid stacking them, as this can cause them to become soft.
Can I freeze the pizzelles?
Yes, you can freeze unfilled pizzelles for up to 1 month. Just layer them between parchment paper in an airtight container or freezer bag to prevent sticking. When you’re ready to enjoy them, reheat thawed pizzelles in a preheated oven at 350°F (175°C) for about 5 minutes to restore their crispness.
How long do filled Cream Filled Pizzelles last in the fridge?
Filled pizzelles will stay fresh for up to 2 days in a covered container in the refrigerator. To keep the filling intact, avoid filling them until just before serving, as this prevents the shells from becoming soggy.
What common mistakes should I avoid when making pizzelles?
To ensure perfect pizzelles, avoid overmixing your batter after adding dry ingredients, as this can lead to a tough texture. Additionally, shape the pizzelles immediately after baking while they’re still hot to prevent cracking. Lastly, remember to cool them in a single layer rather than stacking to avoid moisture build-up.
Can I make these pizzelles gluten-free?
Yes! If you’re looking to make gluten-free Cream Filled Pizzelles, substitute the all-purpose flour with a gluten-free flour blend that you’ve had success with in other recipes. Keep an eye on the texture as you may need to adjust the liquid slightly for the best results. Enjoy experimenting!
Cream Filled Pizzelles: Irresistibly Light and Creamy Delights
Ingredients
Equipment
Method
- Preheat your pizzelle maker according to the manufacturer's instructions for about 5 minutes.
- In a large mixing bowl, combine 4 large eggs, 1/4 cup granulated sugar, and 1/4 teaspoon fine salt. Beat on high speed for about 2 minutes until pale and creamy.
- Drizzle in 2 tablespoons grapeseed oil and 1/2 teaspoon vanilla extract. Mix on low speed for about 30 seconds until combined.
- Sift in 1 cup all-purpose flour and mix on low speed until just incorporated, about 1 minute. Do not over-mix.
- Spoon about 1 tablespoon of batter onto each mold in the hot pizzelle maker. Bake for 18-20 seconds until dark golden brown.
- Immediately remove hot pizzelles and wrap around a wooden stick to form a tube. Do this quickly before they harden.
- Place pizzelles in a single layer on a baking sheet to cool for about 10-15 minutes.
- In a separate bowl, blend 8 oz cream cheese, 1/3 cup sweetened condensed milk, and 1/4 teaspoon vanilla extract until smooth. Fold in 8 oz Cool Whip until fluffy.
- Using a piping bag, fill each cooled pizzelle with the cream filling and dust with powdered sugar before serving.
- Refrigerate filled pizzelles for at least 30 minutes before serving.
Leave a Reply