
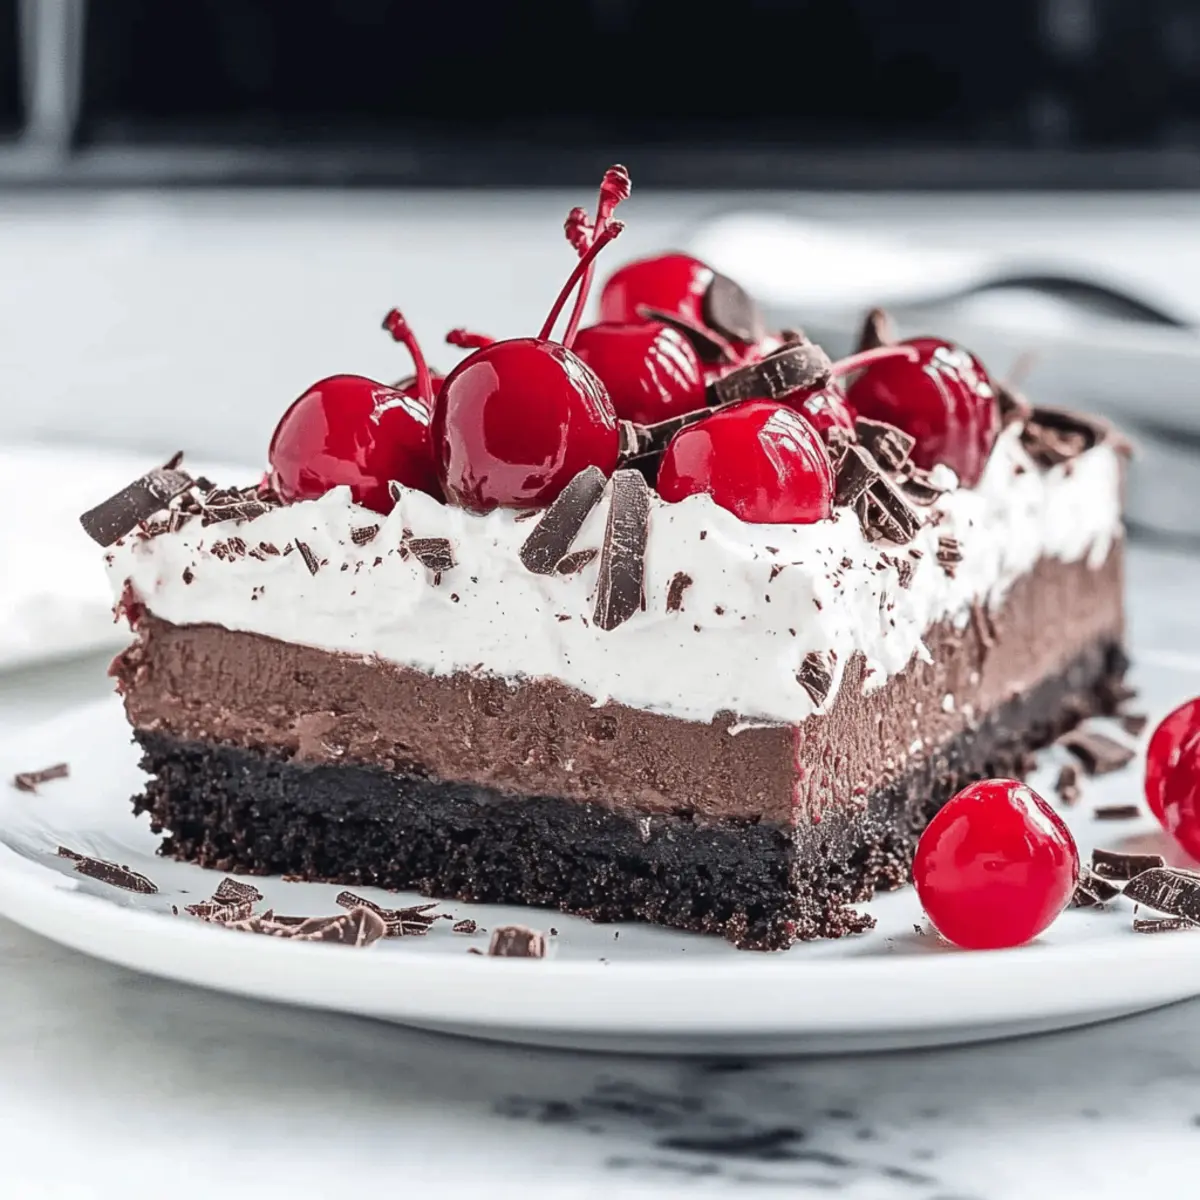
As I stood in my kitchen, the unmistakable aroma of cocoa filled the air, whisking me away to my favorite bakery in the heart of the Black Forest. This memory fueled my excitement as I decided to create a homemade twist on a classic dessert: Black Forest Cheesecake Bars. With a crunchy Oreo crust supporting a luxuriously creamy chocolate cheesecake, each bite is a heavenly experience for any chocolate lover. These bars are not only easy to make but also a crowd-pleaser, making them the perfect treat for gatherings or cozy nights in. They’re indulgent yet surprisingly simple, proving that homemade desserts can bring joy without fuss. Are you ready to elevate your dessert game with this delightful recipe? Let’s dive in!
Why Are These Cheesecake Bars Irresistible?
Decadent Flavor: The rich chocolate cheesecake filling paired with an Oreo crust creates a delightful explosion of taste that will satisfy any sweet tooth.
Effortless Preparation: With just a few easy steps, you can whip up these bars without the stress of traditional baking methods.
Perfect for Sharing: These cheesecake bars are ideal for gatherings, guaranteed to impress friends and family. Cut into squares and watch them disappear!
Versatile Toppings: The option to top with cherries, whipped cream, or even a drizzle of caramel allows you to put your unique spin on this classic treat. For more variations, try making Peanut Butter and Jelly Bars or Sweet Potato Pie Bars to keep your dessert table exciting!
Make-Ahead Friendly: Prepare them in advance for seamless entertaining; they chill well, saving you time on party day.
Crowd Favorite: Backed by the timeless appeal of Black Forest Cake, these bars are sure to be a hit at any event!
Black Forest Cheesecake Bars Ingredients
For the Crust
- Oreo Cookies – The base for a rich sandwich crust; you can substitute with chocolate graham crackers for a different flavor profile.
- Butter – Binds the crust together beautifully; always use unsalted butter for better control over saltiness.
For the Filling
- Cream Cheese – Gives that creamy texture we all love; make sure to soften it for easier mixing, and consider low-fat for a lighter option.
- Granulated Sugar – Sweetens the cheesecake delightfully; brown sugar can enhance the overall flavor profile.
- Cocoa Powder – Adds a depth of chocolate flavor; Dutch-process cocoa is ideal for an even richer taste.
- Eggs – They help to set the cheesecake; ensure they are at room temperature for better incorporation.
- Melted Chocolate – Intensifies the chocolate flavor in the filling; bittersweet chocolate adds a nice richness.
For the Whipped Topping
- Heavy Whipping Cream – Whipped to soft peaks for topping; you can use a non-dairy alternative if preferred, making it suitable for lactose-free diets.
- Maraschino Cherries or Cherry Pie Filling – A classic cherry topping option; fresh cherries can be an excellent choice for a less sweet twist.
- Chocolate Shavings – A lovely garnish that adds texture and visual appeal; use a vegetable peeler to craft shavings from a chocolate bar.
Step‑by‑Step Instructions for Black Forest Cheesecake Bars
Step 1: Prepare the Crust
Begin by preheating your oven to 350°F (175°C). In a food processor, crush the Oreo cookies until finely ground. Melt the unsalted butter and combine it with the crushed cookies, mixing until well blended. Line an 8×8-inch baking pan with parchment paper, then press the cookie mixture firmly into the bottom to create an even layer. Refrigerate the crust for about 10 minutes to set.
Step 2: Make the Filling
While the crust is chilling, soften the cream cheese at room temperature for about 30 minutes. In a large mixing bowl, beat the cream cheese and granulated sugar together until smooth and creamy, around 3-5 minutes. Gradually add the cocoa powder and melted bittersweet chocolate, mixing until fully incorporated. Then, add the eggs one at a time, blending well after each addition until the filling is rich and fluffy.
Step 3: Bake the Cheesecake Bars
Once your filling is ready, remove the crust from the refrigerator. Pour the chocolate cream cheese mixture over the chilled crust and spread it evenly. Place the baking pan in the preheated oven and bake for approximately 45 minutes, or until the center is set but still slightly jiggly. Keep an eye on it, as overbaking can lead to a dry texture.
Step 4: Chill the Bars
After baking, allow the cheesecake bars to cool in the pan for about 30 minutes at room temperature. Once cooled, transfer the bars to the refrigerator and chill for at least 4 hours or until fully set. This chilling time is crucial for achieving the smooth, creamy texture of these Black Forest Cheesecake Bars.
Step 5: Prepare the Topping
Before serving, whip the heavy cream in a mixing bowl until soft peaks form. This should take about 3-4 minutes on medium speed. Once whipped to your desired consistency, gently spread the cream over the chilled cheesecake bars, using a spatula to create an even layer.
Step 6: Garnish and Serve
Finally, top the cheesecake bars with maraschino cherries and sprinkle chocolate shavings for a beautiful presentation. Slice into squares and serve chilled. The contrast of creamy chocolate filling topped with light whipped cream and tart cherries will surely delight your taste buds!
Black Forest Cheesecake Bars Variations
Feel free to explore these delightful spins on your Black Forest Cheesecake Bars, adding touches that suit your taste buds!
-
Fresh Berries: Substitute maraschino cherries with fresh raspberries or strawberries for a vibrant, tart flavor.
-
Caramel Drizzle: Add a layer of caramel sauce to the filling or drizzle on top for a rich, sweet contrast. A caramel layer contributes a luscious sweetness that complements the chocolate beautifully.
-
Nutty Twist: Incorporate crushed nuts, such as walnuts or pecans, into the crust for an added crunch and flavor depth.
-
Flavored Whipped Cream: Mix in vanilla or almond extract when whipping cream for added flavor in the topping. This touch will elevate the dessert with a fragrant aroma.
-
Gluten-Free Option: Use gluten-free chocolate cookies instead of Oreos to create a gluten-free crust that everyone can enjoy.
-
Minty Freshness: Add a few drops of peppermint extract to the chocolate filling for a fresh mint flavor, reminiscent of mint chocolate treats.
-
Chili Kick: For a surprising twist, incorporate a pinch of cayenne pepper in the filling for a gentle heat that balances the sweetness.
-
Mini Versions: Bake in mini muffin tins for bite-sized cheesecake bars perfect for parties. They’re fun to share and easy to enjoy in a single bite!
By experimenting with these variations, you can create a unique batch of cheesecake bars that will tantalize your taste buds. And if you’re looking for more variations, don’t forget to check out my Lemon Cheesecake Mousse for a refreshing twist or the indulgent Baked Toffee Cheesecake that will surely satisfy your sweet tooth!
Storage Tips for Black Forest Cheesecake Bars
Fridge: Store in an airtight container for up to 5 days to maintain freshness. Make sure they are completely chilled before sealing to avoid condensation.
Freezer: Wrap individual bars in plastic wrap and place them in a freezer-safe container. They can be frozen for up to 3 months; simply thaw in the fridge before serving.
Reheating: While best served cold, if desired, you can enjoy them straight from the fridge. For a unique twist, try warming a slice in the microwave for about 10-15 seconds.
Portioning: Cut into squares before freezing to easily grab just the right amount of your Black Forest Cheesecake Bars whenever a craving strikes!
Expert Tips for Black Forest Cheesecake Bars
-
Softened Cream Cheese: Ensure your cream cheese is fully softened to avoid lumps in the filling. Leave it at room temperature for at least 30 minutes.
-
Check for Jiggle: Avoid overbaking! The cheesecake should have a slight jiggle in the center when you take it out—this ensures a creamy texture.
-
Rotate the Pan: For even cooking, rotate the pan halfway through baking if your oven has hot spots. This helps the cheesecake bars bake uniformly.
-
Cool and Chill: Allow the bars to cool at room temperature before chilling. This step is crucial for achieving that creamy, smooth texture in your Black Forest Cheesecake Bars.
-
Whip to Perfection: When whipping the cream for the topping, stop once you see soft peaks. Overwhipping can make the cream grainy, so keep an eye on it!
What to Serve with Black Forest Cheesecake Bars
These decadent bars are the perfect centerpiece for a delightful dessert spread, inviting indulgence in every bite.
-
Fresh Berries: Bright, juicy fruits like raspberries or strawberries add a refreshing contrast and vibrant color to your dessert platter. Their tartness beautifully complements the rich chocolate flavor.
-
Vanilla Ice Cream: A scoop of creamy vanilla ice cream introduces a delightful contrast in temperature and texture, making every bite even more irresistible.
-
Chocolate Drizzle: A simple drizzle of chocolate ganache enhances the indulgence of these dessert bars, providing a visually stunning and flavorful accent.
-
Coffee or Espresso: A strong cup of coffee or a bold espresso offers a perfect flavor pairing, balancing the sweetness while enhancing the chocolate notes.
-
Mint leaves: Fresh mint leaves can serve as a refreshing garnish, adding a hint of herbal brightness that pairs wonderfully with the deep chocolate notes.
-
Cheese Platter: A selection of mild cheeses can balance the sweetness of the cheesecake bars with savory notes. Include some crackers for added crunch.
-
Lemon Sorbet: This light and zesty sorbet cleanses the palate beautifully after the richness of the cheesecake bars, creating a well-rounded dessert experience.
With these complementary options, your Black Forest Cheesecake Bars will shine as the star of any gathering!
Make Ahead Options
These Black Forest Cheesecake Bars are a fantastic make-ahead dessert that can save you valuable time on busy occasions! You can prepare the crust up to 24 hours in advance by mixing the crushed Oreo cookies with melted butter and pressing it into your baking pan. Refrigerate the crust until you’re ready to make the filling. The filling can be made a day ahead as well; simply bake the cheesecake bars, cool them, and then refrigerate for up to 3 days before serving. To ensure they stay delicious and fresh, keep them covered in an airtight container. When it’s time to serve, whip the heavy cream, spread it on the chilled bars, and finish with the cherries and chocolate shavings. You’ll have a stunning, crowd-pleasing dessert with minimal last-minute effort!
Black Forest Cheesecake Bars Recipe FAQs
What type of Oreos should I use for the crust?
Absolutely! Using classic Oreo cookies delivers a delightful flavor for your crust. However, if you want to try something different, chocolate graham crackers can be a fantastic substitute for a unique twist!
How should I store these cheesecake bars?
To maintain freshness, store your Black Forest Cheesecake Bars in an airtight container in the refrigerator for up to 5 days. Ensure they are completely chilled before sealing the container to prevent condensation from ruining that perfect texture.
Can I freeze Black Forest Cheesecake Bars?
Yes, you can! Wrap each bar tightly in plastic wrap and place them in a freezer-safe container. They will keep well in the freezer for up to 3 months. When you’re ready to enjoy them, simply thaw in the refrigerator overnight.
Why did my cheesecake bars crack?
Don’t worry; this can happen to the best of us! Cracks often occur from overbaking or from the cheesecake baking too quickly. To avoid this, make sure to bake it just until the center has a slight jiggle, and consider baking at a lower temperature if your oven tends to run hot. Additionally, a water bath can help provide moisture during baking.
Can I replace cream cheese for a lighter version?
Very much so! You can substitute traditional cream cheese with low-fat cream cheese to lighten the recipe, and even use dairy-free cream cheese if you want to make it lactose-free. Just ensure it’s softened for easy mixing!
What’s the best way to achieve soft peaks for the whipped cream topping?
To hit those soft peaks just right, start with cold heavy cream and whip it at medium speed until it begins to thicken. This usually takes about 3-4 minutes. Stop whipping once you see soft peaks forming; overwhipping can lead to a grainy texture, and we want it to be smooth and fluffy!
Irresistible Black Forest Cheesecake Bars to Delight Your Tastebuds
Ingredients
Equipment
Method
- Preheat the oven to 350°F (175°C). In a food processor, crush Oreo cookies until finely ground. Melt unsalted butter and mix with crushed cookies. Press firmly into an 8x8-inch baking pan lined with parchment paper. Refrigerate for 10 minutes.
- In a mixing bowl, soften cream cheese for about 30 minutes. Beat cream cheese and granulated sugar until smooth, then add cocoa powder and melted chocolate, mixing until incorporated. Add eggs one at a time, blending well after each.
- Remove the crust from the refrigerator. Pour the filling over the chilled crust and spread evenly. Bake for about 45 minutes, until the center is set but slightly jiggly.
- Allow the cheesecake to cool in the pan for 30 minutes at room temperature, then chill in the refrigerator for at least 4 hours.
- Before serving, whip heavy cream until soft peaks form. Spread over the chilled cheesecake bars. Top with maraschino cherries and sprinkle with chocolate shavings. Slice into squares and serve chilled.
Leave a Reply