
As I stood in my kitchen, the warm aroma of sizzling corn filled the air, instantly transporting me to the vibrant streets of Colombia. That’s where I first discovered the magic of Arepas con Queso—those pillowy, cheese-filled corn cakes that serve as the ultimate comfort food. Whether you’re whipping them up for breakfast, a cozy lunch, or an impromptu snack, these savory delights are sure to impress. Plus, they’re gluten-free and incredibly simple to make with just a few ingredients! Imagine biting into a crispy, golden exterior only to uncover a gooey, cheesy center—it’s pure bliss. Intrigued? Join me as we dive into the art of crafting these irresistible Arepas con Queso, where each bite tells a delicious story that you won’t want to miss!
Why are Arepas con Queso irresistible?
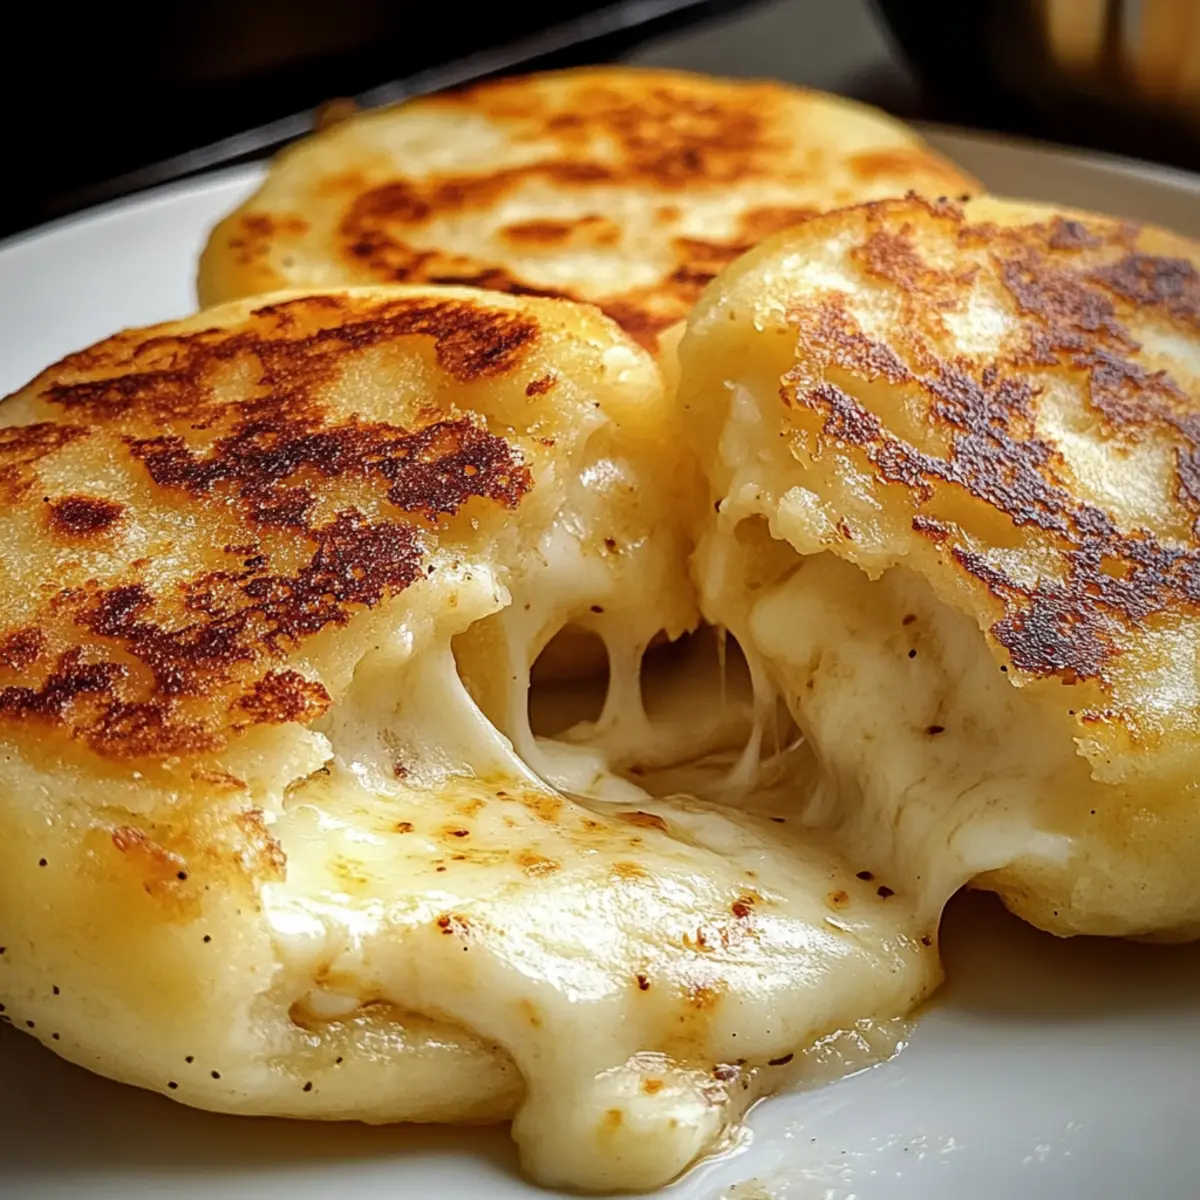
Satisfying Texture: With a crispy exterior and a gooey cheesy interior, each bite of these arepas delivers joy and comfort—a perfect treat any time of day!
Quick to Prepare: This easy recipe requires minimal cooking skills and can be on your table in under 30 minutes, making it ideal for busy weeknights.
Versatile Filling Options: While I adore the classic cheese version, explore your creativity! Fill them with meats or veggies, or try toppings like avocado or salsa, just like in my Bacon Cheeseburger Frito recipe.
Great for Any Meal: From breakfast to snacks, these arepas can do it all! Serve them warm and watch them disappear at your next gathering, just like the crowd-pleasing Pumpkin Scones Cozy.
Gluten-Free Goodness: Made with masarepa, these are not just delicious but also a fantastic gluten-free option, so everyone can enjoy!
Experience the charm of Colombian cuisine with my Arepas con Queso—they’re sure to put a smile on your face!
Arepas con Queso Ingredients
For the Dough
- Masarepa – Pre-cooked white cornmeal is essential for that authentic texture; masa harina can be used, but it alters the final outcome.
- Sea Salt – A pinch enhances the flavor beautifully; kosher salt is a great substitute.
- Cotija Cheese – Adds a delightful salty tang; feta can work as a similar substitute in a pinch.
- Butter – Provides richness and aids in browning; for a dairy-free version, olive oil or coconut oil is a good alternative.
- Warm Water – Hydrates the masarepa to create a smooth dough; adjust the amount as needed for the right consistency.
For the Filling
- Mozzarella Cheese – Shredded for a gooey, melty center; other melting cheeses like Monterey Jack are excellent alternatives.
For Cooking
- Oil or Butter for Cooking – Helps achieve that perfect golden brown; consider a non-stick cooking spray for an easy option.
Dive into the irresistible world of Arepas con Queso with these straightforward ingredients and unleash your inner chef!
Step‑by‑Step Instructions for Arepas con Queso
Step 1: Mix the Dough
In a large mixing bowl, combine 2 cups of masarepa, a pinch of sea salt, ½ cup of crumbled Cotija cheese, and 2 tablespoons of softened butter. Gradually add about 1½ cups of warm water while mixing until a smooth, non-sticky dough forms. Knead the dough for about 2-3 minutes until it’s well combined and the texture is pliable.
Step 2: Let the Dough Rest
Cover the dough with a clean kitchen towel and let it rest for 10 minutes. This allows the masarepa to fully hydrate and makes it easier to work with. The dough should feel soft and slightly tacky when you check it after resting, ensuring optimal texture for shaping your Arepas con Queso.
Step 3: Shape the Arepas
Wet your hands to prevent sticking, then divide the rested dough into 8 equal portions. Roll each portion into a ball, then flatten each ball into a round disk about 5 inches in diameter. The disks should be thick enough to hold filling without cracking, showcasing how you’re about to make delightful Arepas con Queso.
Step 4: Fill the Arepas
Place a generous amount of shredded mozzarella cheese in the center of half of the disks. Then, take the remaining disks, fold them over the filled ones, and pinch the edges to seal tightly. Ensure there are no openings where the cheese can escape during cooking, creating the perfect cheesy surprise inside each Arepa.
Step 5: Cook the Arepas
Heat 2 tablespoons of oil or butter in a skillet over medium heat. Once hot, add the filled arepas and cook for 4-5 minutes on one side until golden brown and crisp. Carefully flip them over and cook an additional 4-5 minutes on the other side, achieving that beautiful golden-brown crust that enhances the overall flavor of your Arepas con Queso.
Step 6: Serve and Enjoy
Once cooked, remove the arepas from the skillet and place them on a paper towel to absorb any excess oil. Serve warm, optionally topped with a pat of butter or your favorite salsa for added flavor. Each bite delivers a crispy exterior and a gooey, cheesy center, making these Arepas con Queso a comforting delight for any meal of the day.

Storage Tips for Arepas con Queso
Fridge: Store leftover arepas in an airtight container for up to 3 days. Make sure they are cooled completely to maintain freshness and prevent sogginess.
Freezer: For longer storage, freeze cooked arepas with parchment paper between each one to prevent sticking. They can last up to 3 months in the freezer.
Reheating: When you’re ready to enjoy, reheat in a toaster oven or regular oven at 350°F for about 10–15 minutes. This will help retain their crispiness and cheesy goodness.
Room Temperature: If you’re serving them soon, keep arepas at room temperature for up to 2 hours. After that, refrigerate or freeze to avoid food safety issues.
Make Ahead Options
Arepas con Queso are a fantastic choice for meal prep enthusiasts! You can prepare the dough up to 24 hours in advance—simply combine the masarepa, salt, Cotija cheese, butter, and warm water as per the recipe, then cover and refrigerate it. Additionally, you can shape and fill the arepas before placing them in the fridge for up to 3 days. To maintain their quality, ensure they are tightly wrapped or stored in an airtight container. When ready to serve, simply cook the arepas in a skillet as instructed. With these make-ahead tips, you’ll have cheesy, delicious Arepas con Queso ready in no time, making weeknight meals a breeze!
What to Serve with Cheesy Colombian Arepas con Queso
As you savor the warm, cheesy bliss of these arepas, consider pairing them with delightful accompaniments to elevate your meal experience.
-
Fresh Avocado Salad: The creamy texture of avocado contrasts beautifully with the crispy arepas, adding a refreshing bite.
-
Spicy Salsa: A zesty salsa brings a kick that complements the savory cheese filling, balancing the flavors wonderfully.
-
Fried Plantains: Sweet, golden-brown plantains add a comforting sweetness that pairs perfectly with the cheesy goodness of the arepas.
-
Cilantro-Lime Rice: This aromatic dish infuses brightness and a splash of citrus that elevates your arepas to a vibrant meal.
-
Grilled Shrimp Tacos: Juicy shrimp nestled in soft tortillas bring a delightful seafood twist, creating a feast of textures.
-
Chilled Beer or Aguardiente: A cold drink enhances the experience and brings the Colombian vibe—perfect for a lively dinner gathering!
-
Tropical Fruit Salad: A mix of juicy mango, pineapple, and papaya adds a refreshing and sweet contrast, round off your meal beautifully.
Indulging in these pairings will create a memorable feast where every bite tells a delicious story!
Arepas con Queso Variations
Feel free to personalize your Arepas con Queso with these delightful twists and substitutions that add flavor and flair!
-
Dairy-Free: Substitute dairy ingredients with vegan cheese and coconut oil, making these arepas completely dairy-free without sacrificing flavor.
-
Meaty Goodness: Add seasoned ground beef or shredded chicken to the filling for a heartier version, turning these delicious arepas into a robust meal.
-
Veggie Delight: Sautéed bell peppers, onions, and spinach can amp up the nutrients and flavor, creating a veggie-packed version that even kids will love.
-
Spicy Kick: For those who crave heat, mix chopped jalapeños or a dash of hot sauce into the cheese filling for a zesty surprise in every bite.
-
Sweet Twist: Try adding a sprinkle of cinnamon and sugar to the dough, then serve with a side of honey or dulce de leche for a sweet treat that’s perfect for breakfast.
-
Crunchy Toppings: Top your arepas with crunchy toppings like crispy bacon bits or fried onions to elevate the texture and add a savory crunch.
-
Air Fryer Option: For a healthier take, use an air fryer to cook the arepas; they’ll still turn out crispy while cutting down on oil.
-
Global Flavor: Experiment with international cheeses like feta or gouda for a unique twist, expanding the flavor palette beyond the traditional mozzarella.
These variations make for a fantastic way to reinvent your Arepas con Queso, ensuring they never get boring! And if you’re looking for more delightful recipes, you might enjoy making Portuguese Coconut Cakes or trying out the cozy flavors in my Pumpkin Scones Cozy. Enjoy your culinary journey!
Tips for the Best Arepas con Queso
-
**Use Masarepa: **Make sure to use masarepa instead of regular cornmeal or masa harina; it’s essential for achieving the right texture and flavor in your Arepas con Queso.
-
Proper Dough Consistency: Check the consistency of the dough after kneading. It should be smooth and slightly tacky; adjust water as necessary to achieve this.
-
Cooking Space: Cook arepas in batches, ensuring each is spaced evenly in the skillet. This helps them cook uniformly and prevents overcrowding.
-
Try Air Frying: For a healthier option, preheat your air fryer to 350°F and cook the arepas for 5 minutes on each side; they’ll still be crispy and delicious!
-
Warm Serving: Serve arepas warm for the best flavor experience. Consider topping them with butter or salsa to elevate the dish even further.

Arepas con Queso Recipe FAQs
What type of masarepa should I use?
Absolutely! It’s important to choose the right kind of masarepa—look for pre-cooked white cornmeal, which is specifically designed for making arepas. Avoid using regular cornmeal or masa harina, as they will alter the texture and flavor of your Arepas con Queso. If you can’t find masarepa, look for brands labeled specifically for arepas in your local Latin grocery store.
How should I store leftover Arepas con Queso?
To enjoy your delicious leftovers, store any uneaten arepas in an airtight container in the fridge for up to 3 days. Make sure they cool completely before sealing to keep them fresh and avoid sogginess. If you have lots left, that’s fantastic—consider freezing them for up to 3 months! Just remember to place parchment paper between each one to prevent them from sticking together.
Can I freeze Arepas con Queso?
Yes, you can definitely freeze your Arepas con Queso! First, let them cool completely. Then, line a baking sheet with parchment paper and place the arepas in a single layer. Freeze them for about an hour, then transfer them to a freezer bag or container, separating layers with parchment paper. They can be kept frozen for up to 3 months. When you’re ready to eat them, reheat directly from frozen!
What can I do if my dough is too crumbly?
If you find that your dough is too crumbly and doesn’t hold together, don’t worry! Simply add a little more warm water, one tablespoon at a time, mixing well. You’re aiming for a smooth, non-sticky dough that’s pliable enough to form shapes. Knead the dough for a couple more minutes after adding water, until it reaches that delightful consistency.
Are Arepas con Queso suitable for gluten-free diets?
Very! Arepas con Queso is naturally gluten-free since they’re made with masarepa, which contains no gluten. This means they are a great option for those with gluten sensitivities or celiac disease. Just double-check any additional filling or topping ingredients for any potential gluten sources to ensure a completely safe and delicious meal for everyone.

Delicious Arepas con Queso: Crispy, Cheesy Comfort Food
Ingredients
Equipment
Method
- In a large mixing bowl, combine 2 cups of masarepa, a pinch of sea salt, ½ cup of crumbled Cotija cheese, and 2 tablespoons of softened butter. Gradually add about 1½ cups of warm water while mixing until a smooth, non-sticky dough forms.
- Knead the dough for about 2-3 minutes until it's well combined and the texture is pliable.
- Cover the dough with a clean kitchen towel and let it rest for 10 minutes.
- Wet your hands to prevent sticking, then divide the rested dough into 8 equal portions. Roll each portion into a ball, then flatten each ball into a round disk about 5 inches in diameter.
- Place a generous amount of shredded mozzarella cheese in the center of half of the disks. Then, fold the remaining disks over the filled ones and pinch the edges to seal tightly.
- Heat 2 tablespoons of oil or butter in a skillet over medium heat. Once hot, add the filled arepas and cook for 4-5 minutes on one side until golden brown and crisp.
- Carefully flip them over and cook an additional 4-5 minutes on the other side.
- Once cooked, remove the arepas from the skillet and place them on a paper towel to absorb any excess oil. Serve warm.
Leave a Reply